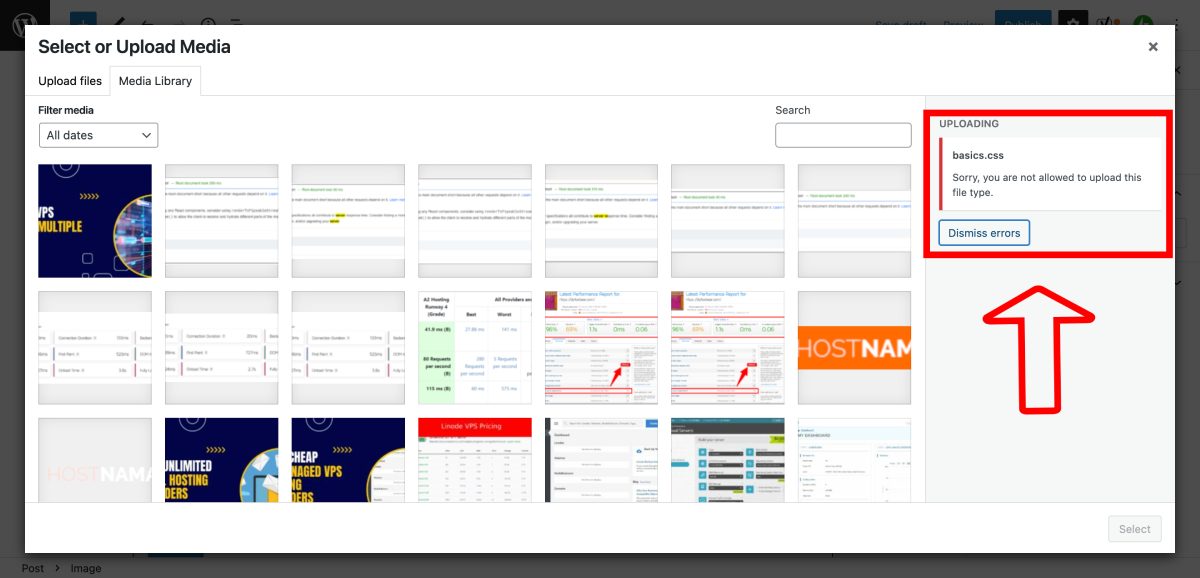
“An Error Occurred In The Upload. Please Try Again Later.” – If you're a WordPress user, you've likely encountered this issue at some point.
This frustrating problem can cause a delay in content uploading and potentially affect your workflow. But worry not!
This comprehensive guide will shed light on this common WordPress error, its causes, and effective solutions.
Understanding An Error Occurred In The Upload. Please Try Again Later.
In WordPress, uploading files is a straightforward process. You typically navigate to the upload interface, select a file, and the system does the rest.
However, due to various factors, you may encounter the error – “An Error Occurred In The Upload. Please Try Again Later.”
But why does this happen?
Different scenarios can trigger this error. Sometimes, it's a simple issue like an unstable internet connection.
Other times, it's more complex – the file you're trying to upload might exceed the maximum file size permitted, or the format isn't supported by WordPress.
Why of this error
Let's explore the most common causes behind this WordPress upload error:
- Internet Connection Issues: A stable internet connection is essential for uploading files. If your connection is inconsistent, you may experience upload failures, prompting the error message.
- Incorrect File Permissions: Each file and directory on your website has permissions. If these are incorrectly configured, it can prevent file uploads.
- Exceeding the Maximum File Upload Size: Each WordPress site has a limit for file uploads. If your file exceeds this limit, an error will occur.
- Wrong File Format: WordPress supports specific file formats. Attempting to upload an unsupported format will result in an error.
- PHP Memory Limit Reached: WordPress sites have a defined PHP memory limit. If this limit is exceeded during an upload, it will cause an error.
- Plugin Conflict: Occasionally, certain plugins can interfere with file uploads, leading to errors.
How to Fix The Error
After identifying the cause, you can address the upload error by:
Change Files Permissions
There are two ways to change the file permissions through FTP or SFTP or directly through command lines. In this article we have covered them both.
Using FTP Client Software
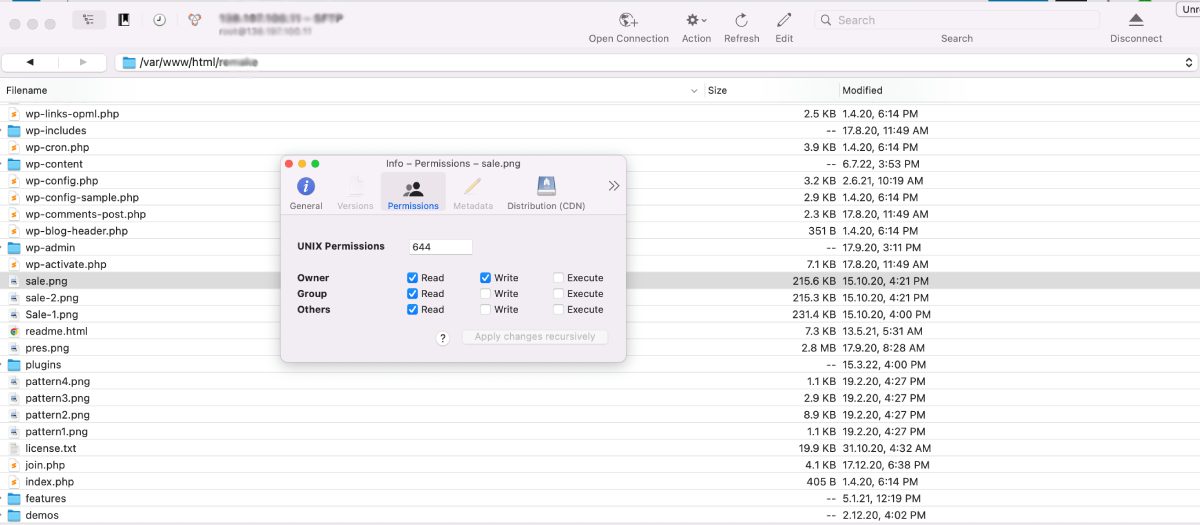
Changing file permissions via FTP (File Transfer Protocol) is quite straightforward. Most FTP clients (like FileZilla, Cyberduck, etc.) allow you to modify file permissions. Here's a general step-by-step guide on how to do it:
- Connect to your server: Open your FTP client and establish a connection with your server using your FTP credentials (host, username, password).
- Navigate to the file or directory: Once connected, navigate through the directory structure in the remote server panel (usually on the right side) until you find the file or directory you want to change permissions for.
- Right-click on the file or directory: When you've found the file or directory, right-click on it. This will open a context menu.
- Select ‘File permissions' or ‘Change permissions': In the context menu, look for an option labeled ‘File permissions,' ‘Change permissions,' or something similar. Click on it to open the permissions dialogue box.
- Change permissions: In the permissions dialogue box, you'll see a set of checkboxes labeled ‘Read,' ‘Write,' and ‘Execute' for the categories ‘Owner,' ‘Group,' and ‘Public.' Check or uncheck these boxes to set your desired permissions. Alternatively, you may directly input the permissions' numerical (octal) value in the ‘Numeric value' box. For example, for read and write permissions, you would enter 755.
- Apply the changes: Once you've set the desired permissions, click on ‘OK' or ‘Apply' to save your changes.
Using Command Lines
Changing file permissions on a Linux system can be done using the chmod command. Here's how:
- Open Terminal: On most Linux distributions, you can open the terminal from the applications menu or using a shortcut key (usually
Ctrl+Alt+T). - Navigate to the File or Directory: Use the
cdcommand to navigate to the directory containing the file or directory you want to change permissions for. - Check Current Permissions: Before changing the permissions, it's a good idea to check the current permissions. Use the
ls -lcommand to do this. The output will show the permissions for each file and directory in the current directory. - Change Permissions: Use the
chmodcommand to change the permissions. Here's the basic syntax:chmod [permissions] [file or directory name]Permissions can be specified in two ways:chmod 754 file.txt - Verify the Change: After running the
chmodcommand, usels -lagain to verify that the permissions were correctly changed.
Remember to be careful when changing file permissions. Incorrect permissions can lead to a variety of issues, including security vulnerabilities. If you're unsure about the correct permissions for a file or directory, it's best to consult with a web developer or your hosting provider.
The file permission issues are also responsible for other errors like Installation Failed Could Not Create Directory
Adjusting Maximum File Upload Size and Format
Adjusting the maximum file upload size and format in WordPress involves modifying some PHP settings. Here's how to do it:
1. Increase Maximum File Upload Size in PHP.ini:
The php.ini file is the default configuration file for running applications that require PHP. Here's how to increase the maximum file upload size:
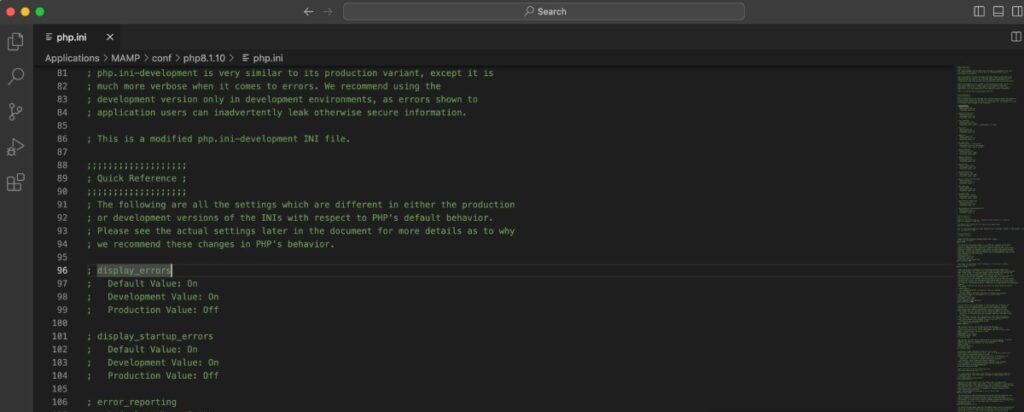
- Access your website's root directory via an FTP client or through your hosting provider's file manager.
- Look for the
php.inifile. If it doesn't exist, you can create one. - Open the
php.inifile and add or modify the following lines:upload_max_filesize = 64M post_max_size = 64M max_execution_time = 300 - Save your changes and close the file. If you created a new file, make sure to save it as
php.ini. - Finally, restart your server if you have access. If you don't, you might have to wait or ask your host to do it.
2. Add Code to .htaccess File:
If you can't locate the php.ini file or don't have access to it, another method is to edit the .htaccess file in your WordPress site's root directory:
- Access your website's root directory via an FTP client or through your hosting provider's file manager.
- Find the
.htaccessfile. If it doesn't exist, you can create one. - Open the
.htaccessfile and add or modify the following lines:Copy codephp_value upload_max_filesize 64M php_value post_max_size 64M php_value max_execution_time 300 - Save your changes and close the file.
3. Add Code to the wp-config.php File:
If the above methods are not suitable or accessible, you can also add a line of code to your wp-config.php file, which is located in your WordPress root directory:
- Open the
wp-config.phpfile. - At the very bottom, just before the line that says
/* That's all, stop editing! Happy publishing. */, add the following line of code:@ini_set('upload_max_size' , '64M' ); - Save your changes and close the file.
4. Contact Hosting Provider
If you are not comfortable editing these files or if these methods do not work, you can contact your hosting provider. Many providers will be willing to adjust these limits for you.
In regards to file format, WordPress supports a variety of file formats for uploading. However, if you are trying to upload a format that is not supported, you may need to use a plugin that allows additional file types or convert the file to a supported format.
Increasing PHP Memory Limit
To increase the PHP memory limit for your WordPress site, you can use one of the following methods. However, please remember to proceed with caution, as incorrect changes can cause problems with your site.
1. Edit your wp-config.php file:
The wp-config.php file contains the base configuration details for your WordPress site. To increase the PHP memory limit:
- Access your WordPress root directory using an FTP client or your hosting provider's file manager.
- Find and open the
wp-config.phpfile. - Add the following line towards the bottom of the file, just before the line that says
/* That's all, stop editing! Happy blogging. */:
define( 'WP_MEMORY_LIMIT', '256M' );This code will increase the PHP memory limit to 256MB.
Save your changes and close the file.
2. Edit your .htaccess file:
The .htaccess file is a configuration file used by Apache web servers. To increase the PHP memory limit:
- Access your WordPress root directory using an FTP client or your hosting provider's file manager.
- Find and open the
.htaccessfile. - Add the following line to the file:
php_value memory_limit 256MThis code will increase the PHP memory limit to 256MB.
Save your changes and close the file.
3. Edit your php.ini file:
The php.ini file is a default configuration file for running applications that use PHP. Some shared hosting providers do not allow access to this file. However, if you have access:
- Find and open the
php.inifile in your website’s root folder. - Look for a line with
memory_limitand adjust the ‘M' value. If it doesn't exist, you can add it:
memory_limit = 256MThis code will increase the PHP memory limit to 256MB.
Save your changes and close the file.
You can also read: How to Fix Memory Exhausted Error
4. Contact your Hosting Provider:
If the above methods don't work or if you're not comfortable making these changes, you can contact your hosting provider. They can assist in increasing the PHP memory limit.
Remember, it's important to increase the memory limit in a reasonable manner based on the needs of your website. Setting a limit that's too high can lead to inefficient memory use. If you're constantly reaching the memory limit, it might be worth looking into the underlying issues causing the high memory consumption.
Resolving Plugin Conflicts
Resolving plugin conflicts in WordPress is a systematic process. Follow these steps to identify and resolve conflicts:
1. Backup Your Site:
Before making any changes, make sure to backup your entire WordPress site. This way, if anything goes wrong, you can restore your site back to its current state.
2. Enable WordPress Debug Mode:
Enable WordPress debug mode by adding the following lines in your wp-config.php file:
define('WP_DEBUG', true);
define('WP_DEBUG_LOG', true);
define('WP_DEBUG_DISPLAY', false);
@ini_set('display_errors', 0);
This will log any PHP errors to a debug.log file within the wp-content directory. If a plugin conflict causes a PHP error, this log will help identify it.
3. Deactivate All Plugins:
From your WordPress dashboard, go to “Plugins > Installed Plugins”. Select all the plugins, choose “Deactivate” from the bulk actions dropdown menu, and then click “Apply”.
4. Test Your Site:
After deactivating all the plugins, check if the issue still exists. If it doesn't, then a plugin was likely the cause.
5. Reactivate Plugins One by One:
Reactivate your plugins one at a time, testing your site after each one. When the issue reappears after activating a specific plugin, you've likely found the conflict source.
6. Test the Conflicting Plugin with the Default Theme:
Sometimes, the conflict might be between a plugin and your current theme. To check, deactivate all plugins except for the one causing the issue. Then, switch your theme to a default WordPress theme, like Twenty Twenty or Twenty Twenty-One. If the issue is resolved, the conflict was with your theme.
7. Contact Plugin Developer or Support:
If you've identified a specific plugin causing the conflict, get in touch with the plugin's developer or support team. Share as much detail about the issue as you can, including any error messages or the debug log.
8. Look for an Alternative Plugin:
If the conflict can't be resolved, consider using an alternative plugin. There are usually several plugins available that offer similar functionalities.
9. Keep Your WordPress, Themes, and Plugins Updated:
Keeping your WordPress core, themes, and plugins updated is essential for avoiding potential conflicts. Developers regularly update their software to resolve bugs and compatibility issues.
By following these steps, you can systematically identify and resolve most plugin conflicts on your WordPress site. Remember, always backup your site before making changes to prevent data loss.
Conclusion
Navigating WordPress errors like “An Error Occurred In The Upload. Please Try Again Later” might seem daunting initially. However, armed with a step-by-step approach, you can troubleshoot and resolve these issues with relative ease.
This guide has highlighted potential causes for the error and offered solutions including checking your file permissions, increasing the PHP memory limit, adjusting your maximum file upload size, and resolving plugin conflicts.
Future prevention is just as critical as resolution. By maintaining updated versions of WordPress, plugins, and themes, checking file permissions regularly, ensuring stable internet connection during uploads, monitoring and adjusting your PHP memory limit as needed, and being careful when installing new plugins, you can significantly reduce the likelihood of experiencing this error.
Understanding and troubleshooting these issues not only helps in maintaining the smooth operation of your site but also deepens your overall knowledge of WordPress functionalities. We encourage you to share your experiences and solutions in the comment section to further enrich our collective understanding.
For more information or support, don't hesitate to consult the WordPress forums or the WordPress Codex. Happy blogging!
As one of the co-founders of Codeless, I bring to the table expertise in developing WordPress and web applications, as well as a track record of effectively managing hosting and servers. My passion for acquiring knowledge and my enthusiasm for constructing and testing novel technologies drive me to constantly innovate and improve.
Expertise:
Web Development,
Web Design,
Linux System Administration,
SEO
Experience:
15 years of experience in Web Development by developing and designing some of the most popular WordPress Themes like Specular, Tower, and Folie.
Education:
I have a degree in Engineering Physics and MSC in Material Science and Opto Electronics.



Comments