We will learn how to install WordPress on your Mac using MAMP. MAMP stands for Macintosh, Apache, MySQL, and PHP. You can experiment and test your WordPress site by setting up a local environment. This way, it won’t impact your live version. Hence, your overall development workflow will boost and provide a safe space to explore.
Creating the Perfect Environment for WordPress
To install WordPress on Mac, you must optimize performance and clean hard drive space. It begins with preparing your Mac adequately. That includes ensuring system compatibility, updating software, and optimizing overall performance. The core is managing MacBook hard drive space for storage efficiency. When the hard drive is at capacity, it can lead to stability issues and freezes. This will hinder your WordPress performance and ultimately lead to frustration. Moreover, keeping free space allows you to smoothly install macOS, WordPress, and MAMP updates.
Optimizing your MacBook includes identifying and removing unnecessary files. It also encompasses clearing cache and temporary files, managing downloads, and uninstalling unused applications. By optimizing the local environment this way, you create an ideal setup for WordPress development. Consider utilizing storage optimization tools and leveraging debugging and troubleshooting tools for optimal results.
Understanding MAMP for Mac: Your Local Server Solution
MAMP is a popular local server solution for macOS. It is convenient and self-contained. It hosts dynamic websites and runs server-side scripts. MAMP includes Apache as a web server and MySQL as the database management system. As for PHP, it is a scripting language. They offer the infrastructure to host and develop PHP-based apps when they come together. That includes WordPress.
Why choose MAMP for local development
There are various reasons you should use MAMP as a local environment for WordPress:
- MAMP is designed specifically for macOS. Hence, it is incredibly compatible with your MacBook.
- MAMP creates a self-contained environment, making moving your entire local WordPress installation to another laptop easy.
- MAMP provides a complete package. You don’t have to install and configure Apache, MySQL, and PHP individually.
- MAMP is very user-friendly. It makes it accessible to both beginners and advanced users.
Downloading and Installing MAMP for Mac
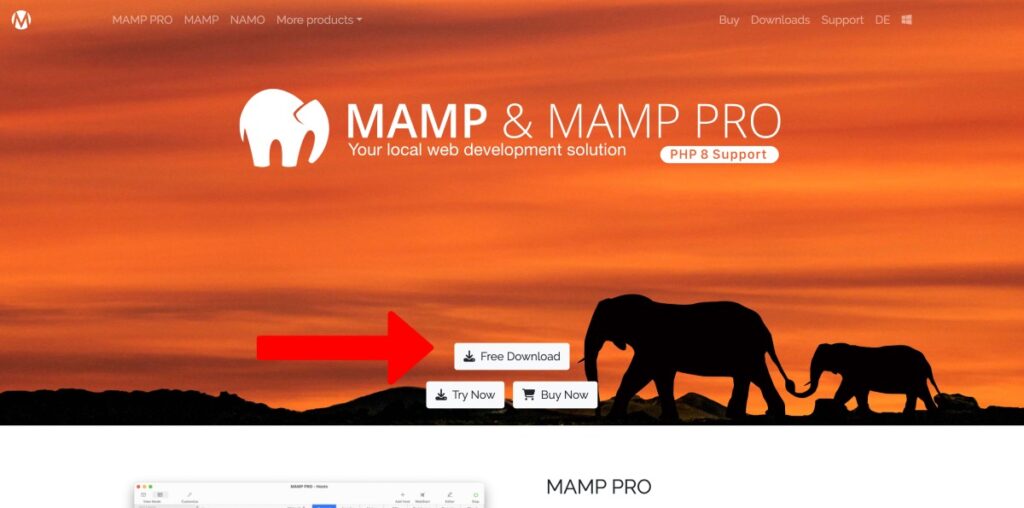
To download and install MAMP, you should:
- You should first visit the official MAMP website. Navigate to “download.”
- Choose the MAMP version suitable for your macOS version.
- Click on the download link and save the package.
- Double-click it once it is downloaded.
- Follow the on-screen instructions, read and agree to the terms, and select installation options.
Configuring MAMP for WordPress on Mac
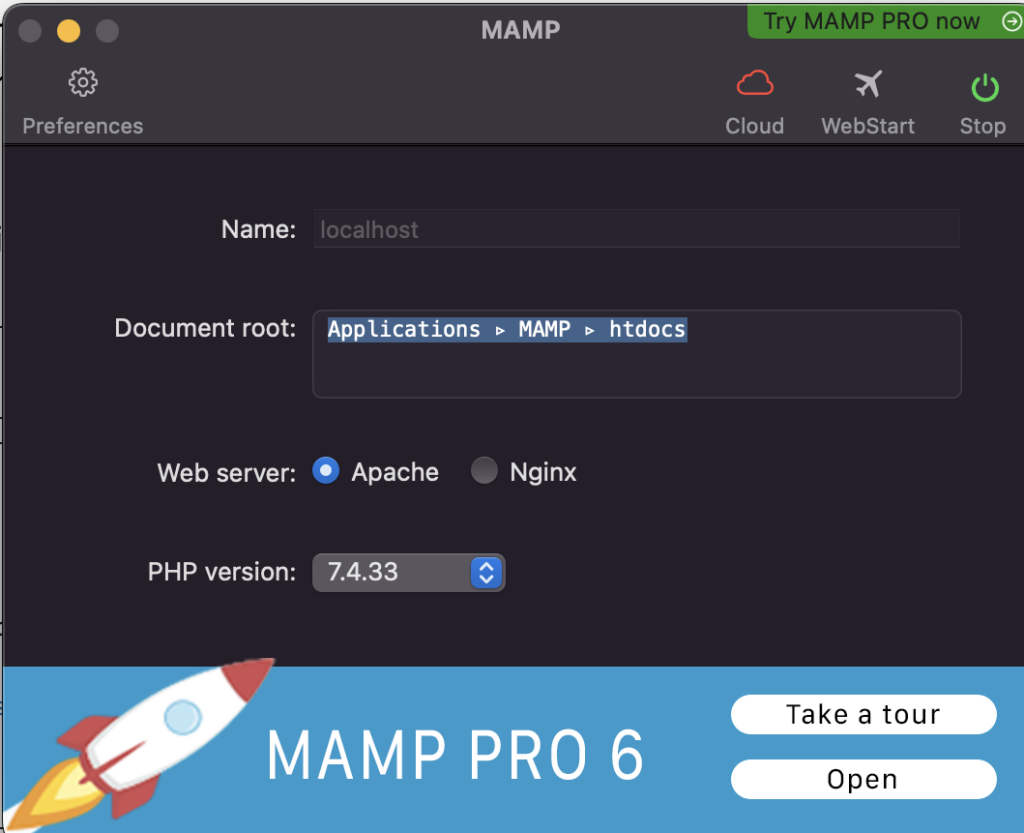
Now, you need to configure your MAMP. You should tailor it to your WordPress development. To do so, follow these steps:
- Launch MAMP from your folder.
- In the MAMP interface, go to “Preferences” or “Settings.”
- Adjust the ports if you need to. Apache’s default port is 8888. MySQL’s default port is 8889.
- Set the document root, which is the folder where your WordPress files will be sorted.
- Choose the PHP version you want for WordPress. Consider using the latest stable version.
- Save the settings and start using your MAMP servers.
Once everything is done, you can open your web browser and access the local WordPress installation. You can enter “localhost:8888” (or your chosen port).
Setting Up WordPress Locally on MacBook
To set up WordPress, you need to download the latest version. You go to the official website, download the ZIP file, and extract content once done.
Creating a database in MAMP
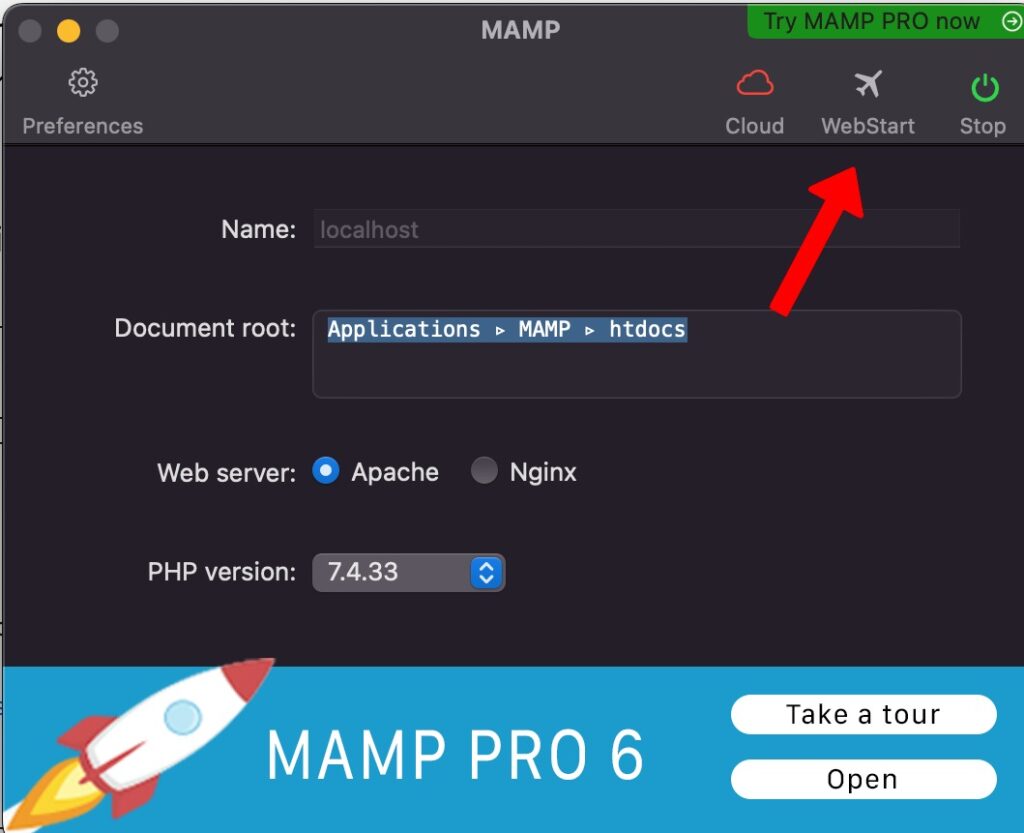
Before installing WordPress (after downloading it), you need to create a database where all your website data will be stored. MAMP makes the process easier. You can do so by following these steps:
- Open MAMP app on Mac.
- Click on “Start Servers” to ensure Apache and MySQL are running.
- In the MAMP interface, click “Open WebStart page.”
- Click on “phpMyAdmin” in the top navigation menu.
- Click on the “Databases” tab.
- Enter a name for your database.
- Choose the “utf8mb4_unicode_ci” collation from the drop-down menu.
- Click the “Create” button to create the database.
Read More: PHPMyAdmin Default Password
Configuring WordPress database settings
After creating the desired database, you need to configure the settings on WordPress. This allows you to establish a connection. Follow these steps:
- Locate the extracted WordPress files on your computer.
- Rename the “wp-config-sample.php” file to “wp-config.php.”
- Open the “wp-config.php” file in a text editor.
- Find ‘database_name_here’ and replace it with the name of the database you created.
- Replace ‘username_here’ with the default MAMP username. That is typical “root.”
- Replace ‘password_here’ with the default, typically “root” also.
- Save the changes to the “wp-config.php” file.
Installing WordPress locally
To install WordPress:
- Move the WordPress folder to the document root folder specified in MAMP’s settings. It is usually the “htdocs” folder.
- Open the web browser and enter “localhost:8888”.
- The WordPress installation page appears. Select your language and click “Continue.”
- Enter the site information. That includes the title, username, password, and email address.
- Click the “Install WordPress” button to initiate the installation process.
- Click the “Log In” button. Use your username and password, and click “Log In” again to access the WordPress admin dashboard.
Read More: How to Install WordPress locally using XAMPP or MAMP
Taking Your Local WordPress Site Live on MacBook
There are three essential steps to follow to carry your website online. These three main points are:
- Choose the right web hosting provider by selecting a reliable one. Choose performance, uptime, scalability, and responsive support.
- Migrate your local site to a live server by following the basic steps. Purchase a domain name and sign up for a plan. Then, create a new database on the live server, then export and import the local database. Upload files, update the database, and test the website.
- Launch your website correctly. You can do a final test, set up plugins, and customize your appearance. Consider creating essential pages, optimizing your SEO, and implementing analytics measures.
Read More: How To Create a WordPress Website 2023 (Beginners Guide)
Conclusion
Finally, installing WordPress locally on your Mac with MAMP provides a robust and adaptable environment. Hard disc space management guarantees maximum performance and storage economy. Locally installing WordPress entails downloading the most recent version and establishing a database. Getting your local site up and running include selecting a hosting provider, moving the site, and launching it. You can design and launch your WordPress websites confidently by following these steps. Embrace the potential of local WordPress development to quickly unleash your creativity.
As one of the co-founders of Codeless, I bring to the table expertise in developing WordPress and web applications, as well as a track record of effectively managing hosting and servers. My passion for acquiring knowledge and my enthusiasm for constructing and testing novel technologies drive me to constantly innovate and improve.
Expertise:
Web Development,
Web Design,
Linux System Administration,
SEO
Experience:
15 years of experience in Web Development by developing and designing some of the most popular WordPress Themes like Specular, Tower, and Folie.
Education:
I have a degree in Engineering Physics and MSC in Material Science and Opto Electronics.




Comments