This is the No 1 Web Series of many others that we will continue to write and film in the future.
WordPress is such a great platform to create beautiful products, customize site's and make money with them. And we want to teach anybody to make the best use of it. The first essential step to learn is to install it. You need a place to host a WordPress website. This place is called a server. You can either host your WordPress installation on an Online Server or in your own Local Host.
You might be interested also: How to create WordPress Website
We are going to explain both of them today with the help of Folie WordPress Theme.
Choose Hosting Provider before Installing WordPress
When it comes to Choosing the Right Server and Hosting Service you may feel a little confused and tired. You are not alone! As much as we understand you, we have some tips to also help you :). Check out this other post we did for Things to Keep in Mind When Choosing a Hosting Provider :
There are 3 main groups of Types of Hosting Providers :
- Shared Web Hosting – Using this Hosting Service means that your website is hosted on a server shared by other websites. The advantage of this setup is the shared cost for sharing a server with hundreds of other websites. We don't recommend choosing this service if you are craving a serious and professional website. Shared hosting is good for beginners.
- Dedicated Web Server – Using this Service means that you are renting only one physical server from a hosting company and you have full control of it. But of course, you are also paying more than using shared web hosting.
- Managed WordPress Hosting – Managed service is today one of the most popular hosting providers. That's because this service can guarantee you that the best up-to-date WordPress Installation and protect your website from hackers and threats.
Whatever Hosting Service you choose make sure to read all their offers and make the best of it regarding your requirements.
Let's get started!
How to Install WordPress on Bluehost

Bluehost is one of the biggest web hosting company owned by Endurance International Group. We are going to install the WordPress and Folie Theme with Bluehost also.
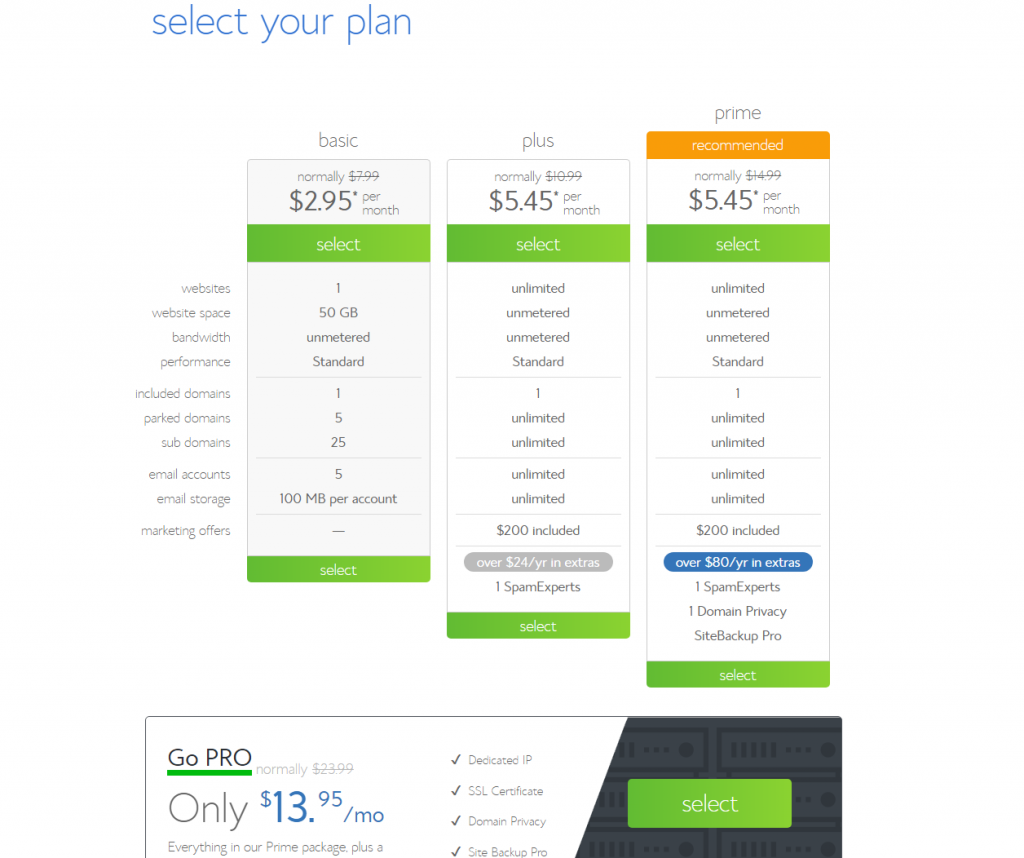
First, you have to choose the Pricing Package. This depends on your website goal. If you are a beginner you may choose the basic plan.
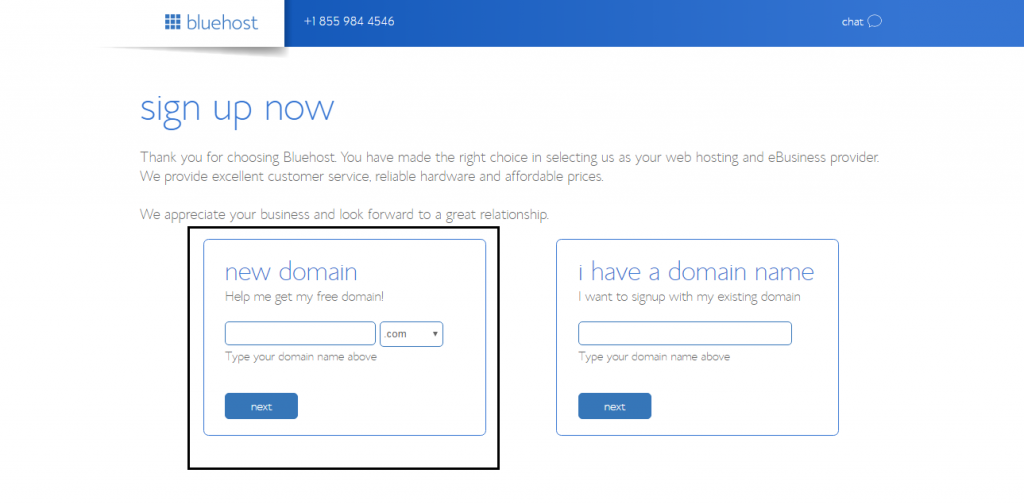
Then you will be directed to the Sign Up panel :
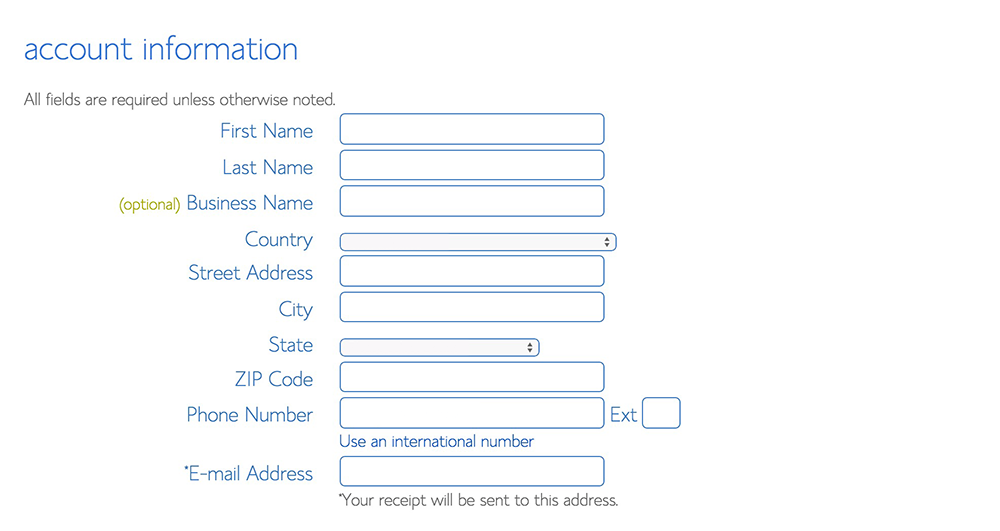
Enter your personal data to complete the payment :
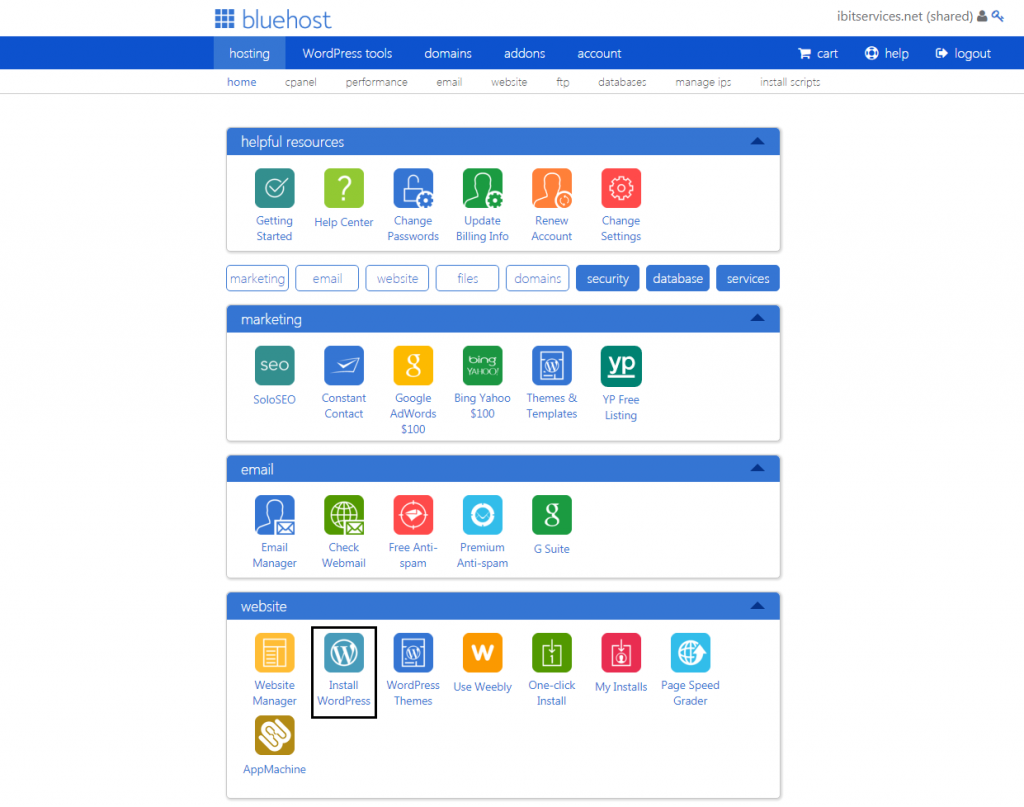
On the administration panel, on the website section choose Install WordPress :
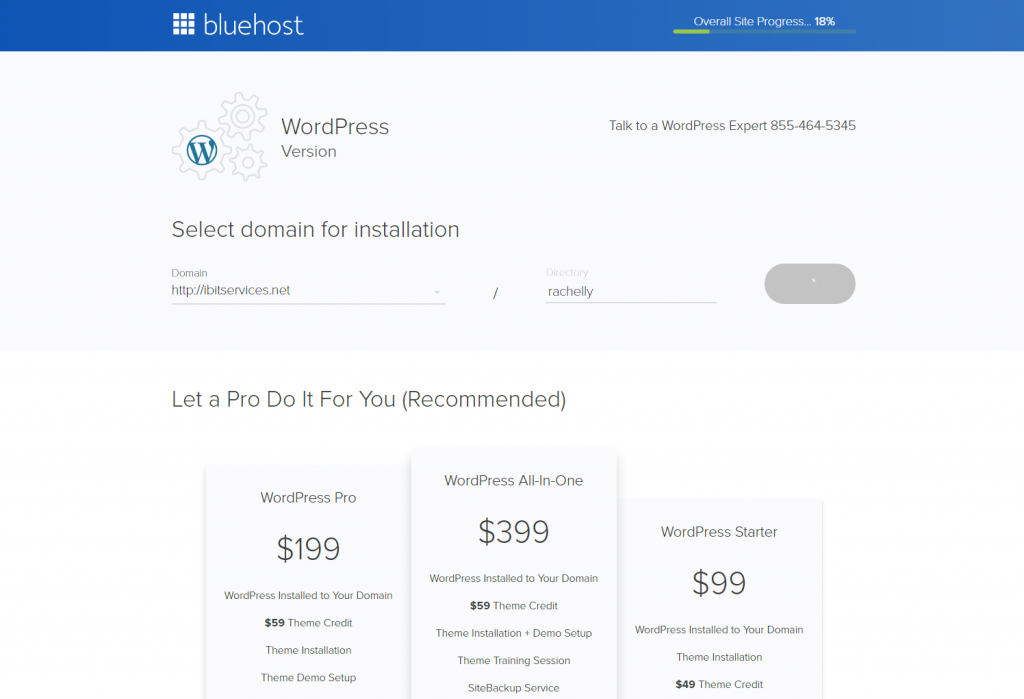
To start the installation you need to choose the Domain of your site and a Directory where it will be saved :
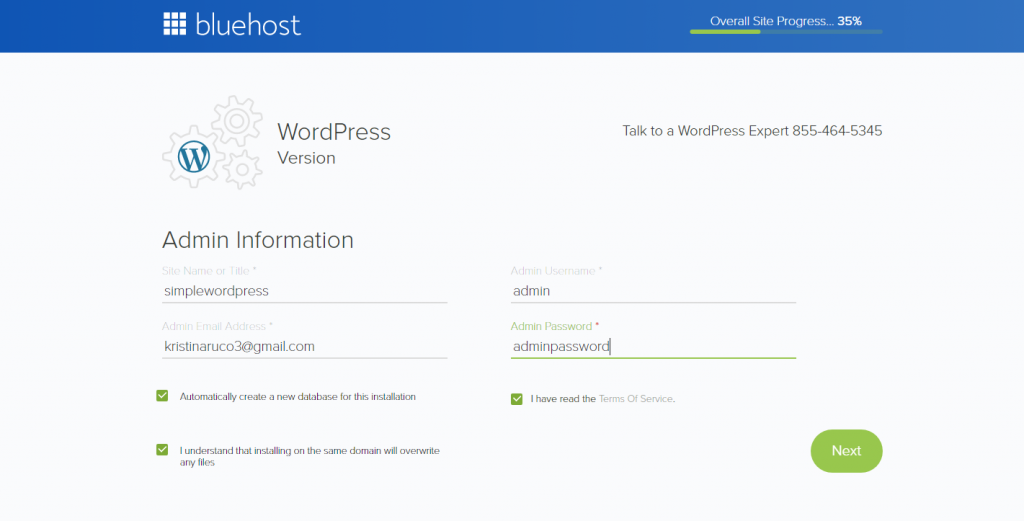
To complete the install, on the next panel you can choose the Site Name, the WordPress Username, and Password :
Once the install is successfull you can see your Credentials :

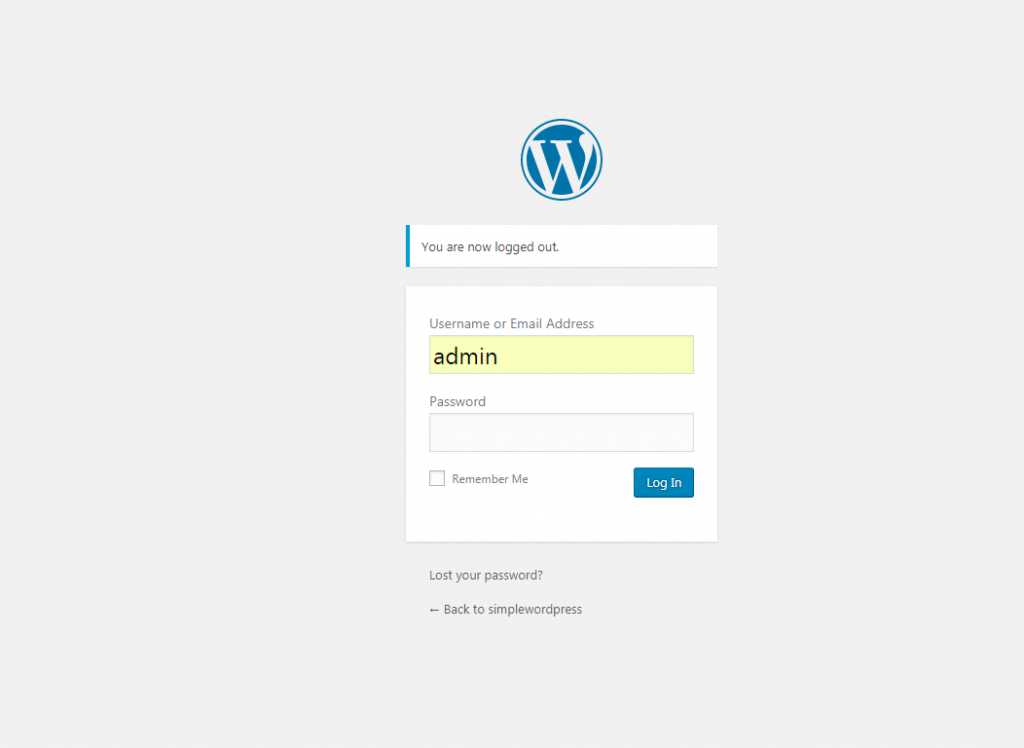
Login to your WordPress with the credentials :
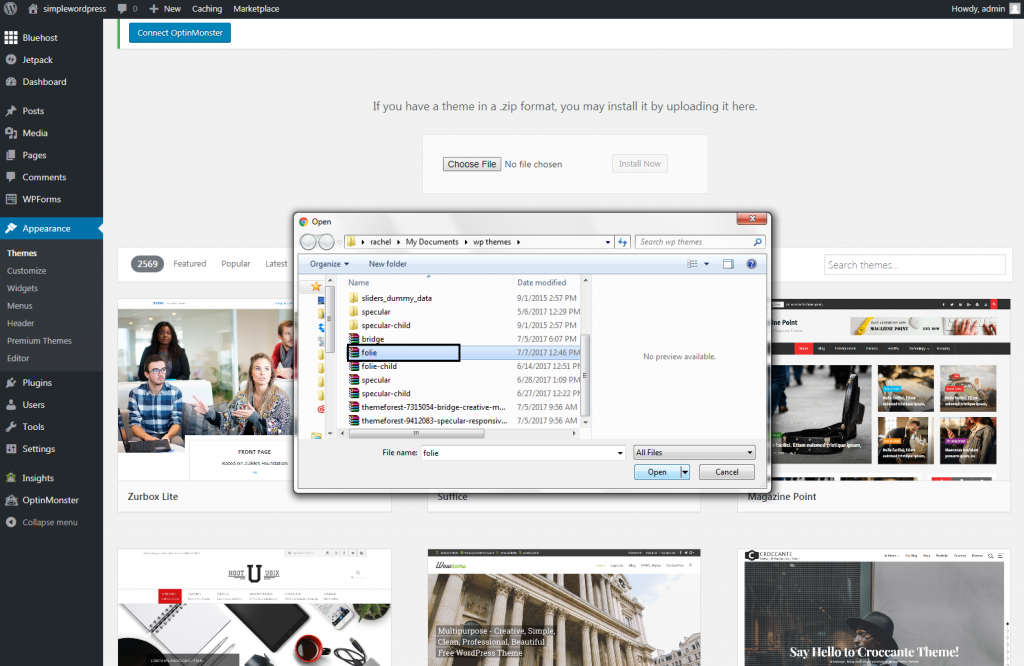
Now you can install the Theme. Go to Dashboard > Appearance > Themes > Upload Theme and choose the zipped theme folder that includes the installable files :
After Folie is installed you should activate it :
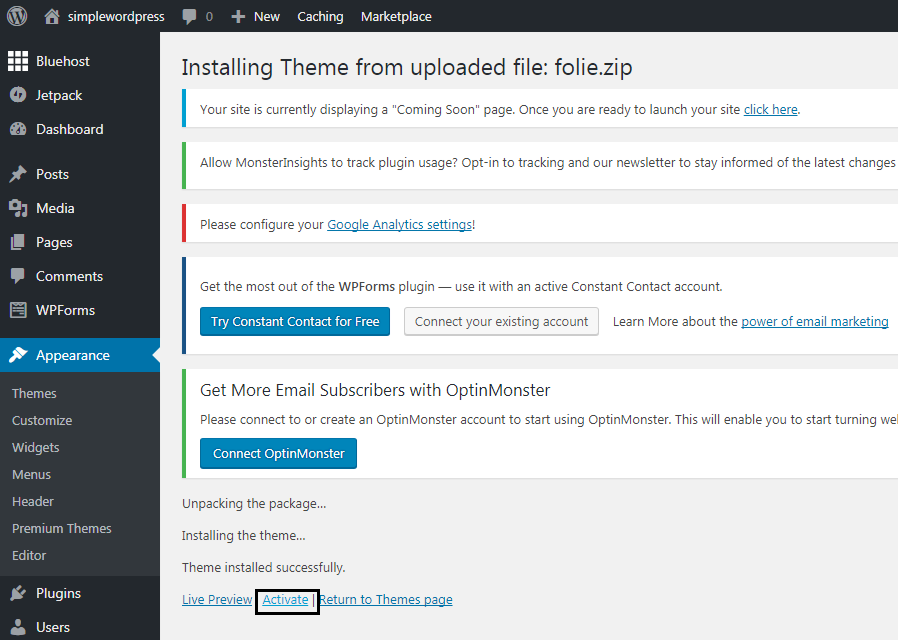
Now the remaining steps are the same as usual: Register the Folie Theme
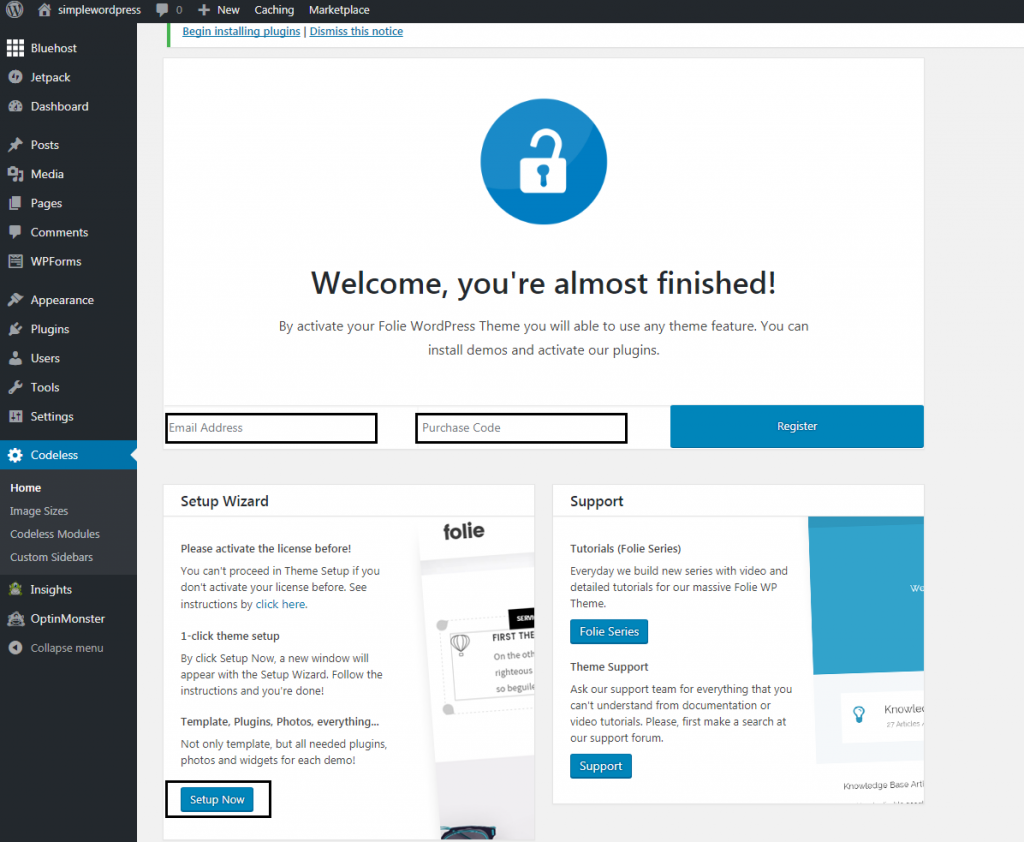
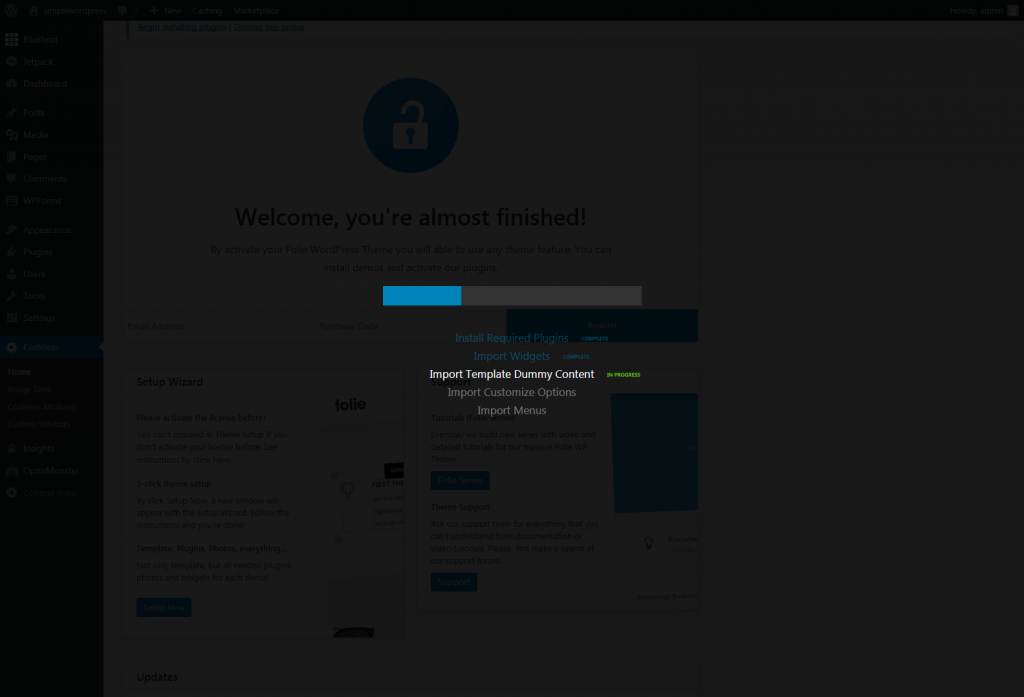
Setup Now to install Plugins, Widgets, Demo Data, Customize Options, and menus :
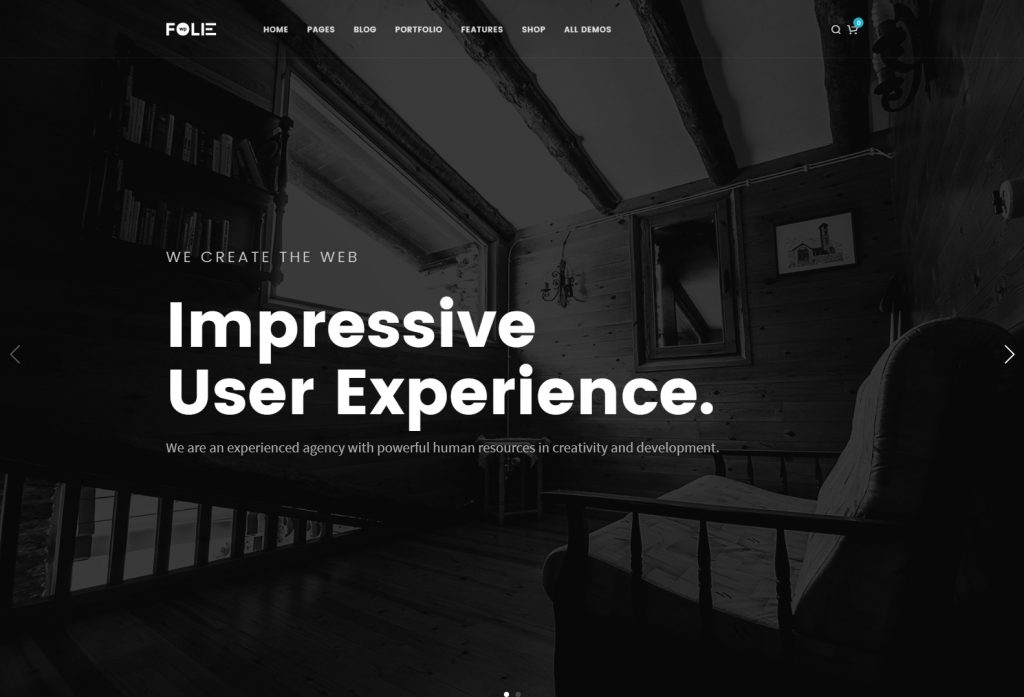
And enjoy your new Website 🙂 !
How to Install WordPress on a Local Host

Before starting with the really technical details i want to introduce some mainly important concepts like WordPress, Hosting, Domains, DNS, MySQL, FTP, PHP:
- WordPress – It is the most popular Content System Management on the market that made possible the creation of 25% of the websites. This platform is Open Source and has a great community. More info at WordPress.org
- Hosting – store (a website or other data) on a server or other computer so that it can be accessed over the Internet.
- Domain – is the website name that will be connected with your hosting account to serve your website.
- DNS – Domain Name Services this service makes possible the translation of the domain address for example: codeless.co with to ip address 222.2333.44.55 of the respective host.
- MySQL – The major open-source database software where all the content and data are stored when we use a dynamic website like WordPress.
- FTP – The file transport protocol, let's us upload and download the website files from the hosting account.
- PHP – It's a popular programming language used by WordPress.
There are some other keywords that we will use in these Web Series but this is a little introduction for those who are very newcomers to the field.
Read More: 7 Best Free WordPress Courses & Certifications (2023)
So let create our first website.

The available local hosts are XAMPP and WAMP for Windows users or Mamp if on mac. Download and install one of these into your computer. (If you need help with the installation of the server, follow these useful links: xamp, wamp, mamp install tutorials)
In this tutorial, we will be using the XAMPP server.

Go to WordPress's official site, download, and unzip the WordPress latest WordPress package version. This should be easy as the latest version is always the one available for download whenever you open this page.
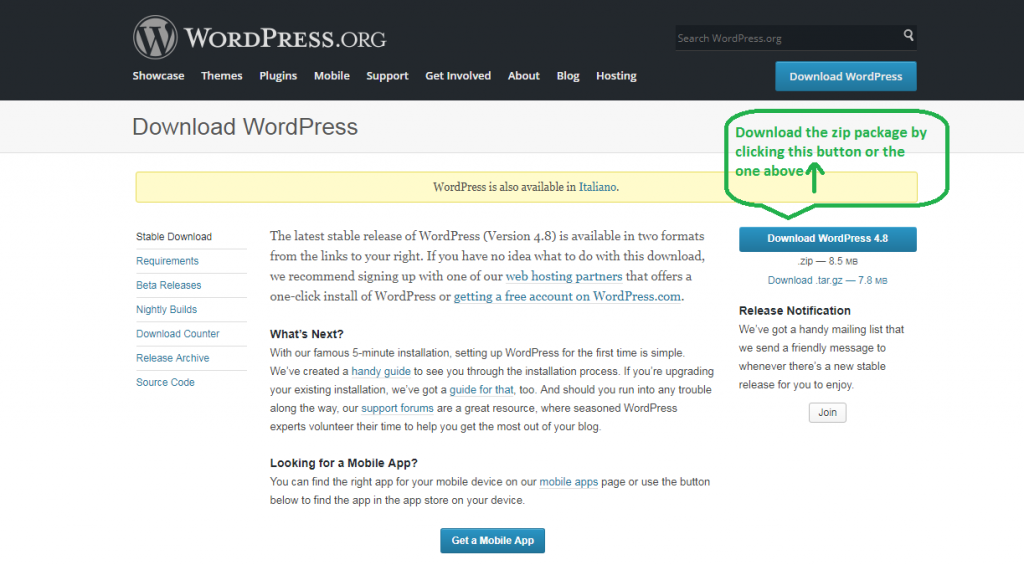
Note: Please do not confuse WordPress.com with WordPress.org. The first one is an online platform owned by a third party that lets you upload your site online without any charge. But it has its limitations, such as restricted FTP access, a limited amount of memory usage, limited rights on theme choice (you can only use the pre-defined WordPress themes but not premium themes), etc. While WordPress.org is the independent version that you can download and install into your localhost. This is what we are downloading now. There are no limitations on it, except the fact that it's not online. But you can use it to build your site beforehand and then upload it online when you have finished the work and are confident about it. Or you can use it to create themes, plugins, or test out things. You will have full access rights on files and folders, memory limit, and database. Also, you can try and install every premium theme available on the market.

Unzip the package you downloaded in the last step. You will find a “WordPress” folder in it. Copy this folder and paste it into xampp/htdocs folder in your computer.
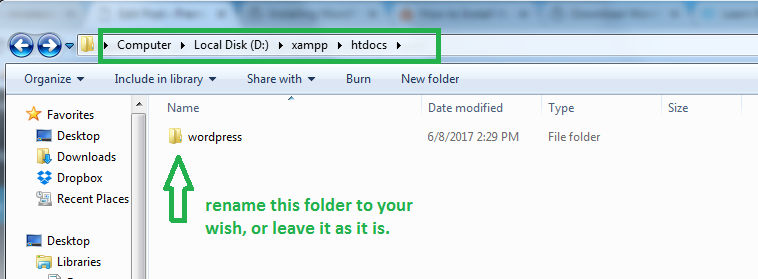
*You can install XAMPP in any of the main computer directories. I prefer the D directory since it can be left untouched in case of a computer formatting. We wouldn't want all that work to be lost, would we? Anyway, this is entirely on your preference so install XAMPP on C or D, wherever it's more convenient for you.
In this article, we installed the XAMPP server in the D directory, so the main path will be: D:\xampp\
We added the unzipped WordPress files in this location: D:\xampp\htdocs\ You can rename the “WordPress” folder as your site's name for convenience or leave it as it is.

The website is composed of files and folders that are stored in the C:\xampp\htdocs\ folder, and of a database that will store all the content (pages, posts, images, configurations, styling ..etc). Before starting the famous 5-minute install, it is needed to create a database. This is done in the phpMyAdmin. To go there paste this link into your browser: http://localhost/dashboard/
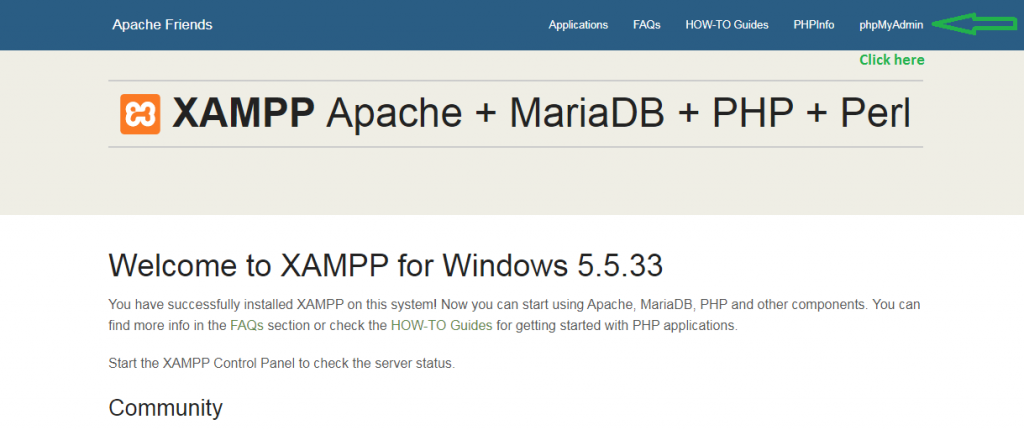
Click on the phpMyAdmin menu. You will be directed to the database administration page. To go there directly, paste this link in your browser's URL: http://localhost/phpmyadmin/ Once here, go to the Database menu and in the field enter the new database name. Click on the “Create” button to finally add it. Once created it will be listed on the left side of the panel. We have now a new empty database.

By default the database root user is “root” and there is no password to protect it. Changing it requires additional steps that will be covered in another article.

Since we have now the WordPress files and the database where to install it, let's proceed with WordPress's famous 5 minutes installation. Go to http://localhost/wordpress where “WordPress” is the name of the folder we added in htdocs folder in step 3. If you have renamed it, then the path would be: http://localhost/your-wp-folder-new-name
After clicking ‘enter' from the keyboard, you will be redirected to the configuration panel.
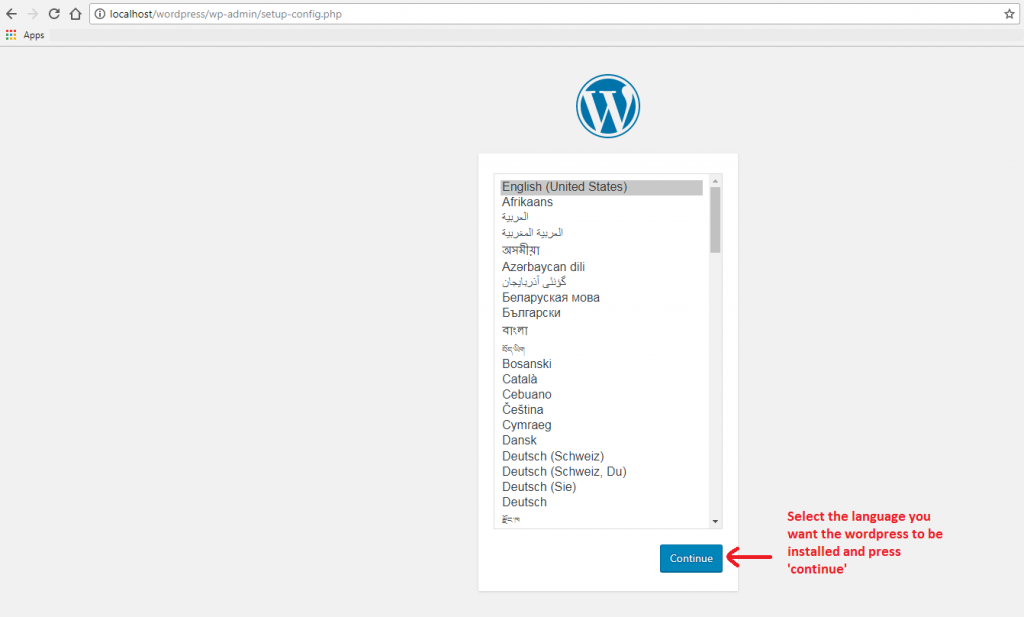
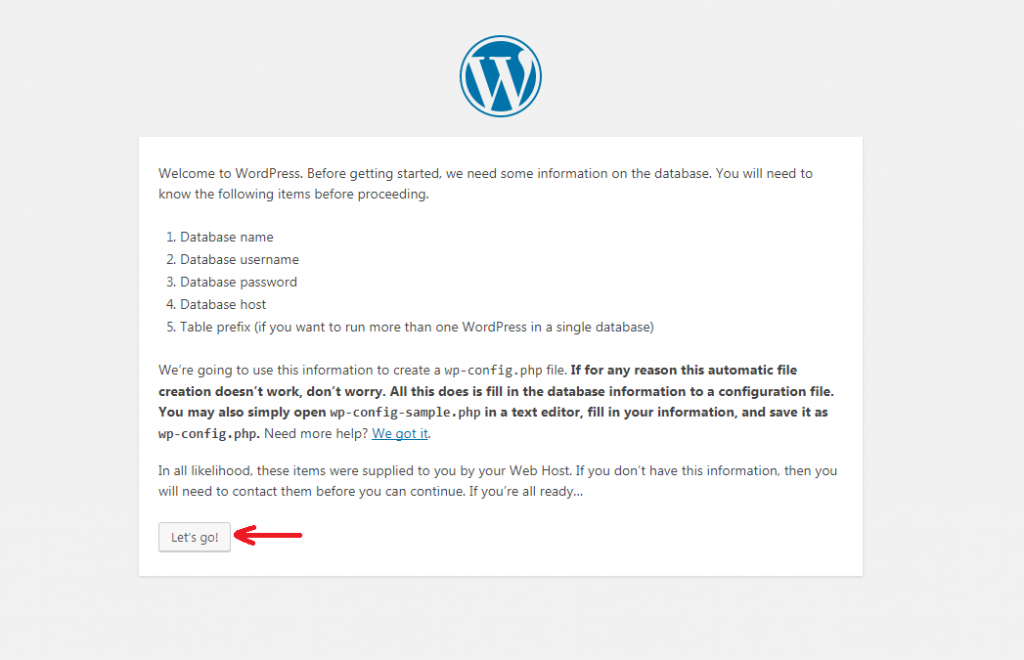
Read some useful information in the next step and click “Let's Go” to finish the installation when you are ready.
In the next step, we setup the database credentials that the installation will use to connect the site with the right database.
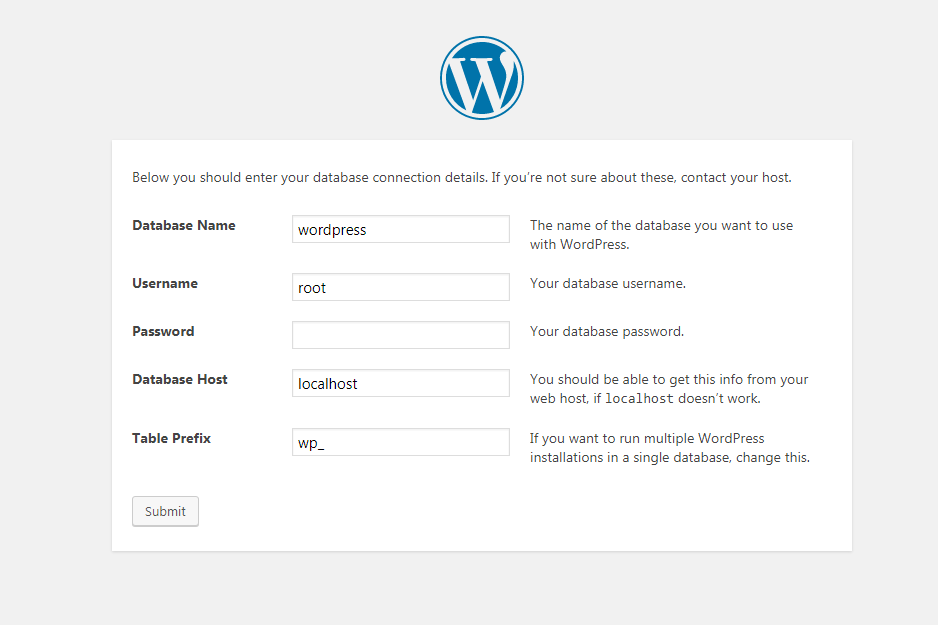
Enter here the name of the database you just created. The username by default is “root” and the password is left empty by default. As stated before to change these values there are other steps to perform. You need a bit more understanding of how localhost work to configure it. But for a simple installation, this is more than enough.
Then you have the database host, which in this case is localhost. Last is the prefix that will be used when creating the database tables. The default value is “wp_“. Change it to your wish if you want another more representative prefix.
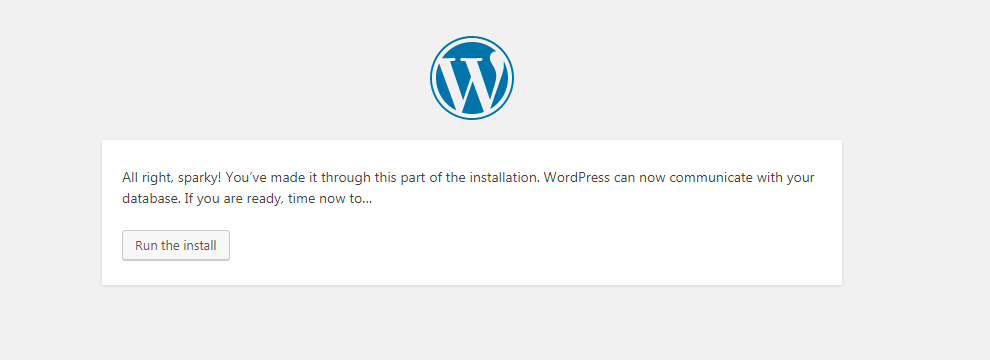
Click on ‘Submit' to enter the variables. The next step is to run the install.
One more form to fill and you are almost over. Now it's time to give some information like the name for your new site, the admin's username, password, and email.
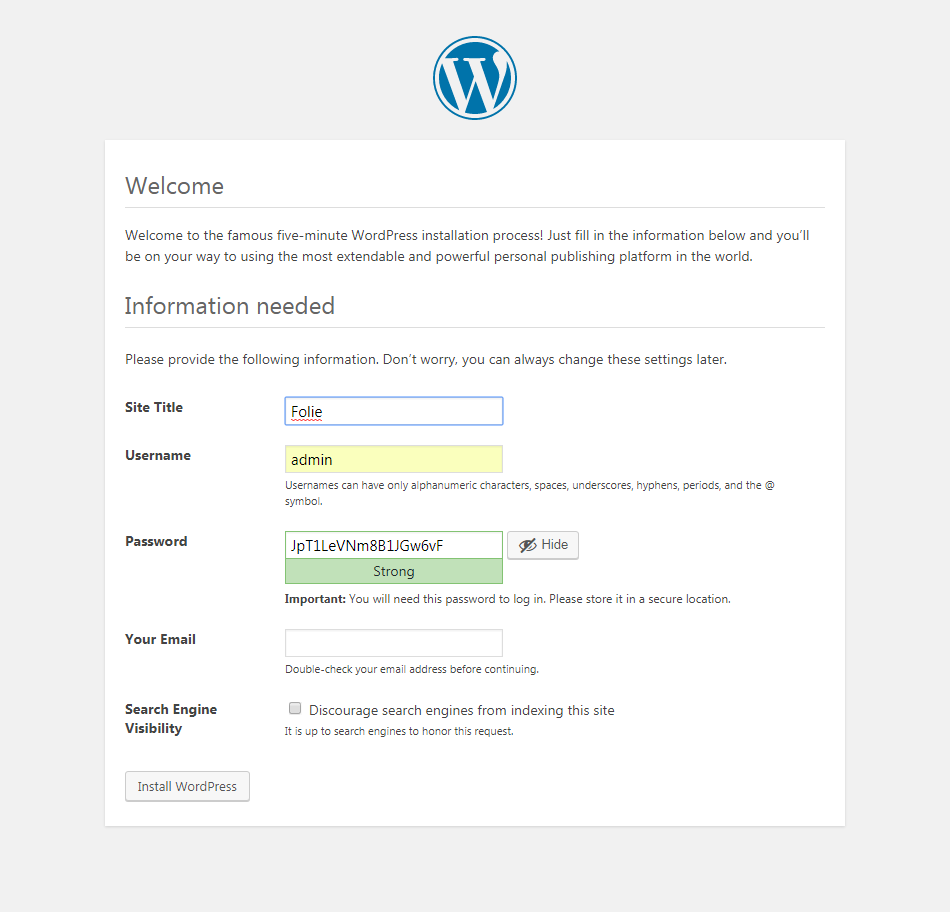
Click on “Install WordPress” and your work is over. Now let WordPress do the job.
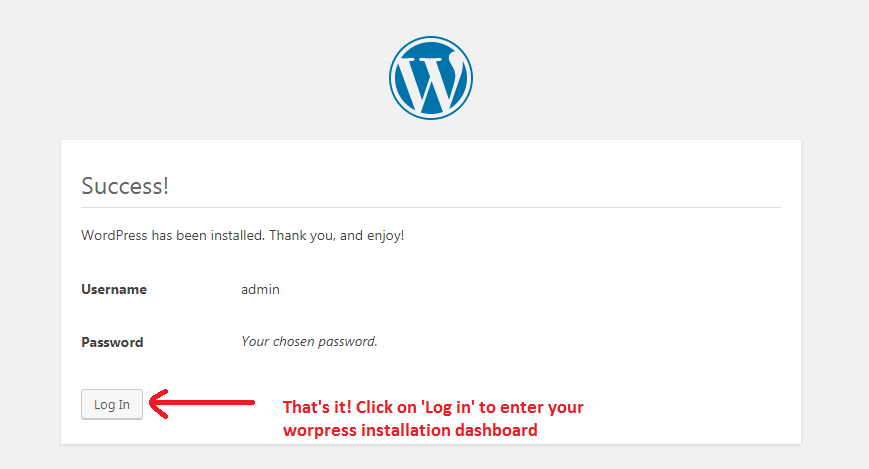
After this, you will be redirected to http://localhost/wordpress/wp-login.php Enter the username and password set up in the last step and login into the installation.
That's all regarding the installation of WordPress in localhost.
Now it begins the New Website Configuration and Set Up. We are going to keep talking about those on the other tutorials after this. Stay tuned!
Hope you enjoyed it 🙂 !
Read More: How to Delete Themes in WordPress (Why you should)
Ludjon, who co-founded Codeless, possesses a deep passion for technology and the web. With over a decade of experience in constructing websites and developing widely-used WordPress themes, Ludjon has established himself as an accomplished expert in the field.





Comments