React.js has become one of the most popular JavaScript libraries for building dynamic, interactive user interfaces. While it's commonly used with backend frameworks like Node.js, many developers seek to deploy their React.js applications on shared hosting environments that use cPanel, a popular control panel for managing web hosting accounts.
This article will guide you through the process of installing and deploying a React.js application using cPanel, even if your hosting provider doesn't specifically cater to JavaScript frameworks.
You can also read: 7 Best Hosting for React Apps 2025 (Compared)
Prerequisites
Before diving into the installation process, there are a few prerequisites you should have in place:
- A Ready-to-Deploy React.js Application: Ensure your React app is complete and ready for production. This means all development work is done, and you're ready to build a version of the app that can be served to users.
- Access to cPanel: You need access to cPanel, which is provided by your web hosting service. Most shared hosting providers offer cPanel as part of their service.(We recommend Hostinger with our special offer using coupon code “Codeless“)
- A Domain Name: A registered domain or subdomain where you will deploy your React app. If you haven't set this up yet, you can either use an existing domain or create a subdomain through cPanel.
Step 1: Prepare Your React.js App
Generate a Production Build
The first step in deploying your React.js application to cPanel is to create a production build of your app. This build is optimized for performance, ensuring that it runs efficiently on the web. Follow these steps should be done at your local computer.
- Open Terminal: Navigate to your React project directory using your terminal or command prompt.
- Run the Build Command:
npm run buildIf you're using Yarn as your package manager, you would use:yarn buildThis command generates abuildfolder in your project directory. Thebuildfolder contains all the static files necessary for running your application, including the HTML, CSS, and JavaScript files.
Preview the Build (Optional)
Before deploying, it's a good idea to preview the production build locally to ensure everything is functioning correctly. You can do this by using a simple server tool:
- Install Serve Globally:
npm install -g serve - Serve the Build:
serve -s buildThis command will start a local server and serve your app from thebuilddirectory, allowing you to preview it in your browser.
Step 2: Set Up Your cPanel Environment
Once your React app is ready for deployment, you need to configure your cPanel environment.
Create a Subdomain (Optional)
If you want your React app to be accessible via a subdomain (e.g., react.yourdomain.com), you need to create one in cPanel:
- Log in to cPanel: Use your hosting provider’s login portal to access cPanel.
- Navigate to Subdomains: In the Domains section, click on “Subdomains.”
- Create a New Subdomain: Enter the desired name for your subdomain and specify the document root directory. If you leave the default settings, cPanel will create a new directory under
public_htmlwith the name of your subdomain.
Upload the Build Files

With the production build ready, you can now upload it to your server.
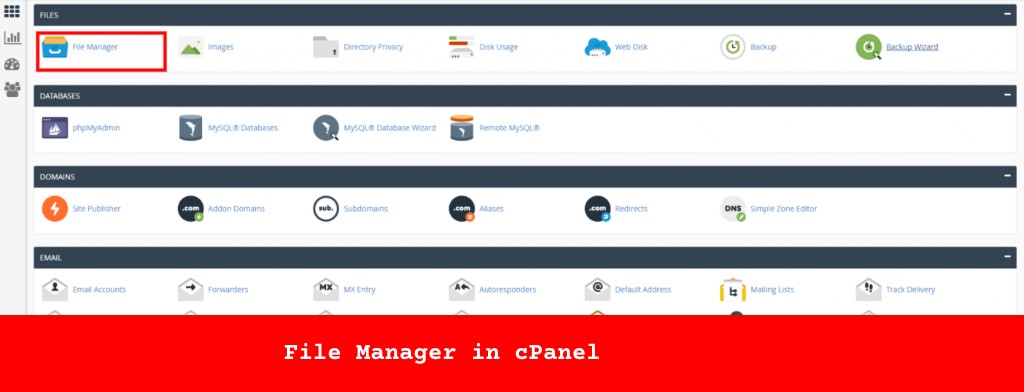
- Access File Manager: In cPanel, locate the “File Manager” under the “Files” section.
- Navigate to the Desired Directory: If you created a subdomain, navigate to the corresponding directory (e.g.,
public_html/react). If you're deploying on the main domain, use thepublic_htmldirectory. - Upload the Build Folder:
- First, compress the
buildfolder on your local machine into a ZIP file. - Use the “Upload” button in the File Manager to upload this ZIP file to the desired directory.
- Once uploaded, right-click the file and select “Extract” to decompress the contents
- First, compress the
Step 3: Configure Server Settings
After uploading the build files, you might need to configure some server settings, especially if your React app uses client-side routing with React Router.
Set Up .htaccess (Optional)
If your app uses React Router, which relies on the HTML5 pushState history API, your server needs to be configured to handle requests correctly. This is particularly important if users can navigate directly to routes other than the homepage.
- Locate or Create .htaccess:
- In your
public_htmlor subdomain directory, check if there is an.htaccessfile. - If not, create a new file named
.htaccess.
- In your
- Add Routing Rules:
- Open the
.htaccessfile and add the following configuration:bashCopy codeOptions -MultiViews RewriteEngine On RewriteCond %{REQUEST_FILENAME} !-f RewriteRule ^ index.html [QSA,L]
index.htmlfile, which is essential for single-page applications like those built with React. - Open the
Step 4: Finalizing and Testing
With everything uploaded and configured, the next step is to finalize your deployment and ensure everything is working as expected.
Check File Permissions
Make sure the files and directories have the correct permissions to be accessed by the web server. Generally, directories should have permissions set to 755 and files to 644.
Test the Deployment
Visit your domain or subdomain (e.g., react.yourdomain.com) in a web browser to verify that your React app is running smoothly. Check all pages and features to ensure that everything functions correctly.
If you encounter any issues, the browser’s developer tools can be helpful in diagnosing problems. Additionally, cPanel’s error logs can provide insights into server-side issues.
Troubleshooting
Deploying a React app on cPanel can occasionally lead to issues. Here are some common problems and their solutions:
- Routing Errors: If navigating to different pages of your app results in 404 errors, ensure your
.htaccessfile is correctly configured to handle client-side routing. - File Not Found Errors: Double-check that all files from the
buildfolder were uploaded correctly and that they are in the correct directory on your server. - Incorrect File Permissions: If files are not loading, check that file permissions are set correctly (
755for directories and644for files). - Caching Issues: Sometimes, changes might not appear immediately due to caching. Clear your browser cache or try accessing the site in incognito mode to see if the issue persists.
Conclusion
Deploying a React.js application on a cPanel-hosted server might seem challenging at first, especially if you're used to more automated deployment processes with services like Vercel or Netlify or check our article: 10 Best Node.js Hosting Providers of 2025 (Cheap & Free). However, by following the steps outlined in this guide, you can successfully get your React app up and running on cPanel.
This process includes preparing your React app for production, setting up your cPanel environment, configuring necessary server settings, and troubleshooting any issues that arise. Once completed, your React.js application will be live and accessible to the world through your domain or subdomain.
As you gain more experience, you can explore more advanced topics such as integrating backend services, setting up continuous deployment pipelines, or optimizing performance further. For now, enjoy sharing your React projects with the world!
Ludjon, who co-founded Codeless, possesses a deep passion for technology and the web. With over a decade of experience in constructing websites and developing widely-used WordPress themes, Ludjon has established himself as an accomplished expert in the field.


Comments