Learning how to enable error logs in WordPress is crucial for maintaining a healthy, well-functioning website. When you face issues on your site, error logs can help pinpoint the underlying problems. This article will guide you through the process of enabling error logs to keep your site running smoothly and efficiently.
By activating error logs, you'll gain valuable insights into your site's performance and potential issues. These logs act as essential tools for website administrators, making it easier to identify and resolve problems quickly.
In this comprehensive guide, you will learn about the different types of error logs and how to enable them in WordPress. We'll also discuss best practices and how to analyze the logs effectively. By following these steps, you'll be better equipped to maintain and optimize your website, ensuring a better experience for your visitors.
Understanding WordPress Error Logs
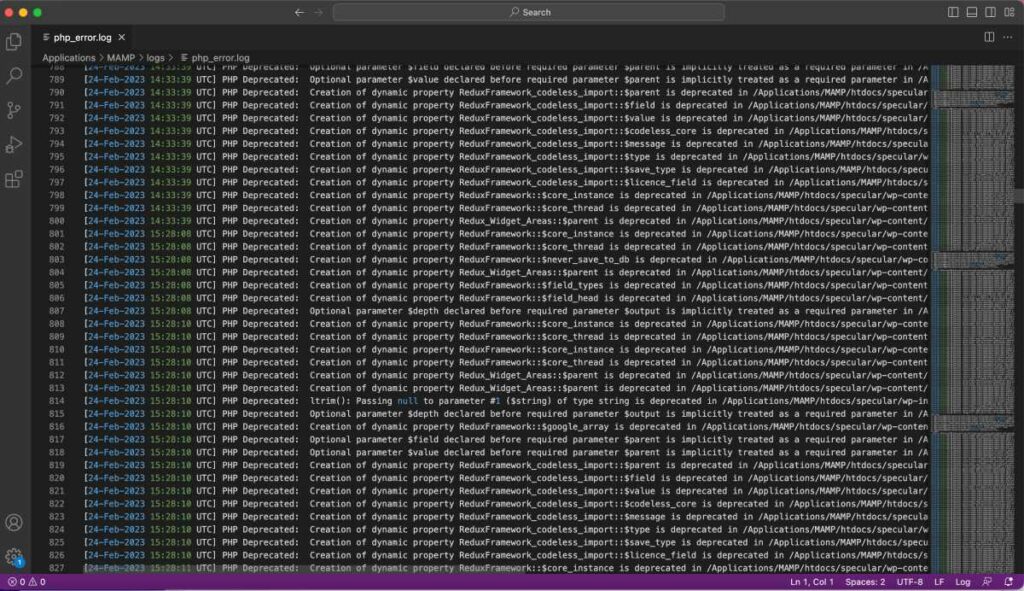
Before diving into enabling error logs, it's essential to understand the two primary types of logs you'll encounter in WordPress:
- PHP Error Logs
- WordPress Debug Logs
Both logs serve unique purposes, and understanding their differences will help you utilize them more effectively.
1. PHP Error Logs
PHP error logs record errors related to the PHP code running your WordPress website. These errors can stem from themes, plugins, or even custom code you've added. PHP error logs provide valuable information on syntax errors, missing files, and other issues that may prevent your site from functioning correctly.
2. WordPress Debug Logs
WordPress debug logs, on the other hand, are specifically designed to capture errors within the WordPress core, themes, and plugins. By enabling debug logs, you'll gain insights into deprecated functions, notices, and other issues that could potentially impact your site's performance and user experience.
With a basic understanding of these error logs, let's now explore the steps to enable them in your WordPress site.
How to Enable PHP Error Logs
Activating PHP error logs is a straightforward process that involves modifying the php.ini file on your server. Follow these steps to enable PHP error logs:
Accessing the php.ini file

Locate the php.ini file on your server. This file is typically found in the root folder or within a subdirectory, depending on your hosting provider.
Finding the php.ini file can vary depending on your hosting environment and server configuration. Here are some common ways to locate the php.ini file:
- Shared Hosting: In shared hosting environments, the php.ini file is usually located in the root directory (public_html) or within a subdirectory, such as /etc/php/. You can access these files using your hosting control panel's File Manager (e.g., cPanel) or an FTP client (e.g., FileZilla).
- Virtual Private Server (VPS) or Dedicated Server: In VPS or dedicated servers, the php.ini file location depends on your server's operating system and PHP installation. Here are some common locations for various systems:
- Ubuntu/Debian (Apache):
/etc/php/[PHP version]/apache2/php.iniUbuntu/Debian (Nginx):/etc/php/[PHP version]/fpm/php.iniCentOS/RHEL (Apache):/etc/php.iniCentOS/RHEL (Nginx):/etc/php-fpm.d/www.conf
find,locate, orgrepto search for the php.ini file if you are unsure of its exact location. - Ubuntu/Debian (Apache):
- Local Development Environment: If you're working with a local development environment like XAMPP, MAMP, or WAMP, the php.ini file can typically be found within the respective application's folder. Some common locations include:
- XAMPP (Windows):
C:\xampp\php\php.ini - XAMPP (macOS):
/Applications/XAMPP/xamppfiles/etc/php.ini - MAMP (macOS):
/Applications/MAMP/conf/php[PHP version]/php.ini - WAMP (Windows):
C:\wamp[64]\bin\php\php[PHP version]\php.ini
- XAMPP (Windows):
- Create a PHP Info File: If you're still unable to locate the php.ini file, you can create a PHP info file to reveal the location. Follow these steps:
- Create a new file named
info.phpin your public_html folder. - Add the following code to the file:
<?php phpinfo(); ?> - Save the file and access it in your browser by visiting
http://yourdomain.com/info.php. - Look for the “Loaded Configuration File” entry, which will display the php.ini file's location.
- Create a new file named
Remember to delete the info.php file once you've located the php.ini file, as it contains sensitive information about your server.
If you're still having trouble finding the php.ini file, consider contacting your hosting provider's support team for guidance.
Configuring the error reporting settings
Once you've accessed the php.ini file, you'll need to modify the following settings:
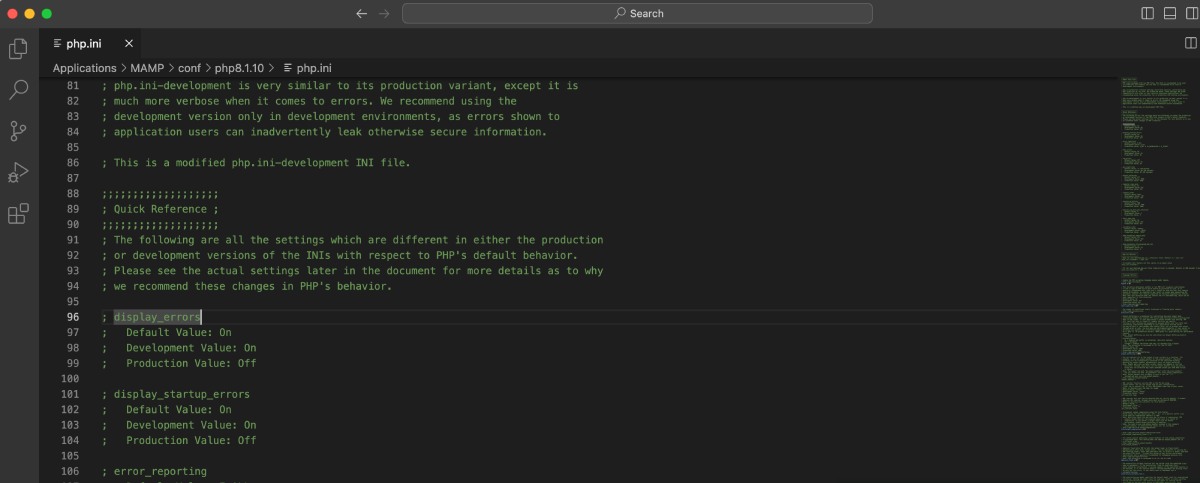
- display_errors: Set this to ‘Off' to prevent errors from being displayed on your website.
- log_errors: Set this to ‘On' to enable error logging.
- error_reporting: Configure the error reporting level (e.g., E_ALL for all errors).
- error_log: Specify the location and name of the error log file.
After making these changes, save the php.ini file and restart your web server for the changes to take effect.
How to Enable Error WordPress Logs
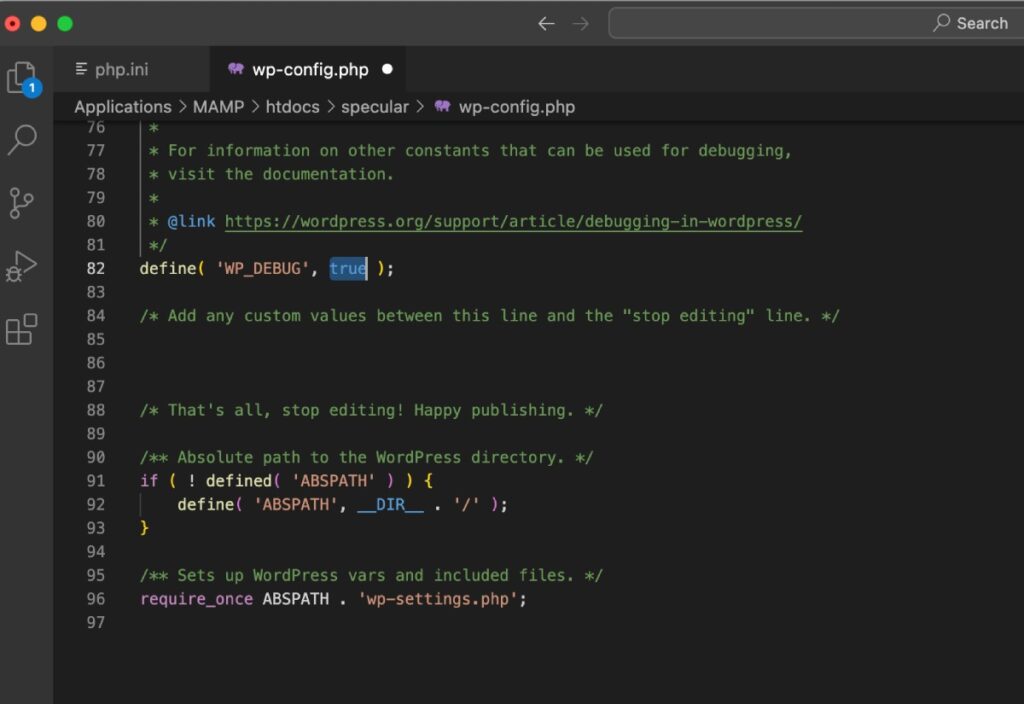
To enable WordPress debug logs, you'll need to modify the wp-config.php file, which is located in the root directory of your WordPress installation. Follow these steps:
Accessing the wp-config.php file
Locate the wp-config.php file and open it using a text editor. If you're unsure of its location, consult your hosting provider for assistance.
Adding or modifying the debug constants
Within the wp-config.php file, add or modify the following debug constants:
- WP_DEBUG: Set this to ‘true' to enable debugging mode.
- WP_DEBUG_LOG: Set this to ‘true' to save debug information to a log file.
- WP_DEBUG_DISPLAY: Set this to ‘false' to prevent debug messages from being displayed on your site.
- SCRIPT_DEBUG: Set this to ‘true' to force WordPress to use the development versions of core CSS and JavaScript files. This can help identify issues with minified or concatenated files.
After making the necessary changes, save the wp-config.php file and refresh your website to apply the new settings.
Check WordPress Error Logs
Now that you've enabled error logs, it's essential to know how to access and analyze them. This section will guide you through locating log files and understanding the log entries.
Locating the log files
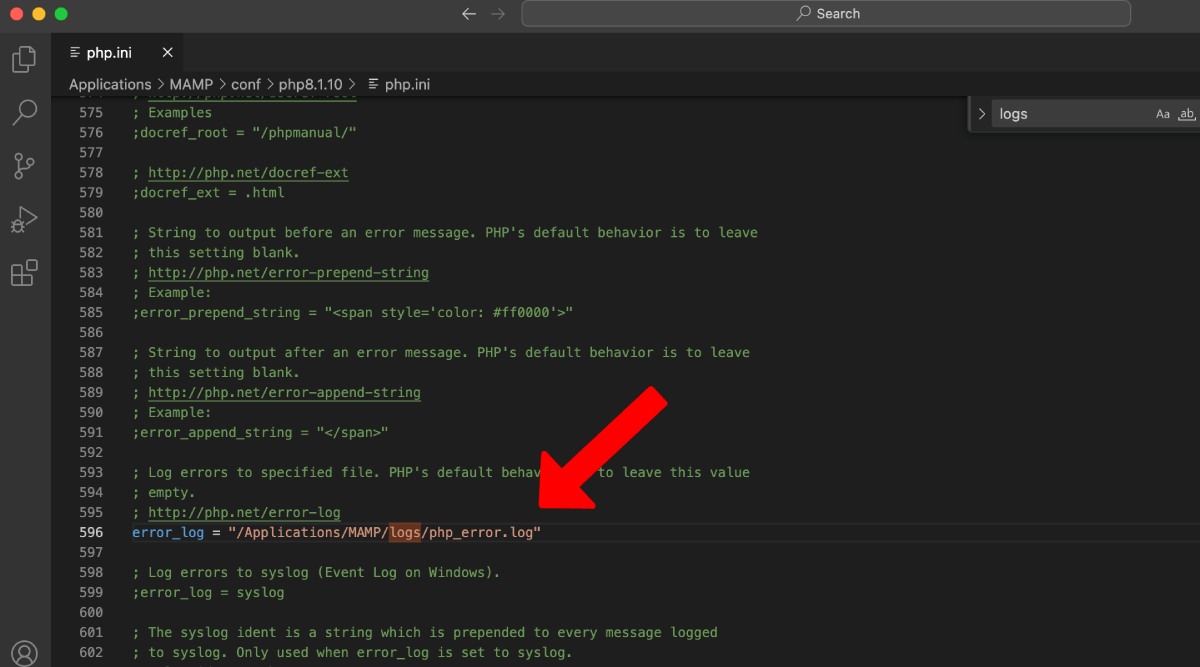
Both PHP error logs and WordPress debug logs are stored in separate files:
- PHP error log file location: As specified in your php.ini file.
- WordPress debug log file location: Usually stored in the /wp-content/ directory and named debug.log. If you've set a custom location in the wp-config.php file, refer to that path.
Reading and understanding the log entries
Open the log files using a text editor to view the entries. Error logs will contain information such as timestamps, error types, file paths, and error messages. By analyzing this information, you can identify the source of the issue and take appropriate action to resolve it.
Identifying and fixing common issues
Some common issues you might encounter in error logs include PHP syntax errors, deprecated functions, missing files, or incorrect file permissions. To fix these problems, you may need to update your themes or plugins, correct your custom code, or consult your hosting provider for assistance.
Error Log Best Practices
To make the most of your error logs, follow these best practices:
- Regular log monitoring and maintenance: Regularly review your log files to identify and address issues proactively.
- Restricting access to log files: Set appropriate file permissions to prevent unauthorized access to sensitive information.
- Managing log file sizes: Periodically archive or clear old log entries to keep log files manageable and improve performance.
- Disabling error logs in production environments: Consider disabling error logs on live sites to maintain optimal performance and user experience. Enable logs only when necessary for debugging purposes.
How to Fix WordPress Stuck in Maintenance Mode (SOLVED)
How to Accept Payments with WordPress – Ultimate Guide
How to Fix “Installation Failed: Could Not Create Directory” Error on WordPress (2023 Guide)
How to Fix WordPress Memory Exhausted Error?
Conclusion
Enabling error logs in WordPress is an essential step in maintaining a well-functioning website. By following the steps and best practices outlined in this guide, you can effectively monitor and resolve issues, improving your site's performance and user experience.
Remember to keep your error logs enabled and regularly monitored, ensuring that your website remains optimized and accessible for all visitors.
As one of the co-founders of Codeless, I bring to the table expertise in developing WordPress and web applications, as well as a track record of effectively managing hosting and servers. My passion for acquiring knowledge and my enthusiasm for constructing and testing novel technologies drive me to constantly innovate and improve.
Expertise:
Web Development,
Web Design,
Linux System Administration,
SEO
Experience:
15 years of experience in Web Development by developing and designing some of the most popular WordPress Themes like Specular, Tower, and Folie.
Education:
I have a degree in Engineering Physics and MSC in Material Science and Opto Electronics.




Comments