Most websites feature dozens or hundreds of images. Images are one of the core elements of the web and without them, your site may look dull. Learning how to reduce image file size will help you use as many images as you need without slowing your site down.
The solution is not to do away with photos in your portfolio or photography site, but to look for ways to reduce the size of your files. This process is called image “optimization,” and it can help you make your site more user-friendly and improve loading times.
In this article, we’ll show you why reducing image file size is essential for websites. Then, we’ll go over the various methods that you can use to reduce the MB size of a photo for a website and discuss their pros and cons. Let’s get to it!
Why It’s Important to Optimize Images for the Web
There’s a reason why you rarely see a website without images. Visuals help provide structure to your content and provide context for stories and articles. If you run an online store, high-quality photos help visitors see what your products look like.
Perhaps the only downside to using photos on a website is that they can inflate page sizes. If you go to a stock photo website and download a high-resolution image, it will probably weigh at least a couple of megabytes.
Now, imagine you have a page with dozens of photos, each weighing a few megabytes. That might be fine for users with access to high-speed internet and modern devices.
However, if your pages contain a lot of files, the majority of your visitors may not have a good user experience. Pages will take too long to load or they may be unresponsive.
“Optimizing images” is shorthand for reducing their MB size so they’re more manageable. Reducing an image’s file size involves compressing or lowering its resolution. If you do this for all images on any given page, it often results in significantly faster loading times.
Loading times are critical to the user experience. Statistics show that users leave a site if a page takes over two seconds to load. The higher the loading times, the more visitors you lose, and image optimization plays a massive role in those numbers.
How Image Compression Works
You’re probably familiar with the concept of file compression. The process involves taking a file and reducing its size without rendering it unusable or altering the integrity of its data.
Similarly, image compression involves reducing the file size of a photo or any other type of graphic while trying to maintain its quality.
There are two main types of image compression methods that you can use:
- Lossless: This type of compression aims to reduce image file size without affecting its quality.
- Lossy: This type of compression can result in much smaller file sizes, but it can also impact image quality in the process.
As a rule of thumb, lossless compression results in smaller file size savings. While most compression tools use a lossy approach, they attempt to minimize the loss of quality to provide you with better optimization.
The type of compression you use will depend on the methods you implement to reduce the MB size of your photos. In the next section, we’ll explore options that use both lossy and lossless compression.
5 Ways to Reduce the MB Size of a Photo for a Website
There are many ways to reduce image file size for a website. While there’s no single method that’s perfect for every case, some approaches are more efficient than others.
In this section, we’ll walk you through different ways to optimize an image, and discuss the pros and cons of each method.
1. Use Image Optimization Websites
There are a lot of websites that will automatically optimize photos for you. All you need to do is upload an image and wait for the site to work its magic. The process usually takes a few seconds.
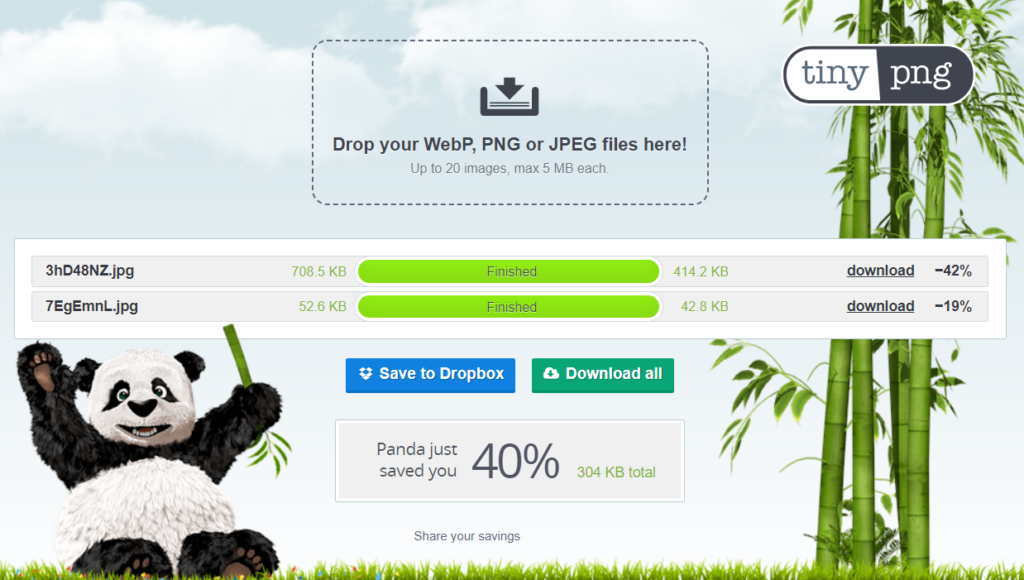
For example, TinyPNG enables you to upload PNG, JPEG, and WebP files under 5 MB. You can upload multiple images at once and the site will optimize them for you:
Keep in mind that different image optimization services will use different types of compression. TinyPNG, for example, uses lossy compression.
As we discussed earlier, lossy compression means there’s some level of degradation in image quality. However, with most services, the loss in quality won’t be noticeable to the naked eye.
The downside of using third-party image optimization websites is that a lot of them limit the number of images you can compress. Likewise, there might be limits to the MB size of the images you’re allowed to upload unless you pay for a premium account.
If you have to optimize hundreds of images and then upload them to your site manually, this approach is not the most efficient. However, if you don’t have access to automated image optimization tools (such as WordPress plugins), this is a good option.
2. Use Image Optimization Plugins
If you use WordPress, there are a lot of plugins that enable you to compress images right from the dashboard. These plugins can also optimize images that are already in your media library, automatically compress new images, and even resize them.
One example of such a plugin is Smush:

Once you activate Smush, the plugin will automatically optimize any images that you upload to WordPress. This applies to images that you upload directly to the media library and to files that you add to your site while using the Block Editor.
If you navigate to the Media Library tab, you’ll be able to see the MB savings for each image:
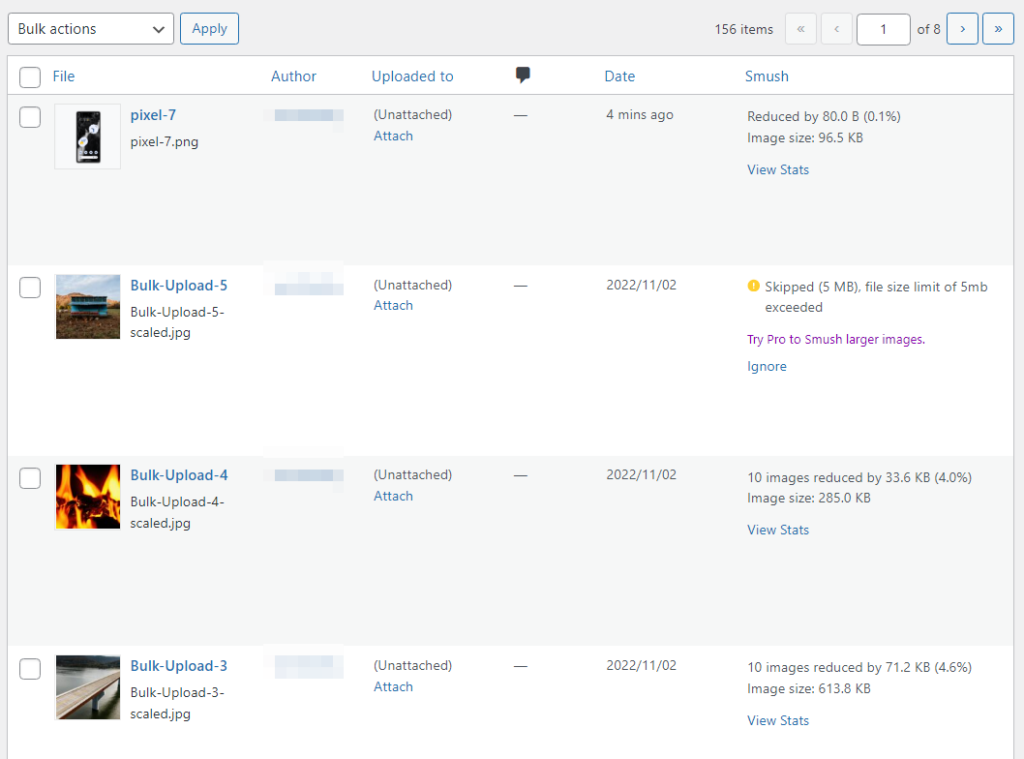
Most of these plugins aren’t completely free. Smush, for example, will enable you to optimize an unlimited number of images, but only if they weigh under 5 MB.
Most plugins will limit the number of images you can optimize per month unless you purchase a license. Some won’t compress photos automatically as you upload them, so you’ll have to do it manually.
If you use WordPress, there’s no reason not to use an image optimization plugin. It can help you fully automate the image optimization process. We recommend that you do a bit of research to find a tool that suits your needs.
3. Resize Image Files on Your Computer
If you take a look at a photo you’ve taken recently, you’ll notice that it comes in very high resolutions. This is because modern devices are built with high-resolution photography in mind.
That’s great if you enjoy taking pictures since you get more detail in your shots. However, those photos will likely have large file sizes.
A simple solution to this problem is to reduce those file sizes before you upload photos to the web. In most cases, this won’t result in a noticeable loss of detail, as the original photo resolutions are already too big to be appreciated on most devices.
Resizing images is a relatively simple process. You can use your favorite image editor to open a photo and look for a resizing option. For example, you can use the free image editing tool, Photopea, to resize an image by setting a specific resolution in pixels:
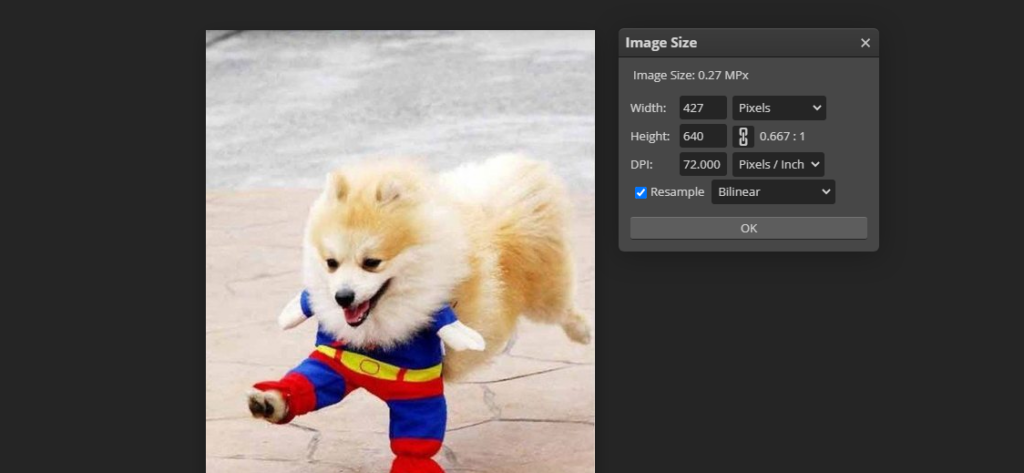
As a rule of thumb, most websites don’t need images with a width of over 1,000-2,000 pixels. You can resize photos on a case-by-case basis, as long as you pay particular attention to the quality.
If you use WordPress, some image optimization plugins can help you automatically resize images when you upload them. Some examples of plugins that can do this include Smush, Resize Image After Upload, and Imagify.
4. Use WebP Images
Some of the most popular image formats on the web include JPEG, PNG, and GIFs. A lot of websites use PNGs and JPEGs interchangeably because there’s little difference in terms of file size savings between these formats. Moreover, these formats are supported by all modern browsers.
WebP is a relatively new image format developed by Google. In terms of file size, lossless WebP files are, on average, 26 percent lighter than their PNG counterparts. Meanwhile, using lossy WebP images translates to file size reductions of 25-34 percent when compared to PNGs.
Most modern browsers already support WebP, including Chrome, Safari, Firefox, Edge, and Opera. This means the majority of your site visitors shouldn’t experience any issues if you decide to switch to WebP for your website’s primary image format.
If you’re a WordPress user, you should know that the Content Management System (CMS) supports WebP out of the box. Moreover, there’s a plan in the works to implement WebP as the default image format for WordPress in future versions.
You can easily convert images to WebP format using plugins such as Imagify. This tool will automatically convert PNG and JPEG images to WebP and serve the new image format to browsers that support the file type.
5. Remove EXIF Metadata from Images
EXIF metadata refers to information such as the date when an image was created, what device was used, its author, and more. This information can be critical for some websites, but in most cases, it doesn’t impact the user experience in any way.
Removing that data from images can reduce their file size. If you’re a Windows user, right-click on a file, go to Properties, and select the Details tab.
Inside, you’ll find an option that reads Remove Properties and Personal Information:
It’s important to note that removing image metadata may not have a significant impact on file size. That’s because we’re talking about small amounts of information. However, this optimization method can be helpful if you want to protect your privacy since EXIF data can contain some personal information.
Conclusion
Reducing the MB size of photos on your website is one of the most impactful optimizations you can make. The less that images weigh, the less it will take for them to load. If you optimize every image on your website, you should see drastic improvements in loading times across the board.
There are several ways to reduce image file size, whether you’re using WordPress or not.
Here are the methods you can use:
- Use image optimization websites, like TinyPNG.
- Use image optimization plugins, like Smush.
- Resize image files on your computer.
- Use WebP images.
- Remove EXIF metadata from images.
Do you have any questions about how to reduce the MB size of a photo for a website? Let us know in the comments section below!
Sophia Lee is a staff writer at WordCandy.co. In her free time, she loves reading science fiction novels and playing board games with her friends.




Comments