I will describe some of the main Wordfence Options that will help you to make your WordPress Website more secure. If you're going to read this article on Wordfence, then you've decided to protect your site by yourself.
This article and the continuation of the Guide to WordPress security.
If you haven't read it yet then do it now. It will be essential to understand how much we are about to explain.
The free plugin we have chosen as a security solution “DIY” is Wordfence, used by 2 million WordPress users.
Wordfence has many options and offers both the firewall, installed internally to your site, which scan tools to detect malware, Trojans, backdoor and other known vulnerabilities. Install the plugin as you usually do and access the dashboard.
Dashboard
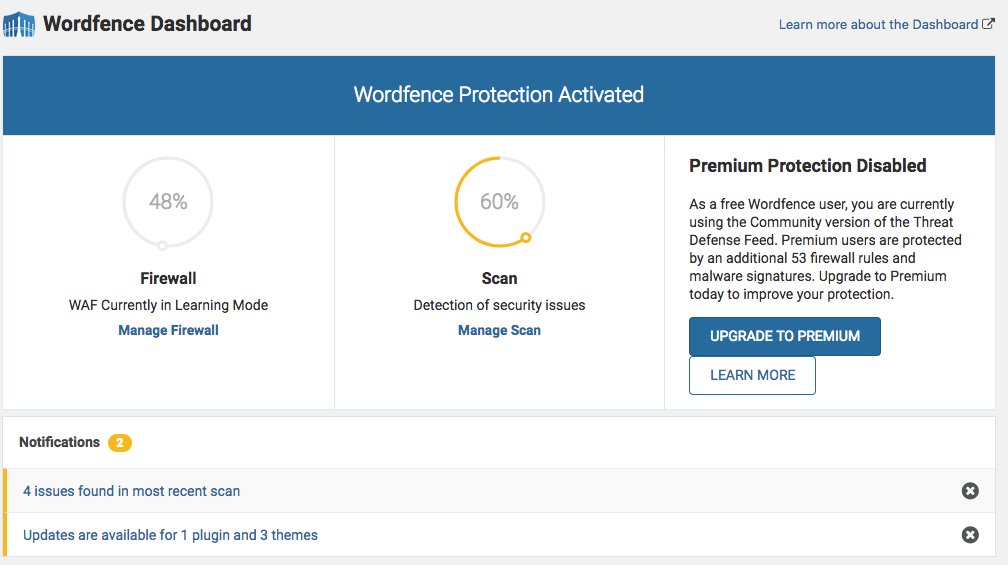
Like any dashboard that respects, on this page we find the summary of the different activities that the plugin carries out. We have the list and the status of all active services and those that would be active only for a fee.In Threat Defense Feed You find the number of types of attack from which the plugin defends itself. The first and the number for all users, the second for the paid service.
There are then several statistical data, such as the number of attacks blocked for our site and a report for all the global attacks defended by WordFence.Interesting to understand also the nations in which the attacks occur, for our site and for the whole world. We can see the number of blocked IPs and a log of login attempts.
Wordfence Options
First, go to the Wordfence Options panel to set settings.
On this page, we can enable or disable many of the features of the plugin. We have the Enable Live Traffic View function. Wordfence In fact allows you to see live all the traffic that comes on your site.
As a basic feature and a features that weights performance, leave it disabled. If you have the need to use it you can activate it anyway later.Important to check that you have active Enable automatic scheduled scans. This will scan the virus in automatic mode.
If you also want Wordfence to install updates automatically, check the option “Update Wordfence automatically…”. Otherwise remember that, if there is a plugin to be updated with constancy, and just the one related to security, then always check that there are no pending updates.
Now enter the email where you want the alerts to the item where to email alerts. Under the heading How does Wordfence get IPs, select the second option (use “PHP built-in…”), which should fit in most cases, otherwise, if there are any problems or alerts, go back to the first choice “Let Wordfence use the most…”.As you can see the Wordfence options are divided into different sections. Get down to those inherent in the alerts.
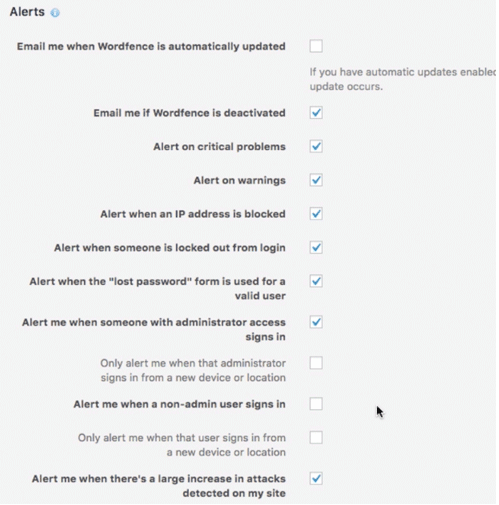
Read these entries and enable or disable those for which you want to receive a notification. Be careful not to enable everything, because options like Alert me when a non-admin user signs in will send you an email every time a user of your site is logged in.
Go down in the Wordfence options section called Scan to Include.
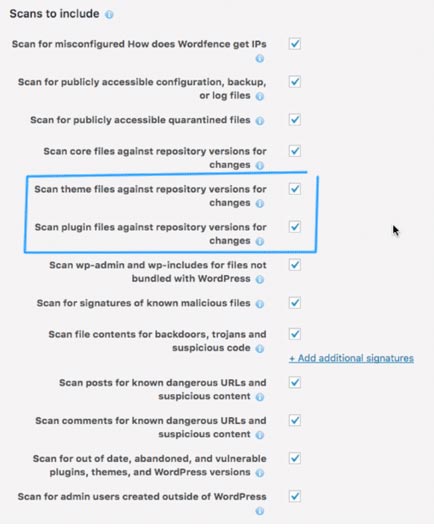
Enable Scan theme files and scan plugin files against repository versions for changes. In this way, the plugin will check that the files of your themes and of your plugins are the same as those found in the repository of WordPress.Since, editing the core files of WordPress, plugins and themes, is not a recommended practice, the files should always match those of the WordPress server.
Logically this option does not work with plugins and themes bought or not present in the official repository. Use low resource scanning and a setting to consider if your server is not very powerful. Enabling, the scan will be prolonged over time, fatigue less the machine on which your site is located.
The other options leave them like this. If you are interested in some of them you can always press the “I” icon to get more information about that specific function.
Scan
Proceed to scan to check for malware, other vulnerabilities, modified core files, or other.
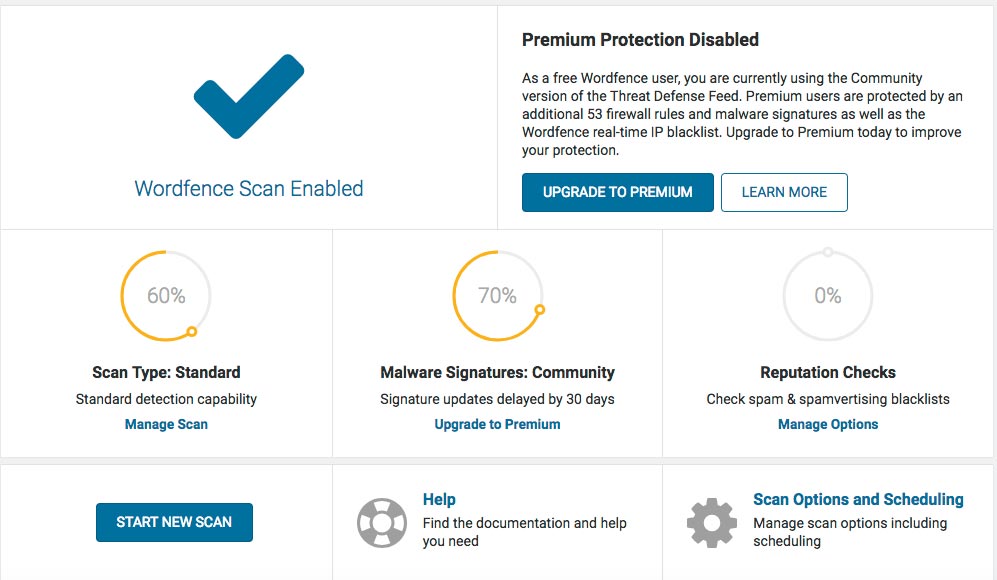
Press the Start button to Wordfence Scan to start. The time required by the procedure depends on the size of your site. Once finished you will be shown the results. If the plugin finds something wrong, then you will also be notified of the recommended actions to perform.
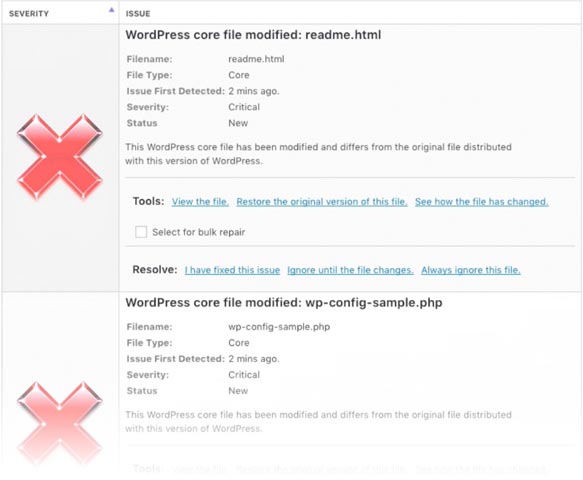
Always in Scan, you will find the tab scheduling at the top.For the free version the scan takes place every 24 hours, while if you want to manage the scheduling manually, you have to switch to the fee. In the Wordfence Options tab you'll find the settings we've seen before in the Options menu item.
Firewall
Wordfence proposes the work of the firewall in two different modes. In the basic set, the firewall works at the plugin level. This means that when a page is requested, the firewall is loaded with the other plugins.
The second method is extended protection. In this case, the firewall comes into action before the core of WordPress, themes and plugins are uploaded. As you can imagine the latter is the safer method because it intervenes before any other element.
To enable this setting, press Optimize the Wordfence Firewall.
In the following screenshot you can see that, automatically, Wordfence retrieves information about the server on which you installed the site. Press Continue.
Wordfence Detect Server
To be able to get the firewall into action before anything else, it is necessary to allow Wordfence to change the. htaccess file of your WordPress installation. In fact, in this file are recorded settings that act directly on the server.
To avoid problems download a backup copy by pressing download htaccess.

In case you have problems with what you need to do and connect via FTP, delete the file. htaccess present in the root of your site, upload the file you just downloaded and rename it on the server exactly .htaccess, with the point at the beginning and without the. txt Eventually.
Ok, now you can press the Continue button.
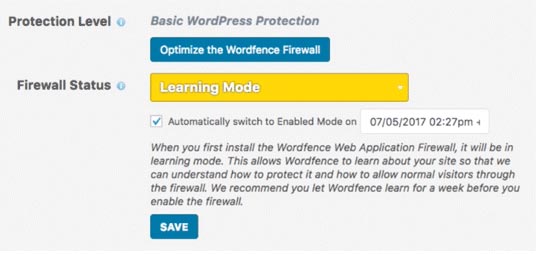
As you see, currently the Firewall and in Learning Mode.
Wordfence, instead of making you set all the various settings, use the Learning Mode for a week, collect data you use in your site and try to understand how to set yourself to the best.
Passed this week will automatically change its status to Enable and Protecting.
The settings in brute Force Protection and Rate limiting leave them as default.
Live Traffic
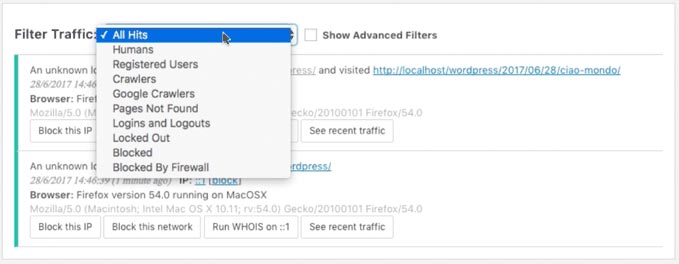
As anticipated Wordfence, in the Live traffic section, allows you to see all the traffic passing through your pages.If you are interested in analyzing a certain type of traffic, you can use the filter by selecting one of the options: Human traffic, registered users, crawlers etc… and you can block the visitor's IP.
Blocking and Tools
All IPs blocked and their management can be found in the blocking section. In Tools the only part that interests us and that of diagnostics, where we find a whole series of useful information in case of malfunctions.
If you want to know in detail each type of setting, Wordfence makes available a complete documentation.
Other manual operations
For Wordfence and everything, we still give the latest directions to give you a further crackdown on your WordPress installation.
Disable the WordPress Editor
To disable the editor you have to insert in the file WP-CONFIG. php This code:
Define (' DISALLOW_FILE_EDIT ', true);
In this way you will no longer be able to edit from Appearance > Editor core files, those of themes and plugins.
Disable direct execution of PHP scripts
To avoid direct execution of PHP files in some directories you have to, using a Test editor, create a new file and paste this code:
<Files * .php>
deny from all
</ Files>
Save the file as .htaccess and upload it via FTP in the folder you want to block the scripts, as for example in the folder WP-content/uploads.
I recommend: creating this file with a text editor like Atom or Sublime text, and keep in mind that files with the dot at the beginning are not visible from your operating system, because they are hidden files. Instead, they are visible from your FTP editor and client, like Filezilla, that you use to upload it to the server.
Avoid showing directory contents (directory listing)
Having an online service that shows the contents of directories is not good. If after checking for different folders see the list of your files, images and folders, then you have to download the. htaccess file located in the root of your site and add the following line:
Options-Indexes
Disable XML-RPC
The XML-RPC protocol is used by WordPress to perform procedures remotely. Since version 3.4 has been activated by default but and a factor that could cause brute Force attacks.
This protocol does not need to be active if:
- Don't post to your site through Windows Live Writer.
- Don't use the WordPress mobile App.
- Do not use any kind of service to remotely connect with your site.
In this case, we always meet the file. htaccess, the one in the root of the site, where we have to enter
order deny, allow

deny from all

allow from xxx.xxx.xxx.xxx

</ Files>
Where the line allows from inserting it if we want to enable only a certain IP (to replace the various xxx).
Ludjon, who co-founded Codeless, possesses a deep passion for technology and the web. With over a decade of experience in constructing websites and developing widely-used WordPress themes, Ludjon has established himself as an accomplished expert in the field.






Comments
Great article, thank you. I just started to use Wordfence so your article has been a great help.