The Domain Name System – DNS – is used to find the IP address of a domain name. With millions of websites on the Internet, the DNS makes browsing possible. When browsing, sometimes the DNS cannot find the IP address, and that’s when you get the Err_Name_Not_Resolved error.

This article extensively covers the “err_name_not_resolved” error, specifically on how to resolve it. But first, we explain what the error is and some of the causes.
Read More: How to Fix ‘ERR_CACHE_MISS’ Error (Solved)
What is Err_Name_Not_Resolved?
There are many sites on the web, and what distinguishes one from another is a unique domain name. Through a domain name, you are able to access the particular website you want to visit. Facebook.com is an example of a domain name, through which you can access the website and log in to your account.
You also need an internet browser like Chrome to access the websites. You type the domain name of the website on the browser’s address bar. The domain name represents the site’s numerical IP address.
The DNS handles the automatic translation of the domain name to the IP address. This translation is what is known as domain name resolution. When the domain name cannot be resolved, you get the err_name_not resolved error message. This error prevents you from accessing the website.
The error message simply says that your browser could not find or locate the IP address that matches the domain name you entered, making it impossible to access the website. The IP address is needed to establish a connection with the web server.
Other variants of this error include:
- The webpage is not available
- The site cannot be reached
- Net:: err_name_not resolved
- Unable to reach the site
- Failed to load resource net:: err_name_not resolved
- Could not find the IP address of the server
Before looking at the solutions for the error, let’s find out what causes the error message.
What Causes Err_Name_Not_Resolved?
You will get the err_name_not_resolved message every time the domain name resolution fails. One of the reasons for the failure is obsolete cached data.
Other causes include:
- Incorrect browser configuration
- Connection problems
- DNSSEC application
- Problems with configuration of the host files
- DNS is temporarily unavailable
- Incorrectly configured internet settings
- Malware and faulty security software
The error is not exclusive to the Chrome browser, you can experience it in other browsers too. Other browsers will display the different variants of the error message listed above. In addition, the error can be experienced on desktop PC as well as on mobile devices like Android devices.
Through the solutions below, you’ll also get to know more causes of the error message. We start with the simplest solutions and finish with the more complex or technical solutions.
How to Fix Err_Name_Not_Resolved
Check the Address

The error has everything to do with the domain name and DNS. Therefore, the first thing to check is whether you’ve entered the correct domain name. Ensure the correct spelling of the domain name without any typos. You can also try adding or removing the “www” subdomain.
Modern browsers like Chrome have a tendency to auto-completing the address when you start typing it. This is one of the reasons why you may end up with the wrong address.
Check the Connection
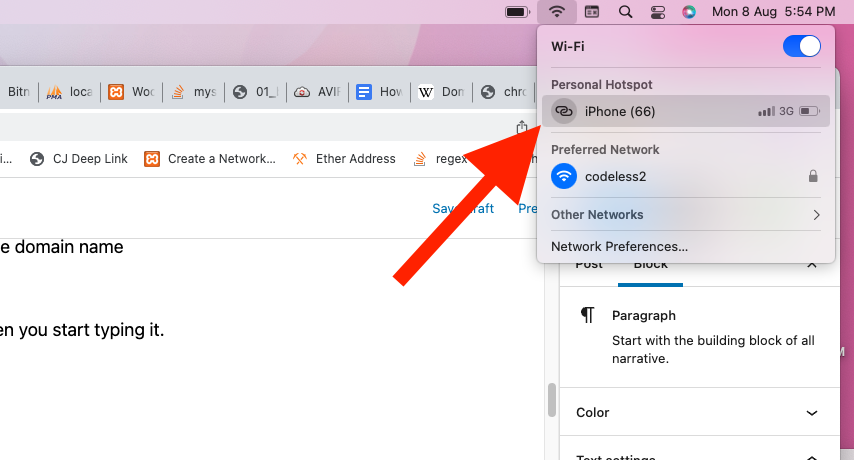
The next solution is to check your connection. Try to connect to a different website first to see if you’ll experience the same error message. If there is still an error, change your connection. For example, you can use your phone data instead of Wi-fi or cable internet.
More troubleshooting options include trying to access the website from a different device connected to the same network. If you still encounter the error, restart your router.
Although the internet connection may seem fine, there are possibilities of some issues that may cause the error. Restarting the network connection can resolve the issue if the problem emanates from the network. A simple restart involves disconnecting the router from the power connection for around 30 seconds. Reconnect the router to the power supply and try to access the website again.
Clear Cache and Cookies
The error you’re experiencing might be caused by problems with cookies or cache data. Although cached data makes it possible for web pages that you’ve previously visited to load faster, it can also cause errors. Clearing your browsing data will resolve the issue in these cases.
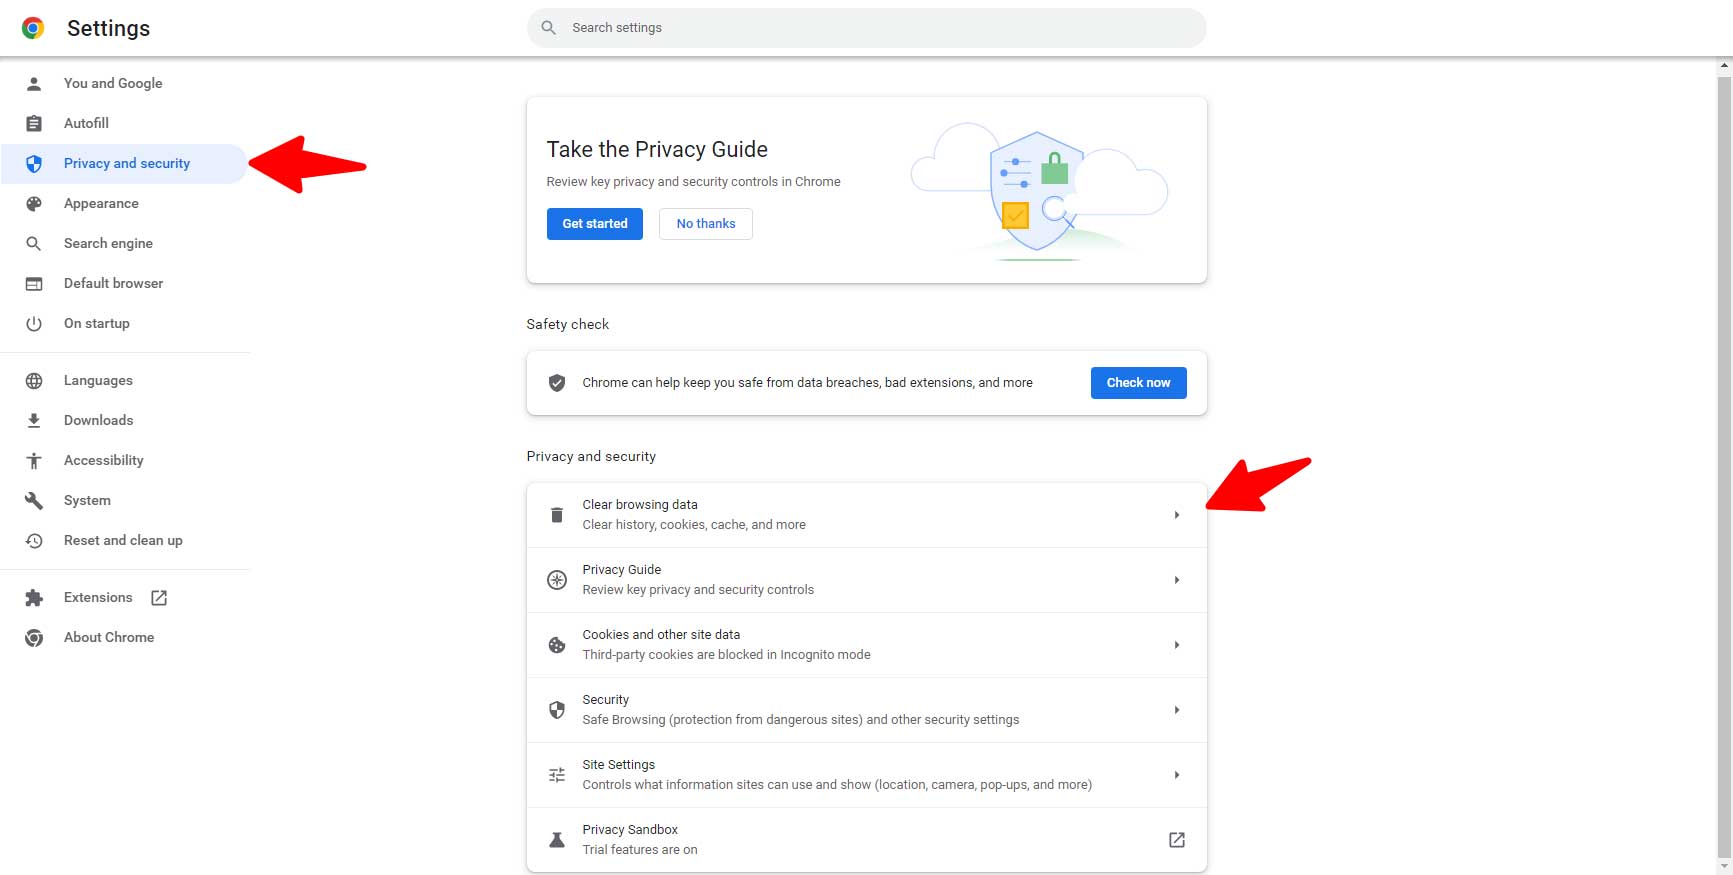
On your Google Chrome browser, click on the three dots on the top right corner. Click on More tools then select ‘Clearing browsing data’. In the new window that pops up, select all the data that you want deleted. You can also choose your preferred time range. Because you want to clear cookies and cache, make sure they are among the items you select from the list – cached images and files, cookies and other site data.
Clearing your cache will also resolve other errors in the process, such as the dns_probe_finished_bad_config error. After clearing your cache and cookies, try to visit the website again. If the problem persists, it’s time to dive into more technical solutions.
Disable the Browser Preload Feature
Google Chrome has a preload feature that helps in preloading links that are not yet open. These are links on the page that you have visited. The feature makes the links load faster when you click on them. However, this preload feature may also be the reason why you encounter the err_name_not resolved error. Turning off the feature may resolve the issue.
You should first confirm if the feature is active before turning it off.
- Go to chrome settings through the three vertical dots on the top right corner of your browser.
- Click on the Security and Privacy option.
- Now click on ‘Cookies and other site data'.
Scroll down to the ‘Preload pages for faster browsing and search’ option, like the one shown in the figure below:

The figure above indicates that the preload feature is on. Click on the blue-highlighted button to turn the feature off.
You can now try to refresh the webpage and see if you still encounter the error message again.
Clear the DNS Cache
Stale data stored in the DNS cache may also cause the DNS resolving error. In addition to your web browser’s cache, your operating system also has web address books. These web address books automatically cache DNS entries for all sites you have accessed previously. When the stored data for an address is outdated or incorrect is one of the reasons for the error. The solution is to clear the DNS cache.
Clear DNS Cache on Windows
This process of clearing DNS cache is applicable to most versions of Windows. You can use it on WIndows 10, 8.1, 8, Vista, 7, or XP. You will need to use the Run as Administrator option to execute commands.
You can use the Windows + R shortcut to quickly open the Run window. Type cmd to open Windows command prompt. Type the command below and press the enter button on your keyboard:

Once you complete the steps above, Windows will clear your DNS cache files. It will also reset the DNS resolver cache.
Like many command operations, you will see a confirmation message in the command prompt, which looks like the figure below:

Clear the DNS Cache on Google Chrome
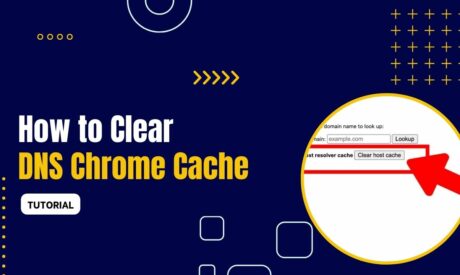
To clear DNS cache on Google chrome, type chrome://net-internals/# in the address bar. This will give you access to the DNS cache settings. Click on ‘Clear host cache’ to clear the browser’s DNS cache.
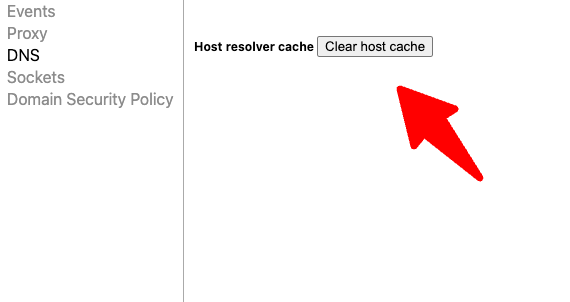
Try to visit the website again to see if the issue has been resolved. If it has not been fixed, check more solutions below.
Reset the Winsock Catalog
This is a solution applicable only to Windows users. You should check the interface and system application Winsock – also known as Windows Sockets or Winsock.
Winsock helps computer programs to communicate using TCP/IP. In order to facilitate this communication, Winsock creates entries for every connection established. However, this data can also prevent access to websites.
Resetting the Winsock catalog should resolve the issue if the problem is due to the data. You can do the reset from the Windows command prompt. You will be required to run the command as an Administrator.
- Type cmd in your search box and select ‘Run as Administrator'.
- After opening the command prompt window, enter the command: netsh winsock reset.
- Press the enter key on your keyboard to run the command. Restart your machine to finish the reset.
Change the DNS Servers
The solutions are now getting more technical. These solutions will require you to change the DNS servers, and there are different approaches depending on the operating system you’re using. After changing the DNS servers, you can use Cloudflare or Google's public DNS.

Change DNS Servers on Windows 10
Open your computer’s control panel and select ‘Network and Sharing Center’. Click on the ‘Change adapter settings option. Access properties by right-clicking on the network you’re using and clicking on the Properties option. Locate ‘Protocol Version 4 (TCP/IPv4) in the list, select it, and then click on properties.
You will now be presented with options, one of them being ‘Use the following DNS server addresses’. Fill in the fields with the public addresses – like Google’s public DNS shown on the figure above.
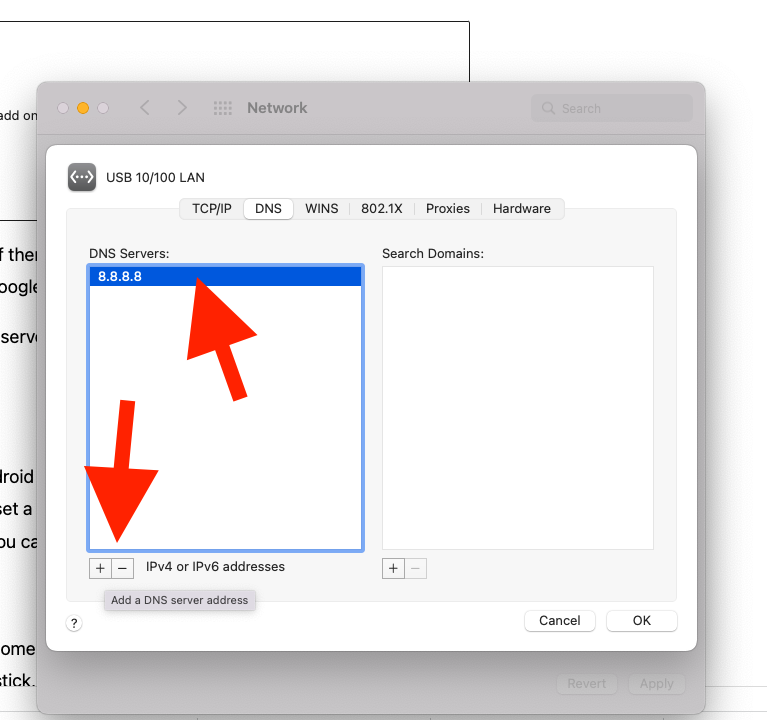
Users of Mac and Linux can also change DNS servers by following specific steps which are different from those applied on Windows.
Change DNS Servers on Android
You can also change DNS servers on your Android device. The first step is to gain access to the settings of the network you’re using. You should then set a static IP and then change the DNS. The new DNS entries include primary and secondary servers, and you can use Google’s public DNS to fill the fields.
Change the DNS Servers on the Router
It is possible to manually set DNS servers on some routers. Through the manual process, it is possible to solve the err_name_not resolved error on firestick, smart TV, as well as other devices connected to the network.
Type 192.168.1.1 or 192.168.0.1 in your browser’s address bar to access the router. Look for the DNS settings and proceed to enter your preferred primary and secondary servers.
The process of getting to the router’s DNS setting could be different depending on the type of router you’re using. As an example, we will use the GL-MT300N-V2 router. Once you get access after entering the router address on your browser, select More Settings, then Custom DNS Server, and finally Manual DNS Server Settings.
Check the Host File
You may not be aware that your computer has a ‘hosts’ file that keeps domain names and their IP addresses. When you try to visit a website, the computer first looks at the hosts file to see if there is a matching domain name and IP address. A DNS request will only be sent if the file does not find any matches.
Browsing problems caused by the DNS can be fixed by adding the website’s IP address to the hosts file. This process also helps identify the error source. For example, if you can successfully access the website after adding the domain name and its IP address to the hosts file, then the problem emanated from your computer.
You need to first obtain the IP address of the domain name you want to use. You can find it through your domain name host’s hPanel. you can then add it to your Windows machine either manually or by using the Hosts File editor.
Changing the File Manually
To change the file manually,
- Find Notepad on your computer, right-click on it and select the Run as Administrator option.
- On your Notepad, go to file, then choose the ‘open’ option.
- Go to C:\Windows\System32\Drivers\etc.
- Make sure you select all files to find the hosts file.
You can proceed to edit the hosts file. Remember the IP address you picked earlier from your domain name host? Add it in the file, followed by a space, then enter the domain name. See the figure below for an example:

Save your changes when you’re done adding the IP address and domain name.
Using the Hosts File Editor
The alternative is to use the Hostsfileeditor tool which is an easier and less technical approach.
On your Windows 10 machine, locate the hosts file editor. The editor has columns for the domain name and IP address. Enter the domain name and IP address in their respective columns. Save your changes.

Check Your Firewall and Antivirus Settings
The next step to take if all the above actions have not resolved the err_name_not resolved error is to check your firewall and antivirus settings.
Malware and computer viruses can change DNS settings, resulting in the error you experience. Use antivirus software to scan your computer for any viruses.
Despite their usefulness, the same antivirus software might block access to some websites. The same applies to firewalls, which can also block access to websites. You should temporarily disable your firewall and antivirus to see if the actions resolve the error. If you’ve recently changed the settings, try resetting to default settings.
Disabling DNSSEC for Your Domain
This solution only applies if you own the domain that you’re trying to access. Otherwise, you can skip this step and contact the website owner if all the solutions above have not worked.
Check the domain on WHOIS to see if DNSSEC is enabled. DNSSEC uses cryptographic signatures to protect DNS records from unauthorized access. However, DNSSEC can also prevent the domain from propagating properly and causing the err_name_not_resolved error. (In this case, I have used: Domain Tools)
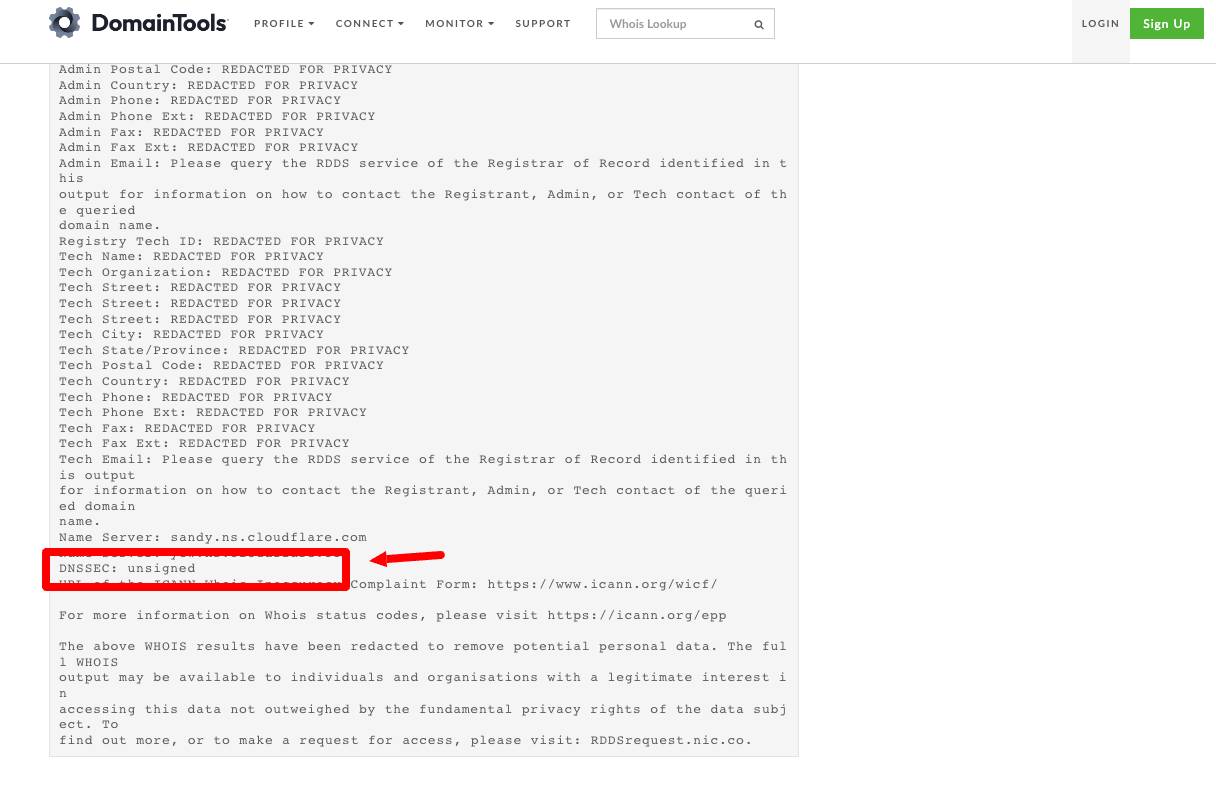
Disabling DNSSEC from your domain account should fix the problem if it caused the error. Otherwise, there is nothing you can do about it if you do not own the website or domain name. You should inform the website owner about the issue.
You can also read about: How to fix Err_Unknown_Url_Scheme (SOLVED)
Conclusion
Resolving the err_name_not_resolved error involves both simple and technical solutions, depending on the exact cause of the problem. You should start with the simplest solutions before trying the more complex approaches.
Not all errors are caused by faults from the client side. If you have tried all the above solutions and they do not work, the problem might not be on your side. Try contacting the website owner or developer for a solution.
As one of the co-founders of Codeless, I bring to the table expertise in developing WordPress and web applications, as well as a track record of effectively managing hosting and servers. My passion for acquiring knowledge and my enthusiasm for constructing and testing novel technologies drive me to constantly innovate and improve.
Expertise:
Web Development,
Web Design,
Linux System Administration,
SEO
Experience:
15 years of experience in Web Development by developing and designing some of the most popular WordPress Themes like Specular, Tower, and Folie.
Education:
I have a degree in Engineering Physics and MSC in Material Science and Opto Electronics.




Comments
I keep having issues with my browsers
In that case, you have to check the website you are trying to access.