Hosting your WordPress website on DigitalOcean can be an excellent choice due to its affordable pricing, reliable infrastructure, and easy-to-use interface.
In this article, we will discuss why you should consider DigitalOcean for your WordPress installation, as well as provide you with some insightful information on how to set up your website on this platform.
DigitalOcean is well-known for its simplicity and ease of use, making it an ideal option for both beginners and experienced users.
It offers an extensive range of cloud products tailored to the needs of WordPress users, including virtual machines, storage, managed databases, and managed Kubernetes.
With its transparent pricing model and industry-leading price-to-performance ratio, DigitalOcean enables businesses to scale without worrying about unexpected costs.
Read More: How to Get DigitalOcean Free Credit ($200 Totally Free)
Let's start!
Creating a DigitalOcean Account
Setting up your DigitalOcean account is a straightforward process that involves a few simple steps.
Here's a step-by-step guide to help you create your account:
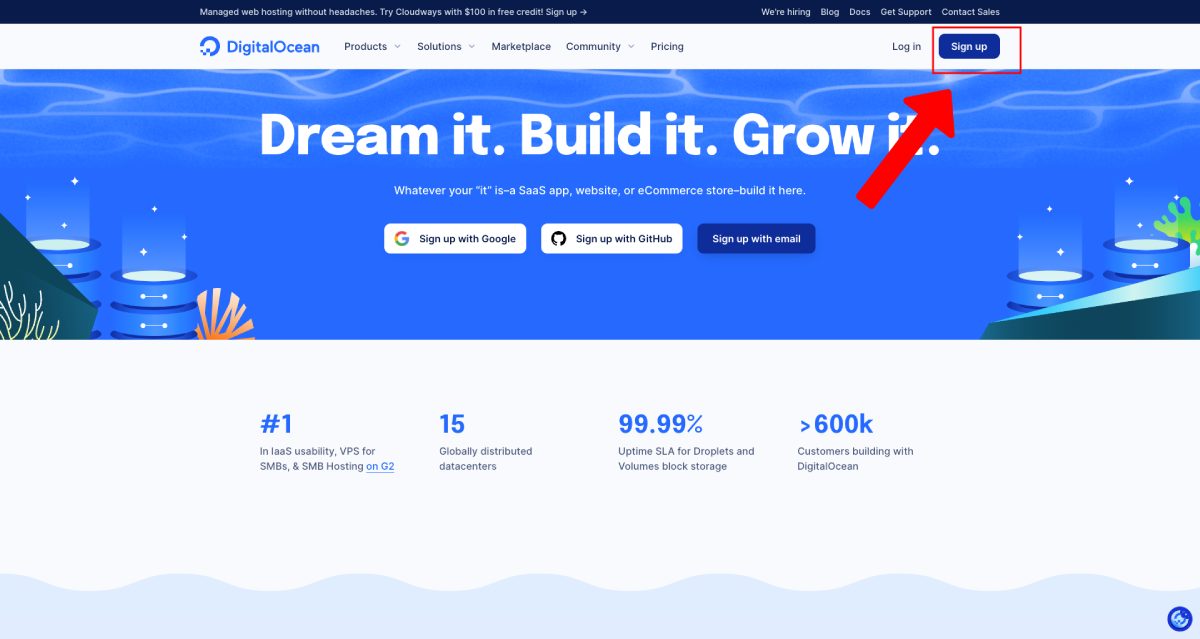
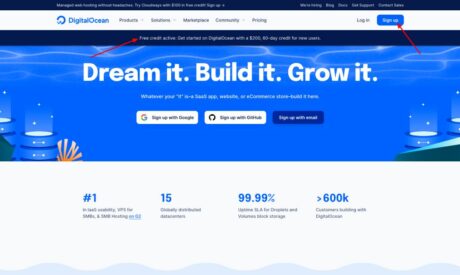
- Visit the DigitalOcean website at digitalocean.com.
- Click on the “Get Started for Free” button on the homepage.
- Enter your email address and create a strong password, then click “Sign Up.”
- Check your email inbox for a verification email from DigitalOcean and click on the confirmation link.
- Once your email is verified, you'll be asked to provide your billing information and choose a payment method (credit card or PayPal).
- After entering your billing information, you'll be all set to start using DigitalOcean's services.
Creating a DigitalOcean account is quick and hassle-free, allowing you to get started with their services in no time. With your account set up, you can now explore the various hosting options and features available for your WordPress website.
Deploying WordPress on DigitalOcean
Now that you have your DigitalOcean account up and running, it's time to deploy WordPress on the platform.
DigitalOcean offers two excellent options for hosting your WordPress website:
- DigitalOcean 1-Click WordPress Installation.
- LEMP Configuration
On the other hand, DigitalOcean 1-Click WordPress Installation enables users to configure a WordPress Droplet
Also, that includes an Ubuntu 20.04 Droplet plus the LEMP stack (Linux operating system, Nginx web server, MySQL database, PHP processes).
This option is best suited for businesses looking for more customization, as DigitalOcean Droplets come in a range of sizes and capabilities to perform at every level of demand. This installation includes two free firewall support programs (UFW and fail2ban) and is compatible with free SSL certificate programs.
Create DigitalOcean WordPress Droplet
To set up a WordPress site on DigitalOcean, the first step is to create a WordPress Droplet from the 1-Click App Marketplace.
Here's how to proceed:
1. Go to DigitalOcean Dashboard > Create > Droplets
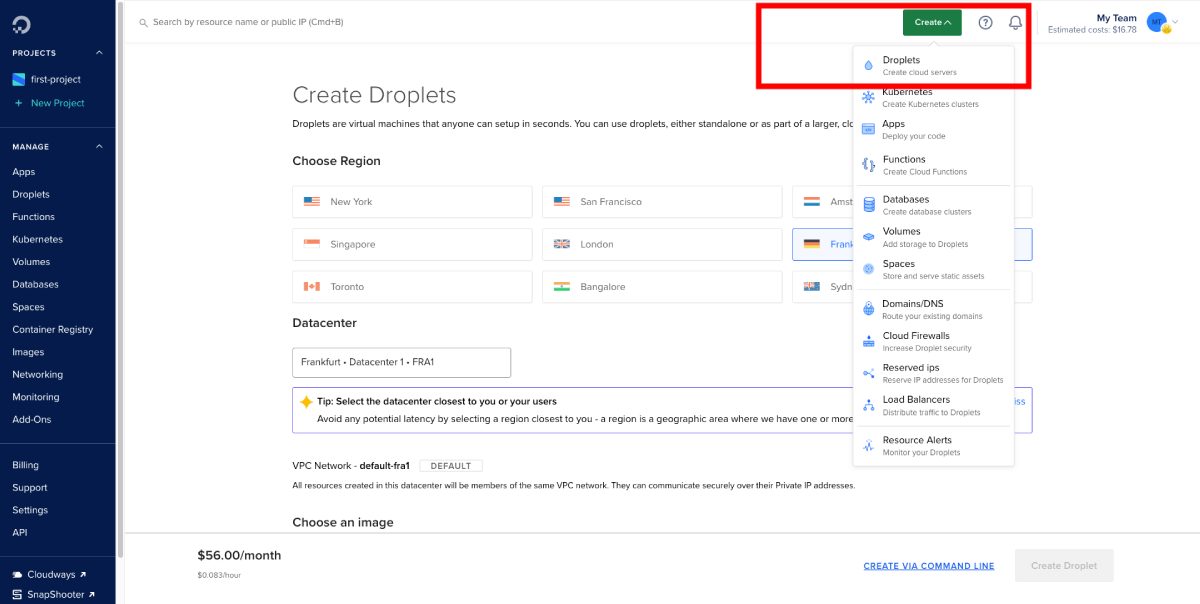
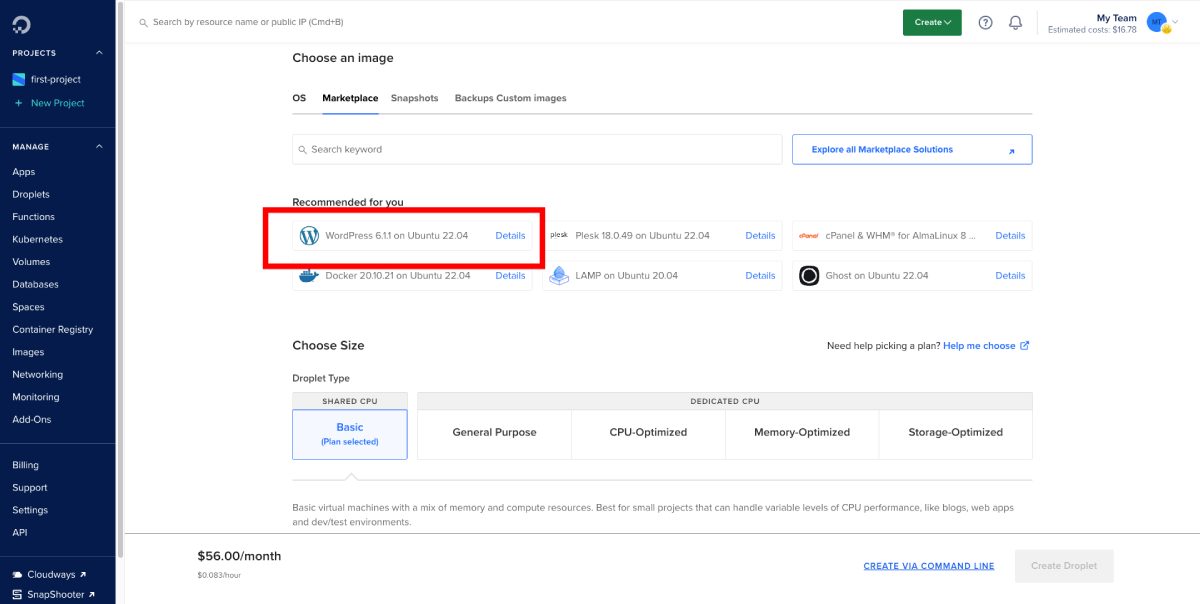
2. Install simply by clicking on the Marketplace tab and searching “WordPress on Ubuntu.” When choosing an image, opt for the WordPress on Ubuntu option, as it comes pre-configured with the necessary components for running a WordPress site.
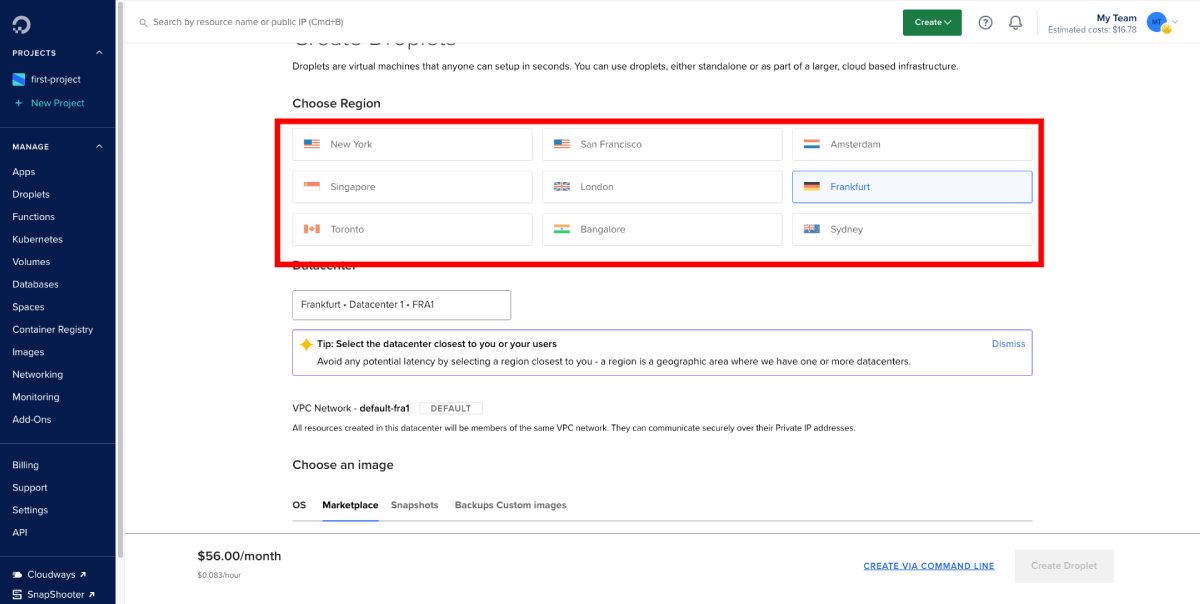
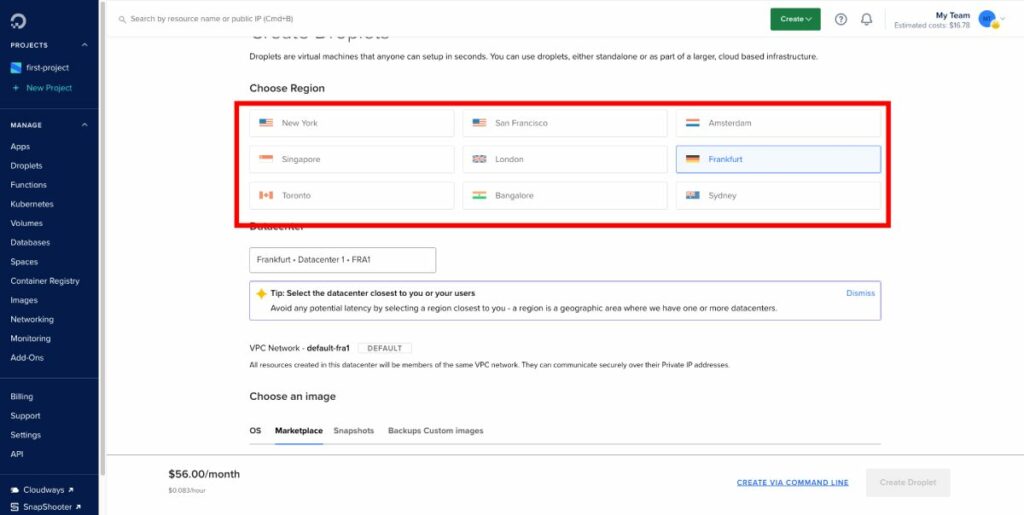
3. Choosing a region: Select a region that is geographically closest to your target audience, as this will result in faster load times for your visitors.
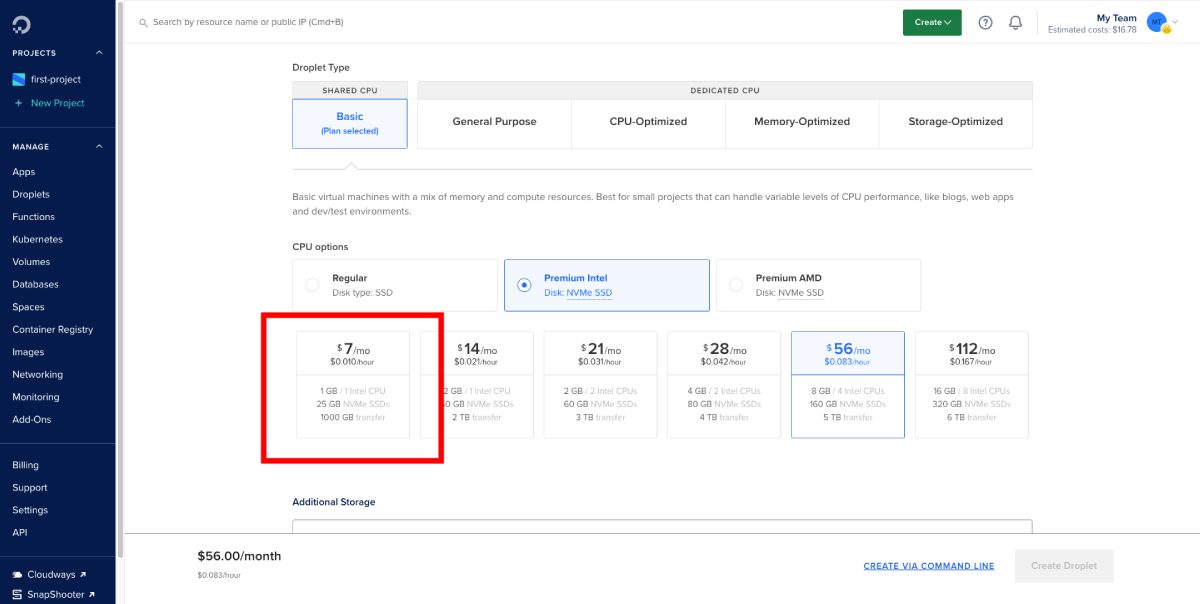
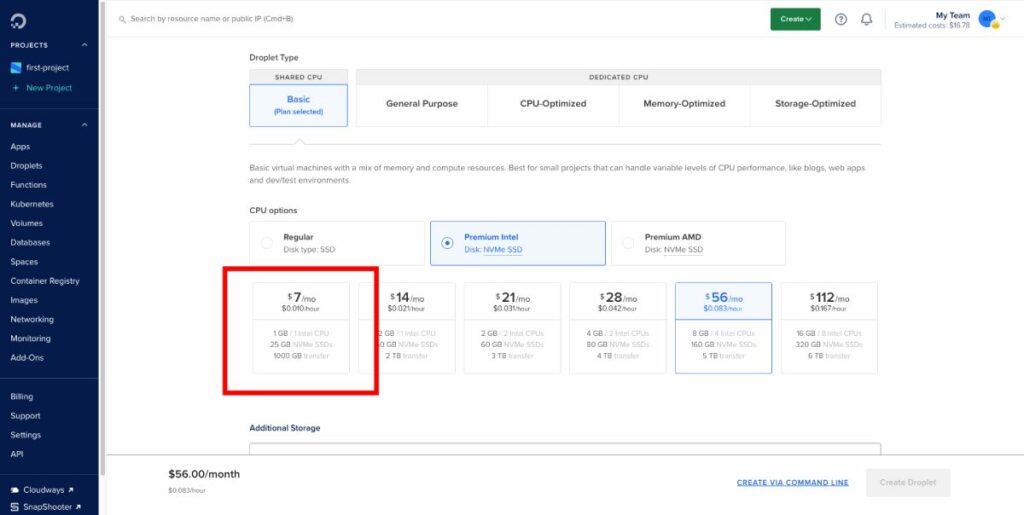
4. Choosing a plan: DigitalOcean offers a variety of plans to accommodate different needs and budgets. The most affordable plan starts at $7/month, but it's important to choose a plan that provides enough resources to handle your site's traffic and performance requirements. You can always scale up later if needed.
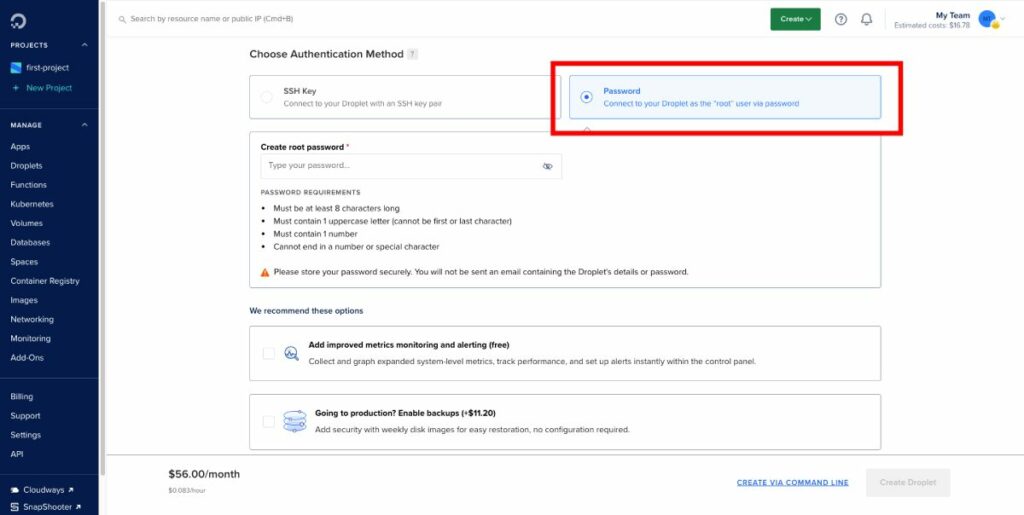
5. Choosing an authentication method: You have the option to choose between using an SSH key or a password for authentication. Using an SSH key is more secure and recommended if you're comfortable setting it up. If you prefer using a password, make sure to choose a strong, unique one for your account.
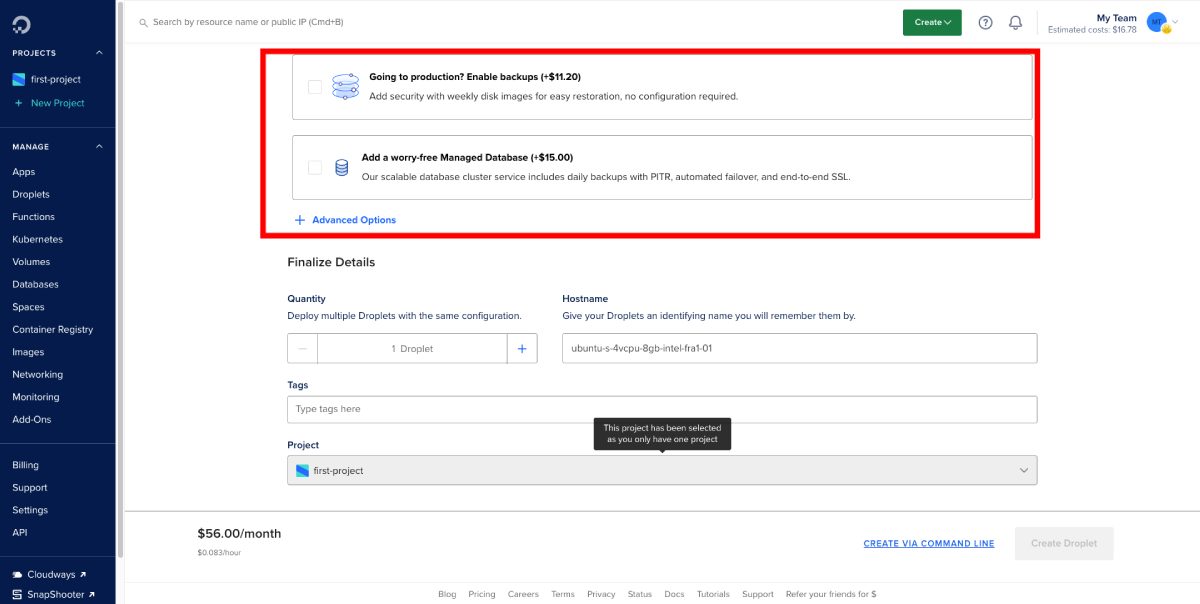
6. Selecting additional options: You can enable additional options like automatic backups, monitoring, and private networking, depending on your needs. These features can help ensure the reliability, security, and performance of your WordPress site.
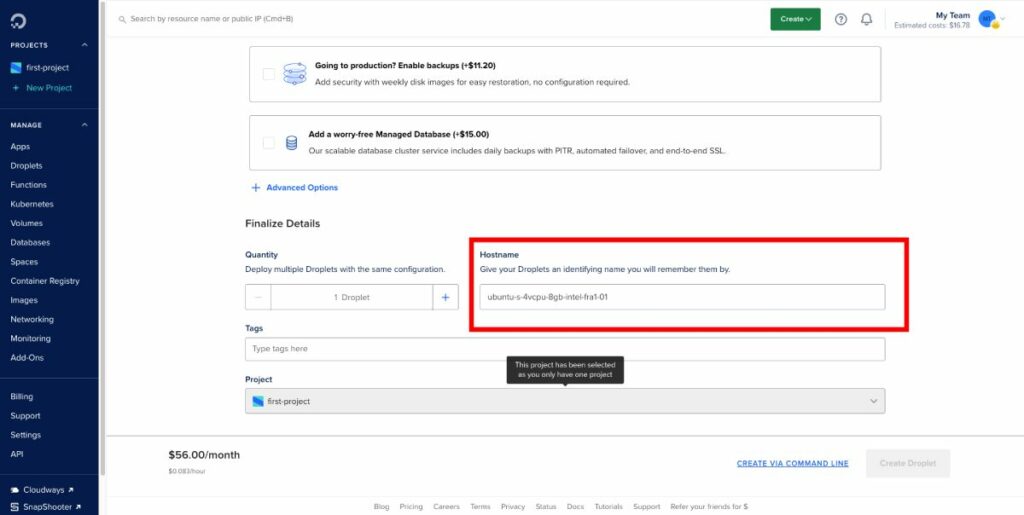
7. Choosing a hostname: Lastly, choose a descriptive hostname for your Droplet that accurately represents your WordPress site. This will make it easier to identify and manage your Droplet in the DigitalOcean dashboard.
Now your installation is finished you can click on the WordPress link to access your WordPress Dashboard.
Hosting WordPress Using LEMP on DigitalOcean
Hosting WordPress on DigitalOcean using LEMP (Linux, Nginx, MySQL, and PHP) provides better performance compared to other installations because it utilizes the lightweight and powerful Nginx web server.
This results in faster page load times and improved resource management, ensuring a seamless user experience for your website visitors.
To install LEMP on DigitalOcean, follow these step-by-step instructions:
1. Choose an image: Go to the DigitalOcean Marketplace tab and search for “LEMP.” Select the “LEMP on 20.04” image, which includes all the necessary components for a LEMP stack.
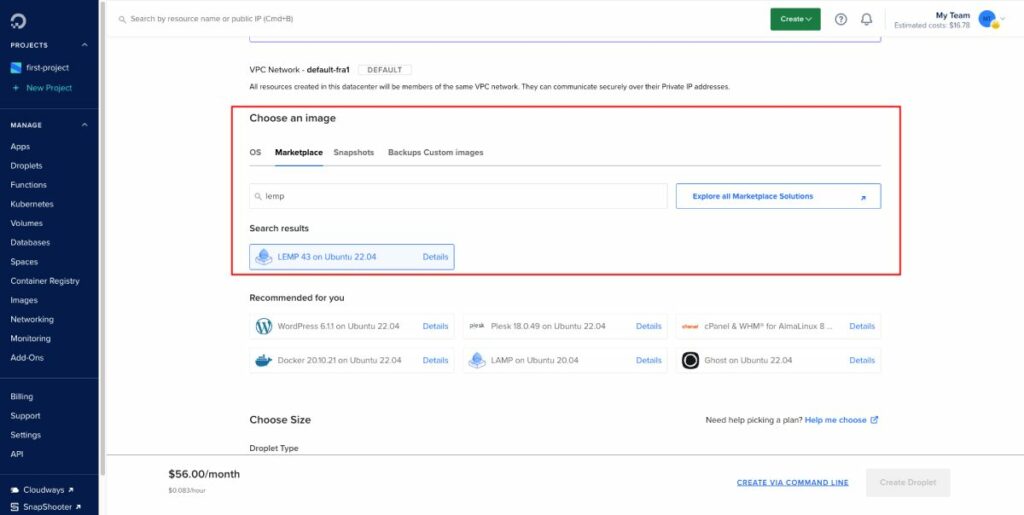
2. Choose a region: Select the data center region closest to your target audience for optimal performance. DigitalOcean has datacenters in multiple locations worldwide, ensuring low latency and fast loading times for your website.
3. Choose a plan: Based on your website's requirements, choose a plan that provides the right amount of resources, such as RAM, CPU, and storage. DigitalOcean offers flexible pricing options, starting from $5/month for basic websites to higher-tier plans for more resource-intensive sites.
4. Choose an authentication method: For secure access to your droplet, choose either an SSH key or a password for authentication. Using an SSH key is highly recommended as it provides an additional layer of security.

5. Select additional options: Consider enabling backups, monitoring, or other add-ons for your droplet. These features provide additional functionality and peace of mind, such as automatic backups for data protection and monitoring to gain insights into your server's performance.
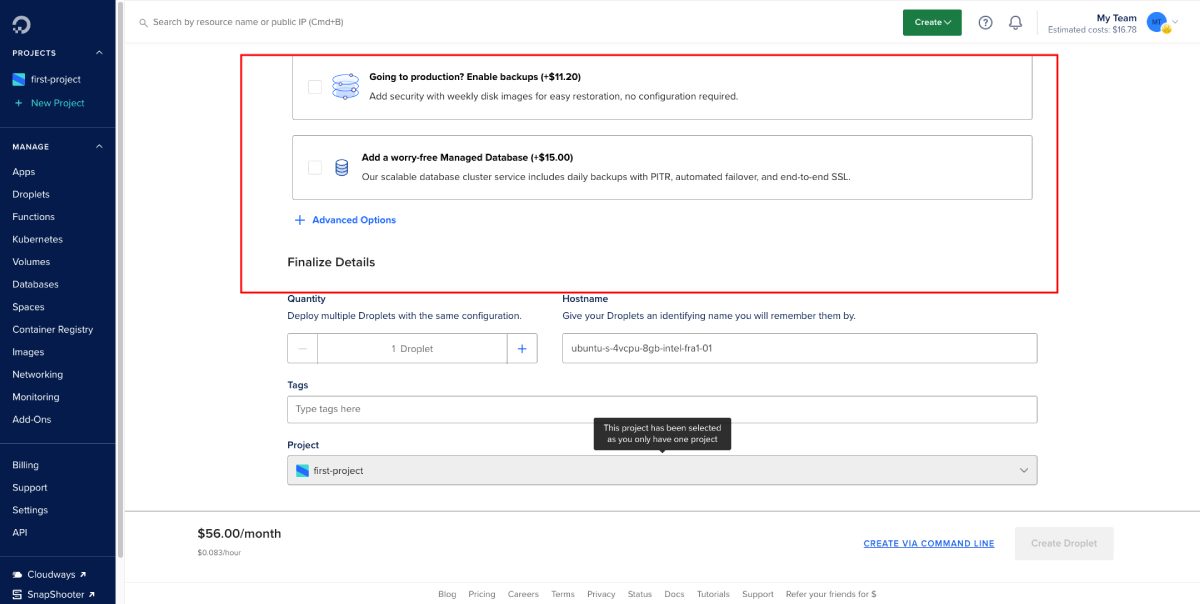
After completing the LEMP installation, follow these steps to install WordPress:
First, access your server using PuTTY by entering your server's IP address. Once connected, navigate to the “Connection > SSH > Auth” and select your PPK file for authentication. Or simply by add the IP address, Username: root, and Password you have set.
Execute the following commands to download and set up WordPress:
wget https://wordpress.org/latest.tar.gz
tar -xvf latest.tar.gz
cp -R wordpress/* /var/www/html/
chown -R www-data:www-data /var/www/html/
chmod -R 755 /var/www/html/
Following these steps will ensure a successful WordPress installation on your DigitalOcean droplet with LEMP. Enjoy the benefits of a fast, secure, and reliable hosting environment for your WordPress website!
Setup a Domain name for your WordPress
Setting up a domain name for your WordPress website hosted on DigitalOcean is an important step to make your site easily accessible.
Although DigitalOcean doesn't provide domain registration services, you can easily purchase a domain from an external provider and point it to your DigitalOcean Droplet. In this section, we'll guide you through the process of adding a domain name to your Droplet, step by step.
First, you need to purchase a domain from a reliable domain registrar, such as Namecheap. The process is quite straightforward:
- Search for your desired domain name on Namecheap
- Check the availability of the domain
- Add the domain to your cart if it's available
- Complete the checkout process, including the free Privacy Protect add-on
- Finish the payment transaction
Once you have completed the domain registration, you need to point the domain's Name Server (NS) records to DigitalOcean. To do this, follow these steps:
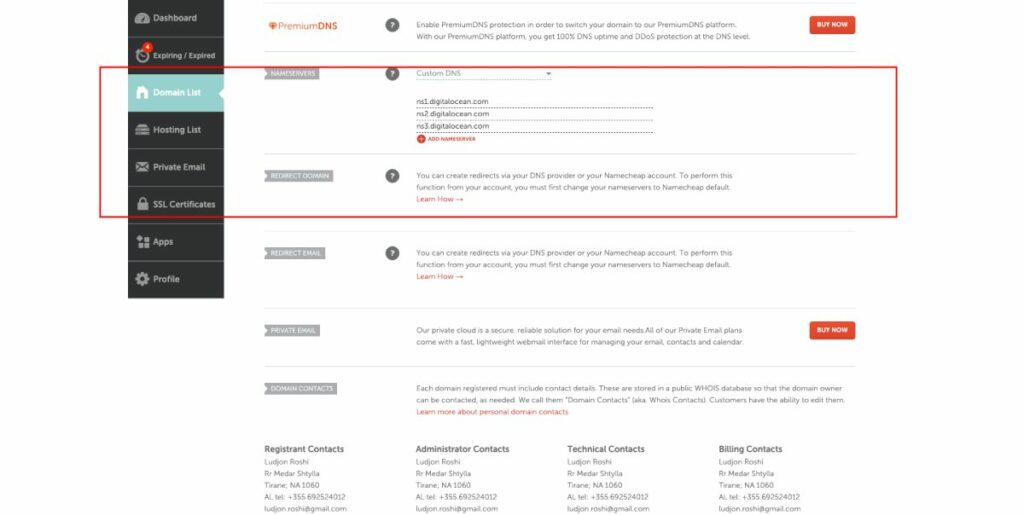
- Log in to your domain registrar's dashboard
- Go to your domain name settings and modify the Name Server (NS) records
- Point the NS records to DigitalOcean's Name Servers with the following values:
ns1.digitalocean.com
ns2.digitalocean.com
ns3.digitalocean.com
Keep in mind that DNS changes may take some time to propagate. In the meantime, you can proceed with adding the domain name to your DigitalOcean Droplet. Follow these steps:

- Log in to your DigitalOcean dashboard
- Navigate to the Networking tab on the left sidebar
- Switch to the Domains tab
- Enter your domain name (e.g., example.com)
- Select your Droplet from the dropdown menu
- Click on Add Domain
Your domain name should now be successfully added, and you'll be taken to the Domain Name Server (DNS) settings page.
Now that you have connected your domain to your DigitalOcean Droplet, you can enjoy the benefits of hosting your WordPress website on this platform.
FAQs
Accessing SFTP on a DigitalOcean Droplet
To access your DigitalOcean Droplet via SFTP, you need a client like FileZilla. To connect, launch FileZilla, and enter your server IP, username (usually “root”), and password in the respective fields.
If you have an SSH key, use that instead of the password. The port for SFTP is typically 22. Once connected, you can browse and manage your server files using FileZilla's interface.
Connecting to DigitalOcean SFTP for WordPress customization
After logging into your Droplet using SFTP, navigate to the WordPress installation directory. By default, this is located at /var/www/html/ for the 1-Click WordPress installation.
In this directory, you'll find all the WordPress files, including themes, plugins, and uploads. You can now transfer files from your local machine to the server or edit the existing files to customize your WordPress site.
Other Resources
How to Install WordPress (Step-by-Step) Guide 2023
How to Install a WordPress Theme (Only 5 Steps)
Conclusion
In conclusion, hosting your WordPress website on DigitalOcean can be a fantastic choice due to its user-friendly interface, affordability, and excellent customer support.
Whether you opt for WordPress DigitalOcean 1-Click installation or LEMP + WordPress you'll have access to a range of features and tools to customize and optimize your site for the best possible performance.
As one of the co-founders of Codeless, I bring to the table expertise in developing WordPress and web applications, as well as a track record of effectively managing hosting and servers. My passion for acquiring knowledge and my enthusiasm for constructing and testing novel technologies drive me to constantly innovate and improve.
Expertise:
Web Development,
Web Design,
Linux System Administration,
SEO
Experience:
15 years of experience in Web Development by developing and designing some of the most popular WordPress Themes like Specular, Tower, and Folie.
Education:
I have a degree in Engineering Physics and MSC in Material Science and Opto Electronics.



Comments