- Getting Ready for Website Development
- Installing WordPress and Vibrance Theme
- Customizing the Vibrance Theme
- Adding Your Photography Portfolio
- Blogging and Content Creation
- Search Engine Optimization (SEO) and Social Media Integration
- Monitoring and Analytics
- Maintaining and Updating Your Website
- Other Resources
- Conclusion
Creating a WordPress photography website is essential for both professional and amateur photographers seeking to showcase their work and establish a robust online presence.
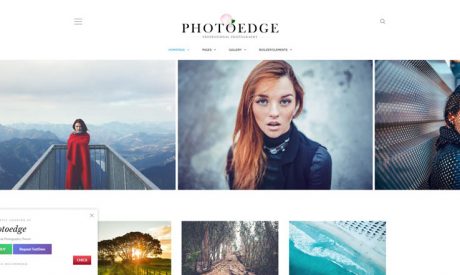
The Vibrance WordPress Theme provides an ideal solution, offering a visually appealing, user-friendly, and feature-rich platform tailored for photography websites.
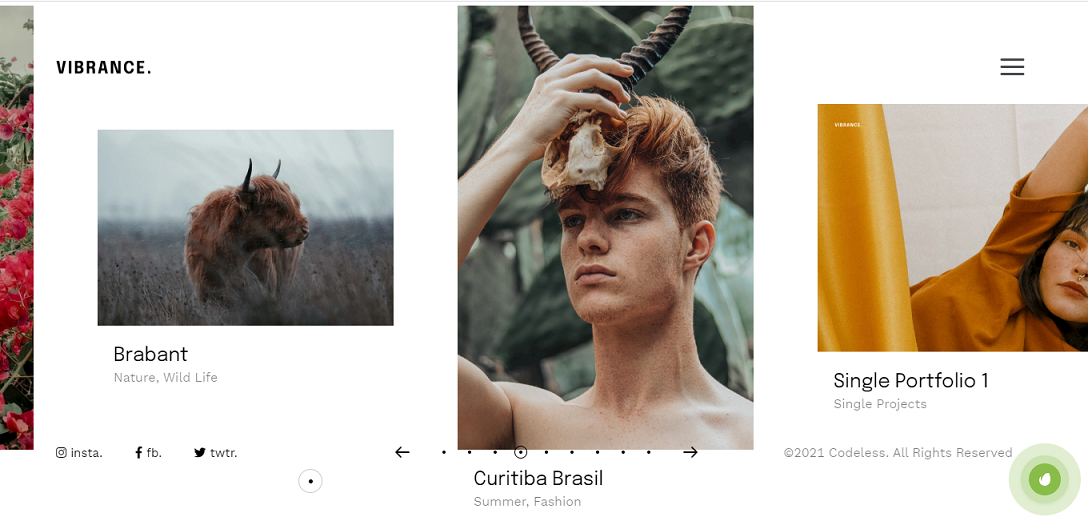
You can also look for other Photography WordPress themes that can fit better to your needs. Anyway, most of the steps below will be the same.
In this article, we'll delve into the process of crafting a unique, engaging, and search engine optimized website that captures the essence of your photography style and connects with your target audience.
Get ready to transform your stunning images into a captivating online portfolio that truly stands out!
In case you don't want to use WordPress I recommend you check: 7 Best Website Builders for Photographers & Videographers
Getting Ready for Website Development
Goals and Target Audience
Before diving into the website-building process, it's crucial to determine your goals and define your target audience.
Ask yourself the following questions:
- What is the primary purpose of your photography website?
- Who are you trying to reach with your online presence?
- What services or products do you offer, if any?
Having a clear understanding of your objectives and audience will guide your design and content choices, ensuring your website resonates with the right people.
Organizing your photography portfolio
A well-organized portfolio is vital for showcasing your work effectively.
Consider the following steps:
- Select your best images: Choose a variety of high-quality photographs that demonstrate your skills and versatility.
- Categorize your work: Divide your images into categories, such as portraits, landscapes, or events, to make it easy for visitors to navigate your portfolio.
- Optimize images: Compress and resize your images to reduce loading times without compromising quality.
Selecting a Domain Name and Hosting Provider
Your domain name is your website's online address, while a hosting provider offers the server space needed for your site to function.
I strongly recommend you use our AI tool for generating exclusive and original domain names: AI Domain Generator or the advanced version DomainAI.io

Also here you can find the list of the Best Photography Website Hosting.
Here's what to keep in mind:
- Choose a memorable and relevant domain name: Aim for a short and easy-to-remember domain that reflects your photography brand or name.
- Research hosting providers: Look for a reliable hosting provider with excellent customer support, uptime guarantees, and affordable pricing plans.
- Consider managed WordPress hosting: Managed WordPress hosting plans are designed specifically for WordPress websites, offering optimized performance and enhanced security features.
Installing WordPress and Vibrance Theme
Installing WordPress on your hosting account
To install WordPress on your hosting account, follow these steps:
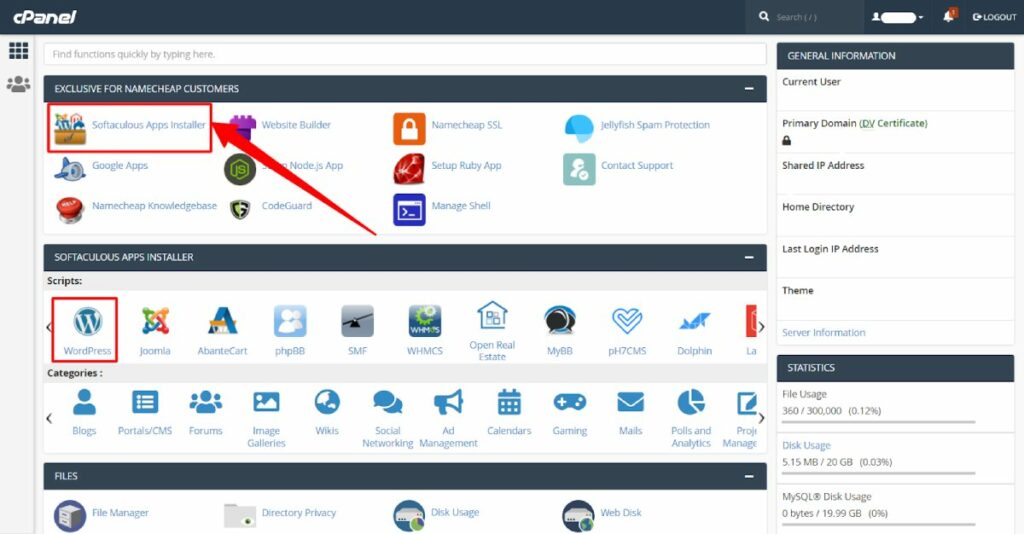
- Log in to your hosting account's control panel (e.g., cPanel).
- Locate the “Auto Installers” or “WordPress Installers” section.
- Click on “WordPress” and follow the installation prompts.
Choose your domain name, set a username and password, and provide an email address.
Complete the installation process, and then log in to your new WordPress site using the provided credentials.
For a more detailed guide on how to install WordPress: How to Install WordPress (Step-by-Step) Guide
Purchasing and installing the Vibrance WordPress Theme
Once you have WordPress installed, it's time to purchase and install the Vibrance Theme:
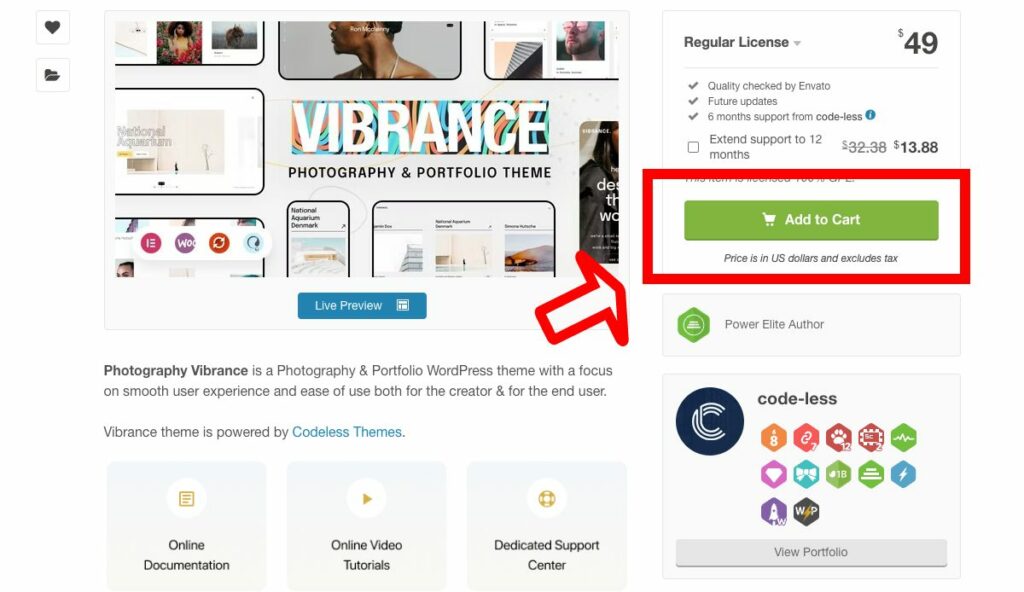
- Visit the Vibrance Theme sales page and complete the purchase process.
- Download the theme's .zip file from your account or the provided download link.
- Log in to your WordPress admin dashboard.
- Navigate to “Appearance” > “Themes” > “Add New” > “Upload Theme.”
- Choose the downloaded .zip file and click “Install Now.”
- Wait for the installation process to finish.
Read our full guide: How to Install a WordPress Theme (in only 5 Steps)
Activate Vibrance and Install the Demo Data
After installing the Vibrance Theme, you need to activate and update it:
In the “Themes” section of your WordPress dashboard, locate the Vibrance Theme.
- Click “Activate” to enable the theme on your website.
- Install all required plugins
- Go to Appearance -> Import Demo
- Click Continue & Import (Wait to finish the installation)
- Check your website to confirm that the theme has been successfully activated and installed.
Customizing the Vibrance Theme
Based on my extensive experience as a theme creator, I can confidently say that the Vibrance Theme offers a remarkable degree of customization.
This allows you to personalize your photography website and make it truly your own.
Exploring the theme options panel
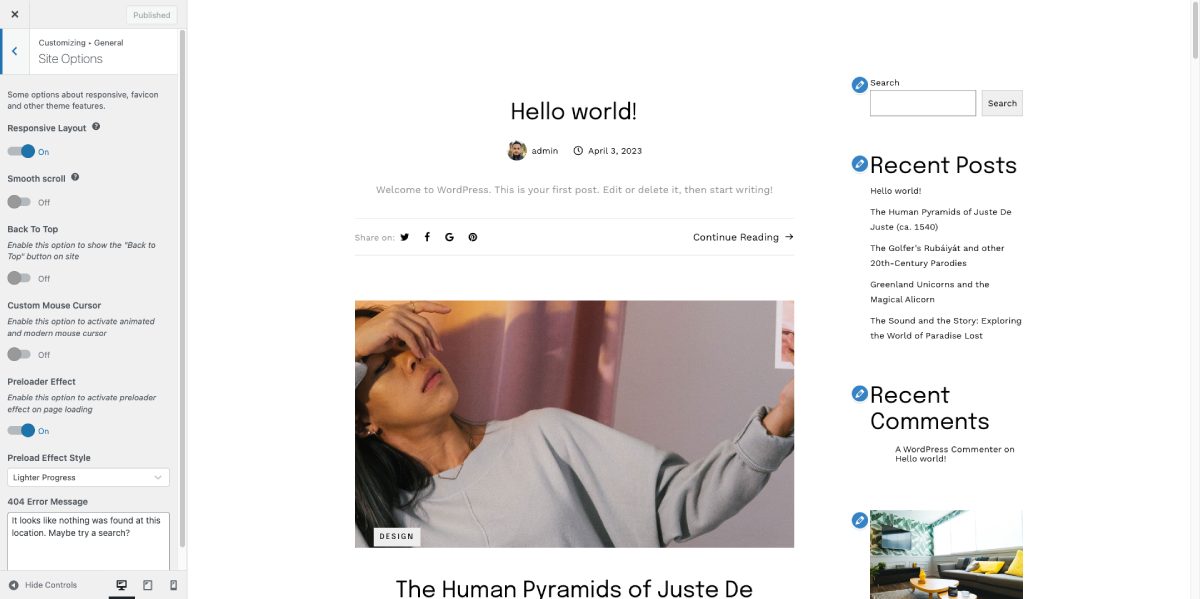
The theme options panel is your gateway to customizing the look and feel of your website. By going to Appearance -> Customize
Here's a quick overview of some essential settings:
- General settings: Adjust global settings like site layout, favicon, and logo to create a cohesive brand identity for your website.
- Typography settings: Customize fonts, font sizes, and font styles to enhance readability and create a consistent visual hierarchy.
- Color scheme options: Select a color palette that complements your photography style and branding. Vibrance Theme offers multiple color scheme options, making it easy to find the perfect match.
Customizing the website header and footer
The header and footer are crucial elements of your site's design.
Customize them to match your branding and improve site navigation, you can use Elementor to edit them with Drag and Drop.
- Edit the header: Add or modify the logo, menu items, and social media icons. Consider using a sticky header to keep the navigation visible as users scroll.
- Customize the footer: Include essential information like contact details, copyright notice, and additional navigation links. Use widgets to add extra functionality, such as newsletter sign-up forms or Instagram feeds.
Themes after the installation come with ready-created Header and Footer templates that you can customize in Elementor.
Setting up the homepage layout
The homepage is the first impression visitors have of your website.
With the Vibrance Theme, you can easily create an engaging and visually appealing homepage:

- Choose a layout: Select from various homepage layouts, such as a full-screen slider, masonry grid, or portfolio showcase.
- Customize the content: Add attention-grabbing headlines, compelling calls-to-action, and featured images that showcase your best work.
- Incorporate dynamic elements: Use sliders, galleries, or video backgrounds to create an immersive and interactive experience for your visitors.
Edit installed pages
Vibrance Theme enables you to create an array of custom pages and templates to suit your needs:
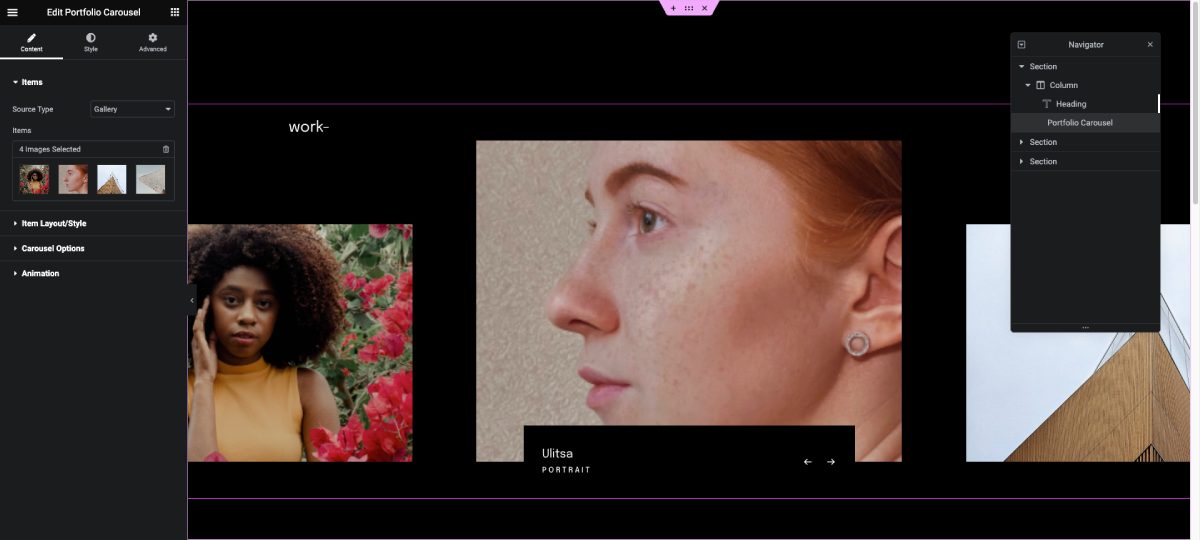
- Edit a compelling “About Us” page (use Elementor Builder): Share your story, showcase your skills, and let your personality shine through.
- Customizer the “Contact” page: Provide multiple ways for visitors to get in touch, such as email, phone, or a contact form.
- Create custom templates: Develop reusable templates for specific photography categories or client projects, ensuring a consistent look and feel across your website.
By utilizing the customization options in the Vibrance Theme, you can craft a photography website that reflects your unique style and appeals to your target audience.
For a full guide, you can read: How to Customize a WordPress Theme (Tutorial)
Adding Your Photography Portfolio
A well-curated portfolio is the cornerstone of any photography website. The Vibrance Theme makes it easy to upload, organize, and display your best work.
Before uploading the images you have to resize them and reduce file size, our tutorial here can help you with that: How To Reduce the Image File Size for a Website?
Uploading and organizing images
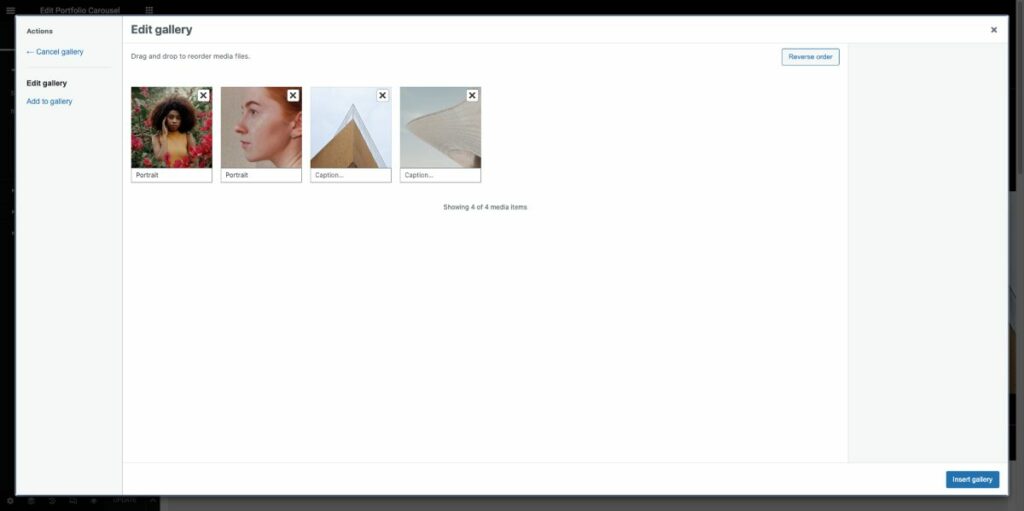
- To upload and organize your images, follow these steps:
- Log in to your WordPress dashboard and navigate to “Media” > “Add New.”
- Drag and drop or select the images you want to upload.
- Once uploaded, add relevant titles, captions, and alt text to improve search engine visibility and accessibility.
Create categories and tags to organize your images, making it easier for visitors to find specific content.
Edit Albums and Galleries
Galleries and albums are essential for showcasing your photography in an organized and visually appealing way. Here's how to create them using the Vibrance Theme:
Use the Slider elements as Albums and Portfolio Elements as galleries that comes by default with the theme.
You have to go to the WordPress dashboard -> Portfolio Items to Add or replace the ones that are already installed with the theme demo data.
There you can categorize them as you want in Categories.
Choose a layout style, such as grid, masonry, or slider, to display your images on the Elementor element settings.
Publish your gallery or album, and add it to your portfolio or any relevant pages.
Integrating with photography plugins for additional functionality
The Vibrance Theme is compatible with various photography plugins that can enhance your website's functionality.
Some popular options include:
- Envira Gallery: Create responsive and fully customizable image galleries with lightbox, social sharing, and watermarking features.
- NextGEN Gallery: Manage and display your photos in various gallery styles, including slideshow, thumbnail, and filmstrip.
- Modula Image Gallery: Design custom grid-based galleries with unique layouts, hover effects, and lightbox options.
By integrating these plugins, you can add powerful features to your photography website, providing a better user experience and making your portfolio stand out.
Blogging and Content Creation
A well-maintained blog is an excellent way to share your expertise, connect with your audience, and improve your website's search engine ranking. The Vibrance Theme makes it easy to create and manage a visually appealing blog.
Adding a blog section to your website

To add a blog section to your website, follow these steps:
Log in to your WordPress dashboard and navigate to “Pages” > “Add New.”
Create a new page with a title like “Blog” or “Journal.” or edit the pages that are installed with the demo data.
In the section, choose a blog template provided by the Vibrance Theme demo data and edit them with Elementor page builder.
Publish the page, and add it to your website's main navigation menu.
Writing and publishing photography-related articles
Creating engaging and informative content is crucial for attracting and retaining your audience. Here are some tips for writing and publishing photography-related articles:
- Choose relevant topics: Write about subjects that interest your target audience, such as photography tips, gear reviews, or behind-the-scenes stories.
- Focus on quality: Provide valuable insights and actionable advice to help your readers improve their photography skills or learn something new.
- Use clear and concise language: Write in a conversational tone, and break your content into short paragraphs and bullet points for easy reading.
- Optimize for search engines: Incorporate relevant keywords, create descriptive titles and headings, and use internal and external links to improve your website's SEO.
- Publish regularly: Maintain a consistent posting schedule to keep your audience engaged and encourage them to return to your website.
Enhancing content with images, videos, and other media
Visual elements can greatly enrich your blog content and make it more engaging. Here are some suggestions for enhancing your articles with media:
- Include high-quality images: Use your own photographs or royalty-free stock images to illustrate your points and break up large blocks of text.
- Add videos: Embed relevant videos from platforms like YouTube or Vimeo to provide additional information or demonstrate techniques.
- Use infographics: Create informative graphics to present complex data or concepts in a visually appealing and easy-to-understand format.
- Embed social media posts: Share posts from platforms like Instagram, Twitter, or Facebook to showcase your work, highlight testimonials, or promote events.
- By incorporating a blog section and creating compelling content, you can effectively showcase your expertise, engage with your audience, and boost your photography website's online visibility.
A strong online presence requires both SEO and social media integration. These strategies work hand in hand to increase your website's visibility and reach a wider audience.
Optimizing your website for search engines
SEO helps improve your website's ranking on search engine results pages, driving more organic traffic to your site. Here are some key strategies for optimizing your photography website:
- Keyword research: Identify relevant keywords related to your niche and incorporate them into your website's content, titles, headings, and meta descriptions.
- Image optimization: Compress and resize images, and add descriptive file names and alt text to improve loading times and accessibility.
- Mobile responsiveness: Ensure your website is easily navigable and visually appealing on various devices, as search engines prioritize mobile-friendly websites.
- Fast loading times: Optimize your site's performance by using a caching plugin, minimizing HTTP requests, and reducing server response time.
- Quality backlinks: Obtain backlinks from reputable websites within your niche to increase your site's authority and credibility.
You can also use some SEO tools to make your process even easier.
Integrating social media sharing buttons
Adding social media sharing buttons to your website encourages visitors to share your content, increasing its reach and exposure.
Here's how to integrate these buttons:
- Choose a plugin: Select a reliable social media sharing plugin, such as Social Warfare, Monarch, or AddThis.
- Customize the appearance: Adjust the button styles, sizes, and colors to match your website's design.
- Select the platforms: Choose the social media platforms most relevant to your audience and niche.
- Position the buttons: Determine the best location for your buttons, such as above or below content, in a floating sidebar, or in a sticky header.
Promoting your photography website on social media platforms
Promoting your website on social media can help you connect with your audience, showcase your work, and drive traffic to your site. Consider these tips for social media promotion:
- Be consistent: Create and maintain profiles on the platforms most relevant to your target audience, such as Instagram, Pinterest, or Facebook.
- Share your content: Regularly post your latest blog articles, images, and news to engage with your followers and encourage them to visit your website.
- Use hashtags: Research popular and relevant hashtags to reach a wider audience and increase your content's visibility.
- Engage with your audience: Respond to comments, participate in discussions, and like or share content from others within your niche to build relationships and establish your brand presence.
- Run promotions or contests: Encourage user-generated content, website visits, and social sharing by hosting promotions or contests on your social media profiles.
By implementing SEO best practices and integrating social media into your photography website, you can expand your reach, engage with your audience, and grow your online presence.
Monitoring and Analytics
Monitoring and analyzing your website's performance and visitor behavior is crucial for making informed decisions and improvements.
Setting up Google Analytics
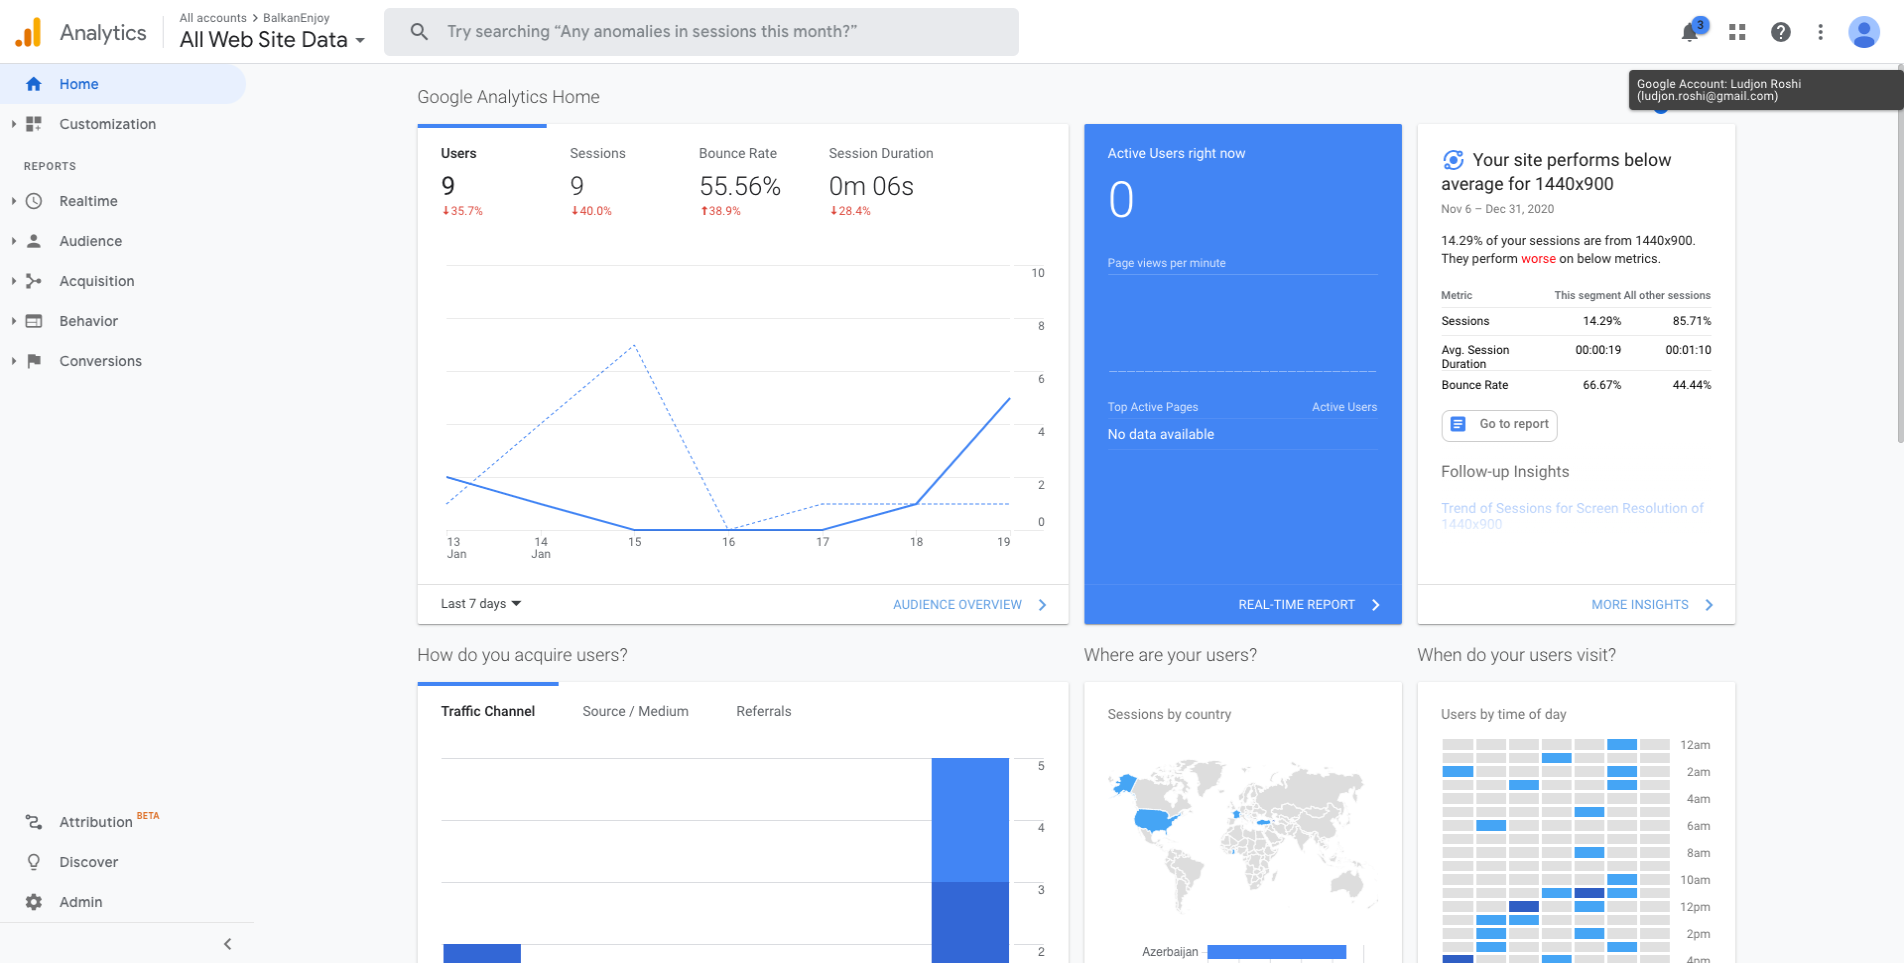
Google Analytics is a powerful tool that provides valuable insights into your website's performance. To set it up, follow these steps:
- Sign up for a Google Analytics account if you don't already have one.
- Create a new property for your photography website.
- Obtain your tracking code (also known as the tracking ID).
- Install the tracking code on your website using a plugin like Google Analytics Dashboard for WP, or by manually adding it to your theme's header or footer.
Analyzing website performance and visitor behavior
Use Google Analytics to gather valuable information about your website and visitors, such as:
- Traffic sources: Discover how visitors find your website, whether it's through organic search, social media, or referrals.
- Visitor demographics: Understand your audience's age, location, and interests to tailor your content and marketing strategies.
- User behavior: Analyze visitor engagement, including page views, bounce rate, and time spent on your website, to identify areas for improvement.
- Popular content: Identify your most popular pages and posts to create more content that resonates with your audience.
Making data-driven improvements to your photography website
Leverage the insights gained from Google Analytics to make informed decisions and enhance your website:
- Optimize your content: Create more content that aligns with your audience's interests and performs well on search engines.
- Improve user experience: Address any issues with site navigation, page load times, or mobile responsiveness to provide a better experience for your visitors.
- Adjust your marketing strategies: Focus on the traffic sources that drive the most visitors to your site and optimize your efforts on those platforms.
Maintaining and Updating Your Website
A well-maintained website ensures a secure and enjoyable user experience for your visitors.
Regularly updating WordPress, theme, and plugins
Keeping your WordPress core, theme, and plugins up to date is essential for security and optimal performance. Regularly check your WordPress dashboard for available updates and install them promptly.
Backing up your website
Regular backups protect your website's data in case of technical issues or security breaches. Use a plugin like UpdraftPlus or BackWPup to schedule automatic backups, or consider using a managed WordPress hosting provider that includes backup services.
Staying informed about industry trends and theme updates
Stay current with industry trends, best practices, and updates related to your theme and plugins. Subscribe to newsletters, follow relevant blogs, and join photography communities to exchange ideas and learn from others in your field.
This will help you make well-informed decisions and maintain a modern and relevant photography website.
Read More: How to Update a WordPress Theme by Theme Authors
Other Resources
How to Create WordPress Portfolio Website in 2023
[Guide] How to Create a WordPress Podcast Website
How To Create a WordPress Website 2023 (Beginners Guide)
Conclusion
Drawing from my extensive experience in web design and theme development, I have provided a comprehensive guide for creating a captivating photography website using the Vibrance WordPress Theme.
Let's Recap
- Prepare for website creation: Identify your goals, target audience, and organize your portfolio. Select a suitable domain name and hosting provider.
- Install WordPress and the Vibrance Theme: Ensure proper installation, activation, and updates.
- Customize the Vibrance Theme: Personalize the theme options, header, footer, homepage layout, and create custom pages and templates.
- Add your photography portfolio: Upload and organize images, create galleries and albums, and integrate photography plugins for additional functionality.
- Create engaging blog content: Add a blog section to your website, write and publish photography-related articles, and enhance content with multimedia elements.
- Optimize SEO and integrate social media: Improve search engine rankings, add social sharing buttons, and promote your website on social media platforms.
- Monitor and analyze your website: Set up Google Analytics, analyze performance and visitor behavior, and make data-driven improvements.
- Maintain and update your website: Regularly update WordPress, the theme, and plugins; back up your website, and stay informed about industry trends and updates.
As you develop your photography website using the Vibrance Theme, remember that your online presence is an ongoing project.
Continually evaluate and refine your website to better serve your audience, showcase your work, and grow your photography business.
Embrace new features and trends, engage with your visitors, and keep producing high-quality content. By doing so, you will establish a strong online presence, forge lasting connections with your audience, and ultimately achieve success in the competitive world of photography.
Now that you have the tools and knowledge to create a stunning photography website, it's time to put your skills to work and showcase your unique artistic vision to the world.
Good luck on your journey!
As one of the co-founders of Codeless, I bring to the table expertise in developing WordPress and web applications, as well as a track record of effectively managing hosting and servers. My passion for acquiring knowledge and my enthusiasm for constructing and testing novel technologies drive me to constantly innovate and improve.
Expertise:
Web Development,
Web Design,
Linux System Administration,
SEO
Experience:
15 years of experience in Web Development by developing and designing some of the most popular WordPress Themes like Specular, Tower, and Folie.
Education:
I have a degree in Engineering Physics and MSC in Material Science and Opto Electronics.




Comments