WordPress and Webflow are two popular website-building platforms with distinct features and advantages.
WordPress is a widely-used, open-source content management system (CMS) that offers extensive customization options and a vast ecosystem of plugins and themes.
Webflow, on the other hand, is a powerful web design tool that allows users to create responsive, visually appealing websites without writing any code, thanks to its intuitive visual editor and built-in CMS. If you want to learn more about Webflow: Webflow Review 2023: Features, Pros, and Cons
Reasons to consider migrating from WordPress to Webflow
There are several reasons why one might consider migrating their website from WordPress to Webflow. Some of the key factors include:
- Streamlined design process: Webflow's visual editor enables users to design and build their website simultaneously, making it an efficient and user-friendly platform, especially for designers.
- Responsive design: Webflow makes it easy to create responsive websites that adapt seamlessly to different devices and screen sizes, ensuring a smooth user experience across all platforms.
- Improved performance: Webflow's optimized code output and built-in hosting can result in faster page load times and better overall performance when compared to many WordPress sites.
- Enhanced security: As a fully managed platform, Webflow takes care of security updates and patches, reducing the risk of vulnerabilities that can affect self-hosted WordPress websites.
- No reliance on plugins: While WordPress often relies on plugins for added functionality, Webflow provides many built-in features, reducing the need for third-party solutions and potential compatibility issues.
Considering these benefits, migrating from WordPress to Webflow could be a strategic move for individuals and businesses looking to elevate their website's design, performance, and overall user experience.
Read More: Webflow vs WordPress: Which is Best in 2023?
Preparing for the Migration
To ensure a smooth migration, it's essential to assess your current WordPress website before moving to Webflow. Take the following factors into account:
- Content: Review the type and quantity of content on your WordPress site, including blog posts, pages, images, and other media. Having a clear understanding of your content will make the transfer process more efficient.
- Design and layout: Analyze your site's design elements, such as color schemes, typography, and overall layout. You'll want to recreate these in Webflow to maintain a consistent look and feel.
- Functionality and interactivity: Identify specific features, such as contact forms, sliders, and e-commerce functionality, currently used by your website. You'll need to find suitable Webflow alternatives or custom solutions.
Setting up a Webflow environment
Before migrating your content, you'll need to create a Webflow environment to host your new website.
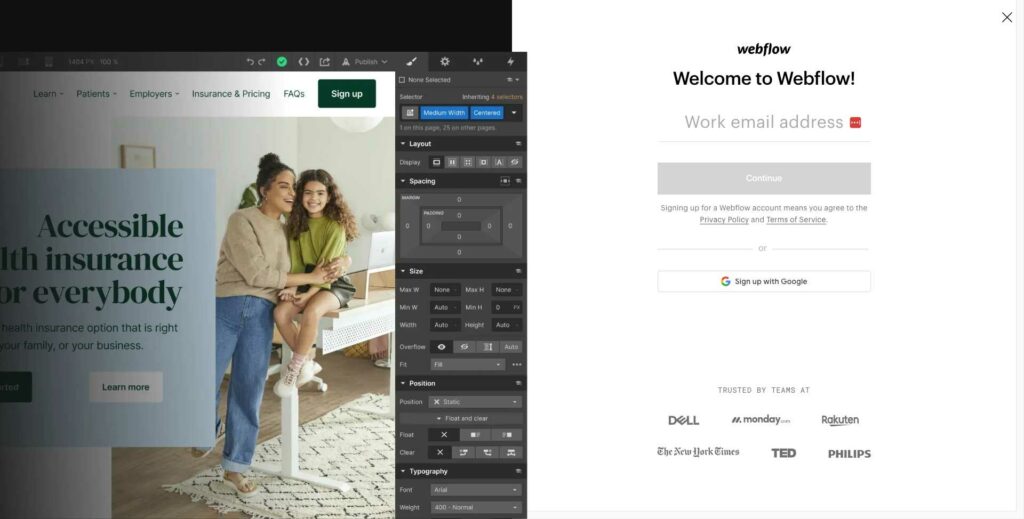
Here's how:
- Creating a Webflow account: Sign up for a free Webflow account by providing your email address and creating a password. This will give you access to Webflow's platform and tools.
- Choosing a plan: Webflow offers various plans to suit different needs, ranging from free plans with basic features to premium plans with advanced functionality. Select the plan that best fits your requirements.
- Selecting a template or starting from scratch: Webflow provides a library of professionally-designed templates that you can use as a starting point for your site. Alternatively, you can choose to start with a blank canvas and create your design from scratch.
Planning the migration process
Proper planning is crucial for a successful migration. Consider the following aspects when creating your migration plan:
- Timeline: Set a realistic timeline for the migration, factoring in time for content transfer, design, and testing. Make sure to allocate enough time for each phase to avoid rushing the process.
- Roles and responsibilities: Determine who will be responsible for each aspect of the migration, whether it's a solo project or involves a team. Delegate tasks accordingly to ensure a smooth and efficient process.
With these preparations complete, you're now ready to begin the actual migration process from WordPress to Webflow. Follow the steps outlined in this guide to create a visually stunning, high-performing Webflow site in no time!
Migrating Content from WordPress to Webflow
Exporting content from WordPress
In the migration process, the first step is to export content from WordPress. This involves two main steps:
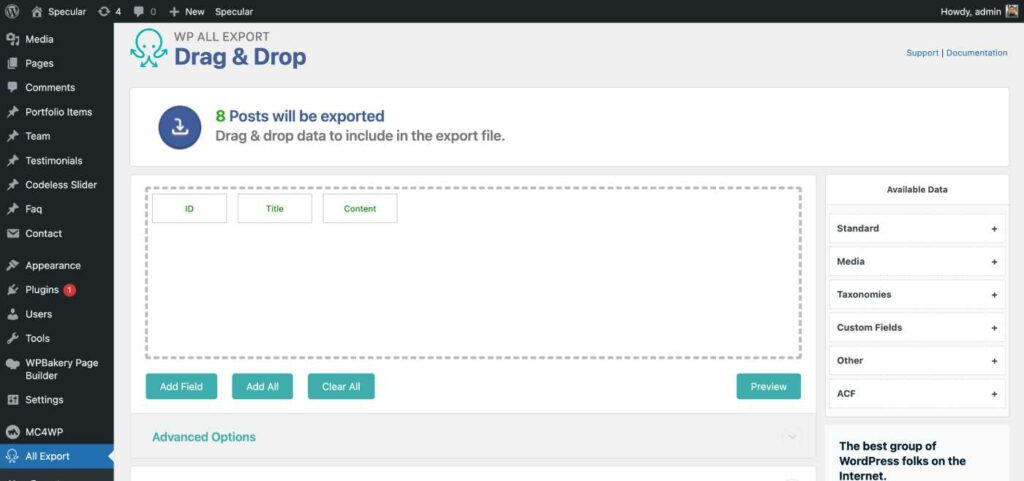
- Posts and pages: Utilize the WP ALL Export exporting tool to download a CSV file containing the site's posts and pages. This file will later be used to import the content into Webflow. (for more on how to install a plugin)
- Images and other media: Download images, videos, and other media assets from the WordPress site, as they'll need to be uploaded to Webflow during the migration.
Importing content into Webflow
Once the content is ready, the next step is to import it into Webflow. This process involves the following steps:
- Creating Collections in Webflow: Collections are the backbone of Webflow's CMS. Set up Collections that correspond to the WordPress content types, such as blog posts or pages. This helps maintain a well-structured website that's easy to navigate and SEO-friendly.
- Importing CSV data: Import WordPress CSV file into the appropriate Webflow Collections using Webflow's Import tool. This step ensures that the content is transferred accurately and efficiently.
- Manual content transfer: If a more hands-on approach is preferred or unique requirements are present, manually copy and paste content from the WordPress site to Webflow. This method is more time-consuming but offers greater control over the content transfer process.
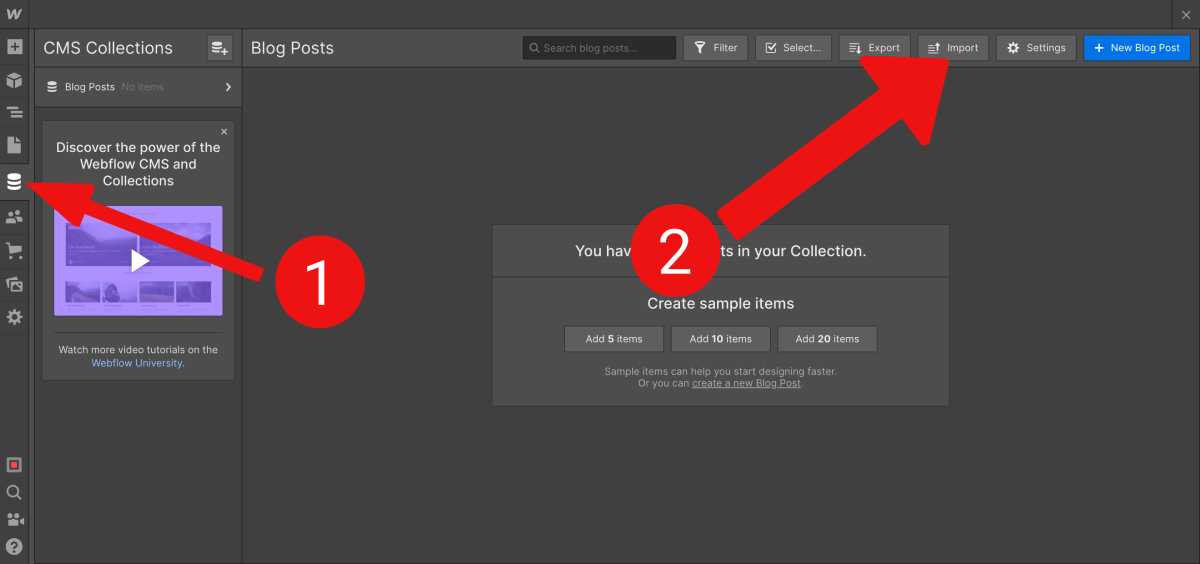
By following these steps, the content can be successfully migrated from WordPress to Webflow, setting the stage for the next phase of the migration: design and layout recreation.
Testing Your Webflow Website
Thorough testing of website functionality
Once the content, design, and layout have been migrated, it's crucial to thoroughly test the new Webflow website to ensure everything works as expected. Focus on the following aspects:

- Forms and user input: Test all contact forms, comment sections, and any other user input fields to ensure they function correctly and capture the necessary information.
- Responsiveness on different devices: Check the website on various devices, such as smartphones, tablets, and desktop computers, to ensure it adapts seamlessly to different screen sizes and provides an optimal user experience.
- Page load speed: Analyze the website's page load speed using tools like Google PageSpeed Insights or GTmetrix to ensure it meets performance standards and offers a fast browsing experience for visitors.
Proofreading and content review
Take the time to proofread and review all content on the new Webflow site. Check for typos, grammatical errors, and inconsistencies in style or formatting.
Ensuring high-quality content not only creates a positive impression on visitors but also contributes to better SEO performance.
Resolving issues found during testing
Address any issues or bugs discovered during the testing phase. This may involve fixing broken links, adjusting design elements, or tweaking the website's functionality.
Keep testing and refining the site until all issues are resolved and the site is ready for launch.
By following these steps, the new Webflow website will be polished, functional, and ready to provide an exceptional user experience, all while offering improved performance and easier design management compared to its previous WordPress incarnation.
SEO Considerations During Migration
When migrating a website from WordPress to Webflow, it's important to ensure that the site's search engine optimization (SEO) isn't negatively impacted.
Consider the following aspects to maintain and even improve the site's SEO performance:
Maintaining URL structure
Try to preserve the existing URL structure of the WordPress site when migrating to Webflow. Consistent URLs help avoid potential issues with search engine indexing. Ensure that any existing backlinks to the site remain functional.
Setting up 301 redirects
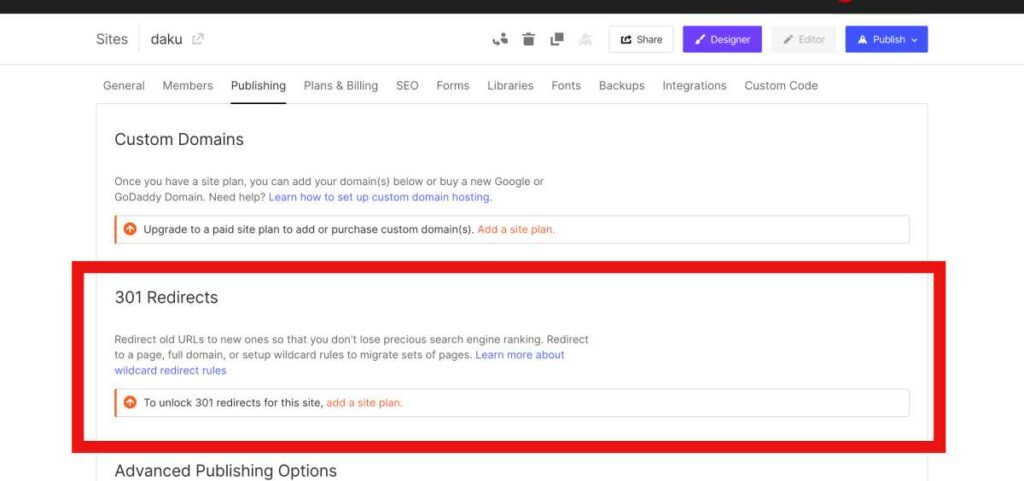
If changes to the URL structure are unavoidable, set up 301 redirects to point the old URLs to their new counterparts on the Webflow site.
This ensures that visitors following old links will be directed to the correct content. So it helps maintain the site's SEO rankings. You can read more by reading the Webflow tutorial on 301 redirects.
Updating sitemap and submitting to search engines

Create an updated sitemap for the new Webflow site and submit it to search engines like Google and Bing. This helps search engines index the site more efficiently.
Optimizing on-page SEO elements
Review and optimize on-page SEO elements, such as title tags, meta descriptions, and header tags, to ensure they're properly formatted and include relevant keywords.
Additionally, make sure that all images have descriptive alt text and that internal links are updated to reflect the new site structure.
By taking these SEO considerations into account during the migration process, the transition from WordPress to Webflow can be smooth and have minimal impact on the website's search engine rankings.
With careful planning and execution, the new Webflow site can maintain or even improve its SEO. In that way, you can get more organic traffic and help achieve online success.
Launching Your Webflow Website
After completing the migration, follow these practical steps:
Connecting your custom domain
- Log in to your Webflow account and go to your project's dashboard.
- Click on the “Settings” tab and navigate to the “Publishing” section.
- Under “Custom Domains,” enter your domain name and click “Add Domain”.
- Follow the instructions to update your domain's DNS settings with the provided values.
- Wait for DNS propagation to complete, which may take up to 48 hours.

Publishing your Webflow site
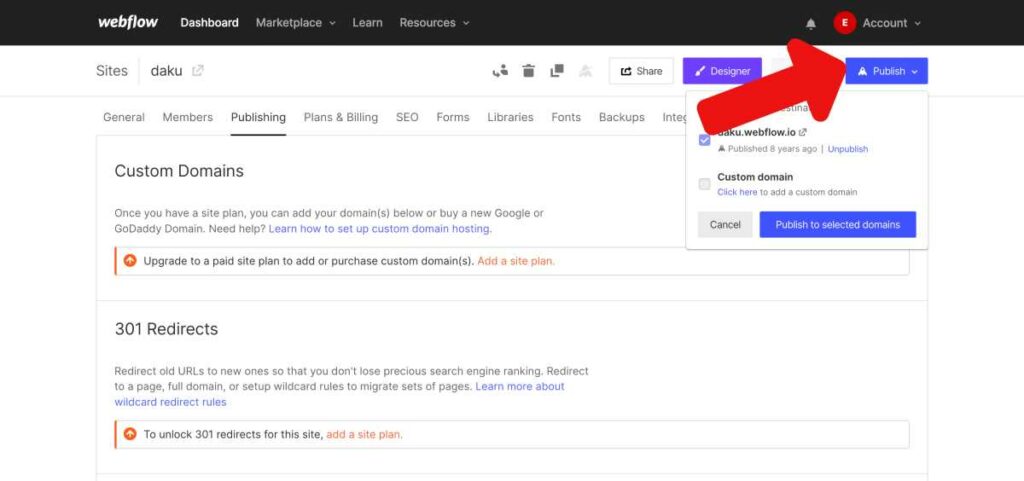
- From your project's dashboard, click on the “Publish” button in the top-right corner.
- Select your custom domain and click “Publish to selected domains.”
- Your site is now live and accessible to visitors.
Monitoring website performance
- Connect your Webflow site to analytics tools, such as Google Analytics. For that go to Project Settings -> SEO -> Google Analytics
- Regularly review the data to track user engagement, conversions, and traffic sources.
- Use insights from analytics to make data-driven decisions and improve website performance.
Post-migration support and maintenance
- Regularly update your Webflow site's content to keep it fresh and engaging.
- Perform routine backups to protect your site from data loss.
- Address any issues or bugs that may arise, ensuring a smooth user experience.
- Consider subscribing to a Webflow support plan for additional assistance and resources.
Following these practical steps ensures a successful Webflow site launch, maintaining performance and user experience post-migration.
If you are not liking Webflow you can check out some its alternatives: 7 Best Webflow Alternatives (Ranked & Compared)
Conclusion
In this guide, we've covered the essential steps of migrating a website from WordPress to Webflow:
Recap of the migration process
- Preparing for the migration by evaluating your WordPress site and setting up a Webflow environment.
- Migrating content, including exporting from WordPress and importing into Webflow.
- Recreating the design and layout in Webflow.
- Testing the new Webflow site for functionality, responsiveness, and content quality.
- Considering SEO aspects, such as URL structure, 301 redirects, and on-page optimizations.
- Launching the Webflow site by connecting a custom domain, publishing, and monitoring performance.
Now that your website has successfully migrated to Webflow, take advantage of its flexibility and potential.
Explore the wide range of design possibilities, experiment with interactions and animations, and leverage the powerful Webflow CMS to create a truly unique and engaging user experience.
With Webflow, you can unlock your website's full potential and achieve online success.
As one of the co-founders of Codeless, I bring to the table expertise in developing WordPress and web applications, as well as a track record of effectively managing hosting and servers. My passion for acquiring knowledge and my enthusiasm for constructing and testing novel technologies drive me to constantly innovate and improve.
Expertise:
Web Development,
Web Design,
Linux System Administration,
SEO
Experience:
15 years of experience in Web Development by developing and designing some of the most popular WordPress Themes like Specular, Tower, and Folie.
Education:
I have a degree in Engineering Physics and MSC in Material Science and Opto Electronics.



Comments