Looking for ways to create a podcast website?
Creating a podcast website is not hard but it’s a lot of work.
You will need to design a professional-looking website, upload all your audio files, optimize your posts for search engines, set up analytics to track the site’s progress, add subscription boxes to capture leads, and leverage monetization opportunities, among other things.
This amount of work can seem overwhelming and some of you are probably thinking you are better off without a website. Don’t worry!
You don’t have to create a website from scratch. You can use a dedicated podcast theme like Livecast that comes with a ready-made template. Just upload and get a podcast site up and running in no time.
In this article, we will show you how to create a podcast website using a dedicated WordPress theme.
Let’s get started.
How to Create a Podcast Website
To create a podcast website, you need to take the following steps:
Table of Contents
- How to Create a Podcast Website
- Step 1: Purchase a Domain, Hosting, & SSL Certificate
- Step 2: Install WordPress
- Step 3: Install a Dedicated Podcast Theme
- Step 4: Import Livecast Pre-built Site
- Step 5: Customizing Website
- Step 6: Configure Existing Plugins & Add More Plugins
- Step 7: Configure WordPress Setting Pages
- Step 8: Add Pages
- Step 9: Create Social Media Profile
- Step 10: Add an Email Subscription Box
- Step 11: Set Up Shop & Funding Accounts
- Conclusion
Let’s dive into each step.
Step 1: Purchase a Domain, Hosting, & SSL Certificate
Domain Name
The domain name is the name of a website like “Codeless.co” is the name of our website.
How does one go about choosing a name? You can use your podcast name as your domain name. This is what most podcasts do. But if you plan to start more than one podcast then consider using your company name (if you have one). Later you can add each podcast name as a subdomain.
Artificial Intelligence can help you choose your domain name through our Codeless tool: AI Domain Name Generator
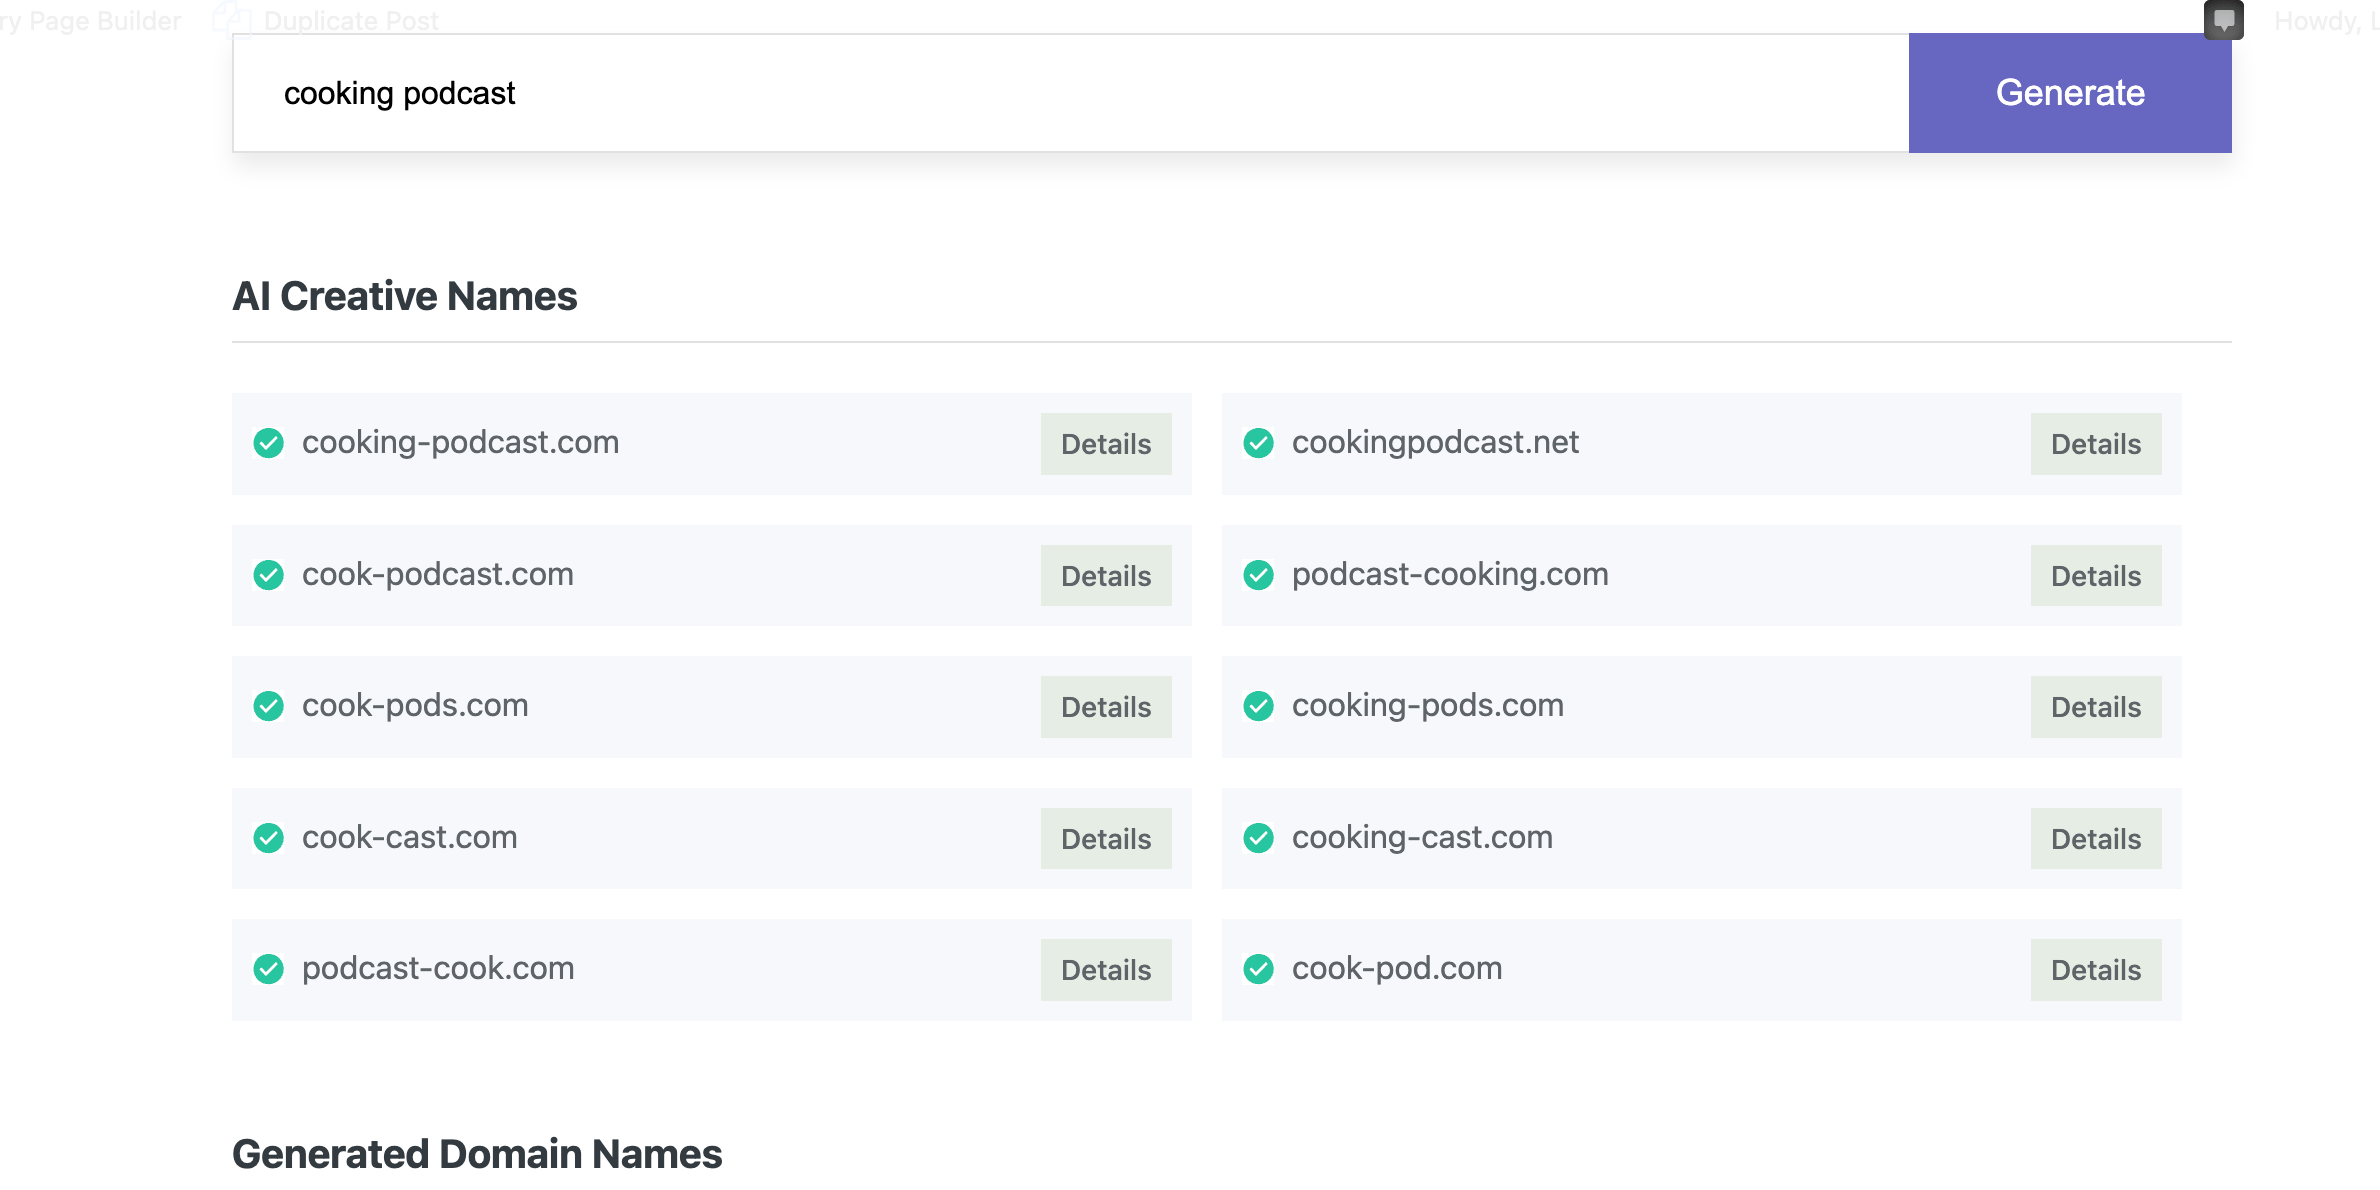
So let’s say, I have a company called Example and I start two podcasts named Swindled and Cold Cases. I can have a domain named example.com and subdomains for my podcasts will look like swindled.example.com and coldcases.example.com.
If all these seem too complicated then just go make your podcast name your domain name.
When people look for your podcast on search engines, the domain name that has the name of the podcast will catch people’s attention and help draw traffic to your website.
There are many domain registrars to choose from. We recommend you buy your domain name from the same service that is offering a hosting server and an SSL certificate. More on this in the next section.
Hosting Server
Besides a domain name, you also need a hosting server that will help store your website files and folders.
There are several hosting providers to choose from. Most hosting providers offer 3 major types of hosting plans: shared, managed, and VPS hosting.
The managed and VPS hosting are meant for advanced users and they are expensive. Shared hosting is for beginners and it’s affordable. So go for shared hosting providers.
There are many shared hosting providers out there. The popular ones are
You can start with any one of these providers. When you purchase a hosting server from any of these providers, be sure to purchase an SSL certificate too.
SSL Certificate
SSL certificates are software installed on your domain name. They validate your website's identity as a legitimate blog or business to the visitor as well as the web browsers.
Without the certificate, web browsers mark your website as insecure. SSL certificates are a mandatory part of any website.
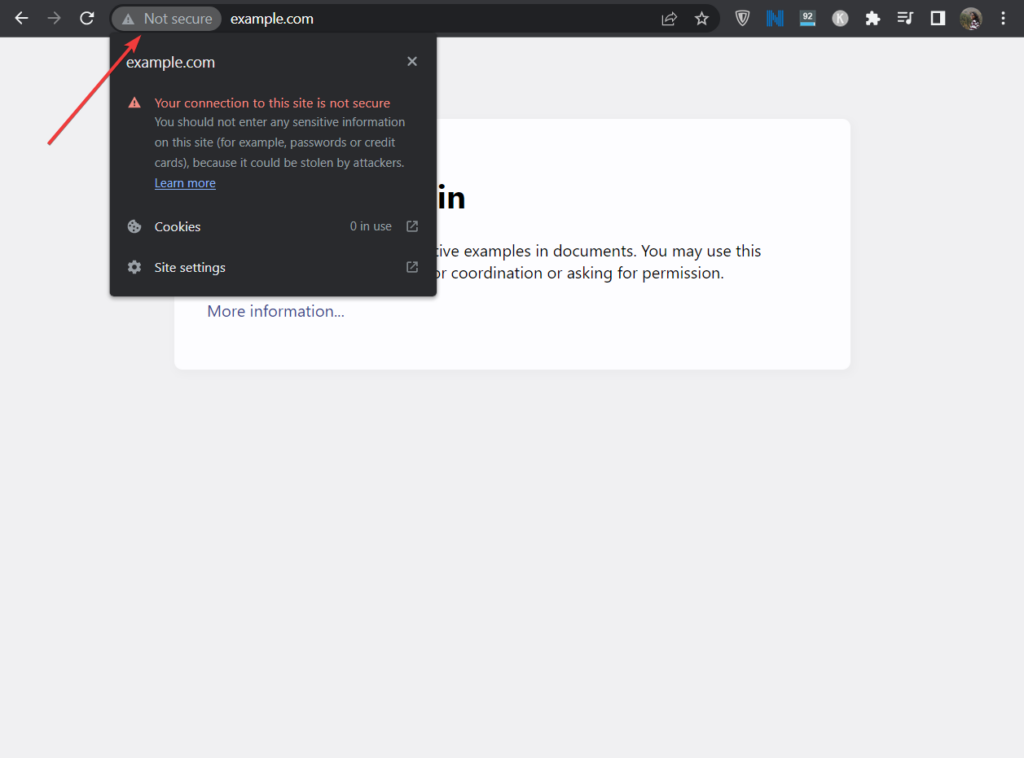
Hosting providers typically offer SSL certificates as well as domain names.
Most hosting providers offer a free SSL certificate in the first year and you only need to pay for the domain name and hosting server. So whichever hosting provider you choose, be sure to ask if they offer a free SSL certificate.
IMPORTANT: After purchasing the SSL certificate, make sure you install it into your domain before moving to the next step. Installation is not difficult but you will need some instructions. Installation instructions can be found in your hosting provider’s help docs. If you can’t locate the appropriate help docs then seek help from your hosting provider and ask them to install the certificate for you.
Step 2: Install WordPress
Apart from a domain name, hosting server, and an SSL certificate, you also need a content management system (CMS).
A content management system or CMS is a website-building software that helps you create and manage a site without having to code it. Thanks to such software anyone can create a website these days.
There are several CMS’ to choose from. The most popular CMS is WordPress and we will use show you how to use it to create a podcast site.
The first thing you need to do is install WordPress on your site.
Open your hosting account and go to cPanel from your hosting dashboard. Keep in mind that not all hosting providers offer cPanel. We have created a specific article for that: Best cPanel Web Hosting
The location of the cPanel differs from one hosting to another. In some hosting dashboards, the cPanel is easy to spot and in others (like in Bluehost), it’s hard to find.
Your hosting provider should have a help doc explaining how to access the cPanel. Find it. Or else seek help from your hosting’s support team.

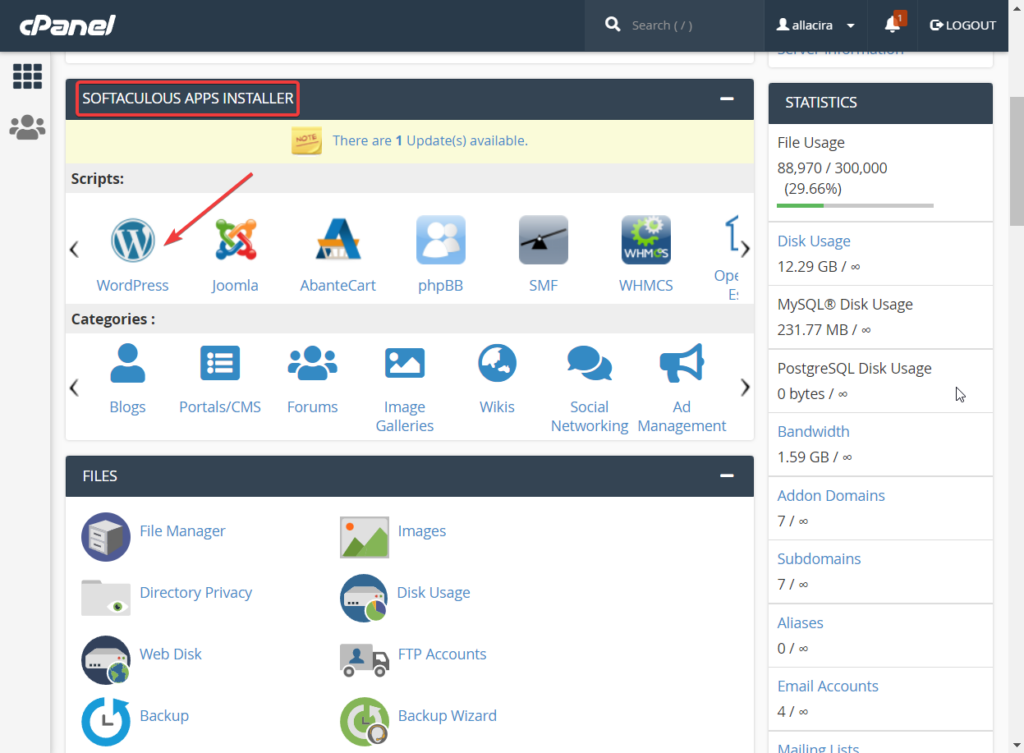
After you locate the cPanel and select it, you will be taken to the cPanel page. On that page, scroll down to the Softaculous Apps Installer section and select the WordPress option.
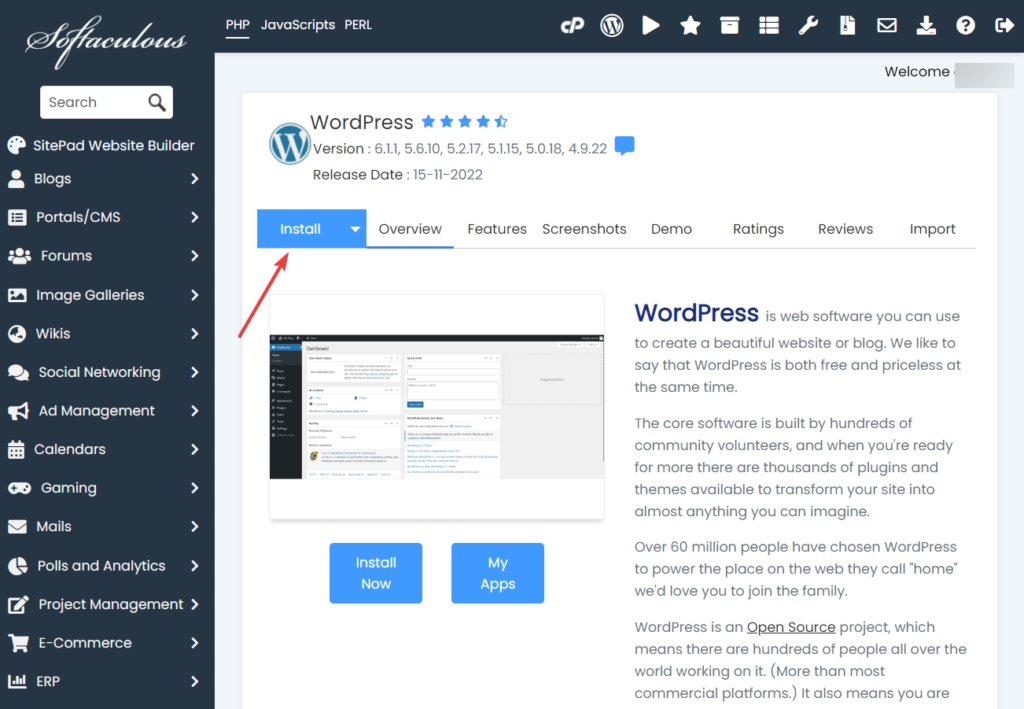
A new page will appear. Here you will install WordPress into your website.
What you will need to do is select the Install button. As soon as you do that, you will be taken to a different page.
On the new page, there is an option called Choose Installation URL. Under that, you will be asked to Choose Protocol and Choose Domain. Make sure you select https:// as the protocol and your new domain name.
Then hit the Quick Install button to initiate the installation of WordPress.
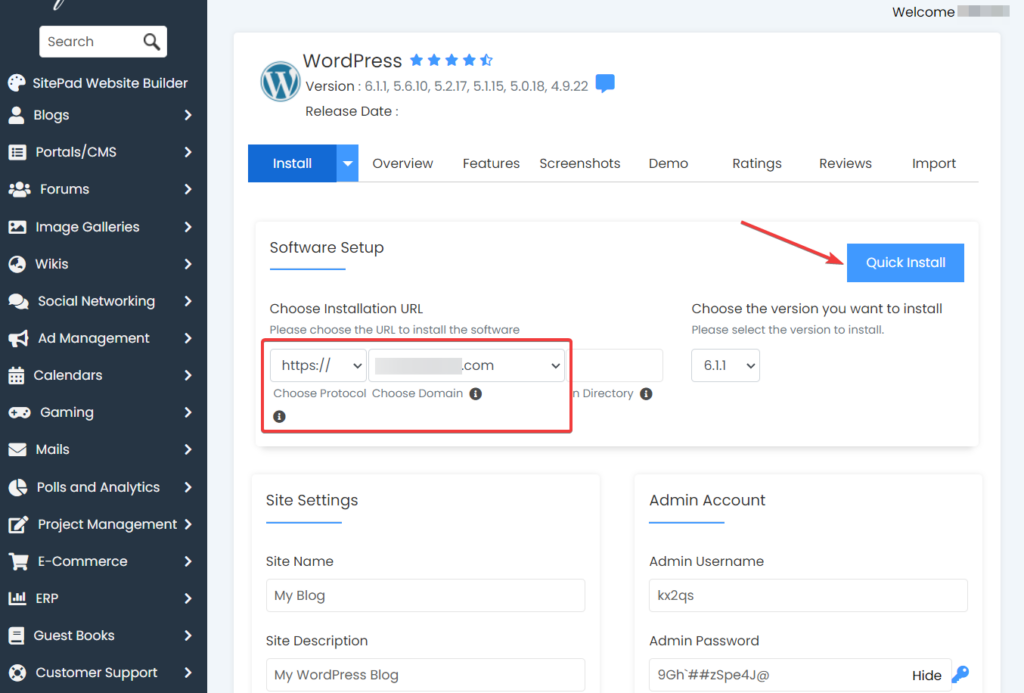
It will take less than a minute for the installation to be over. When it’s complete, Softaculous will give you the URL of your site’s login page along with a username and password.
Please note them down somewhere safe. You will need them going forward.
Step 3: Install a Dedicated Podcast Theme
There are several dedicated podcast themes to choose from but few offer comprehensive features as Livecast does.
Livecast is one of our best WordPress Themes created for podcasters. We are also known for creating high-quality themes for non-coders.
The theme offers 5 site templates, multiple audio players, and the ability to embed popular podcast platforms like Spotify, SoundCloud, Buzzsrpout, Deezer, etc in your website.
Although the theme integrates with Elementor (an extremely popular website editor) it also offers in-built design blocks that can be used to create beautiful posts and pages.
Livecast is compatible with dozens of other useful plugins like Advanced Custom Fields Plugin, Slider Revolution Plugin, and YellowPencil – Visual CSS Style Editor, etc. You can install these plugins to expand your site's functionalities without any fear of breaking your website.
Now let’s install Livecast into your new WordPress website.
First, kindly purchase Livecast. It’s a premium theme and costs $59.
After you have made the purchase, download the theme to your local computer. You would have received the theme in your welcome email or you can download it from your Themeforest account.
Next, open your hosting login page and use the URL you got from Softaculous in step 2 or click directly on the WordPress installation from cPanel admin.
On the WordPress login page, insert your username, and password and hit the Login button.
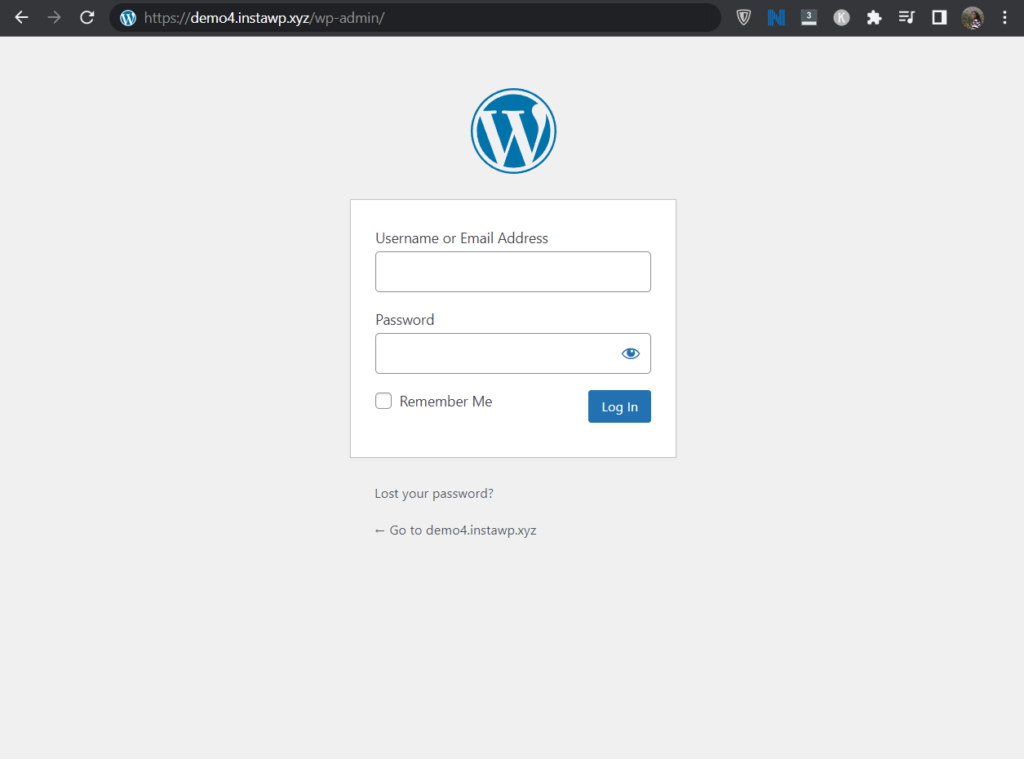
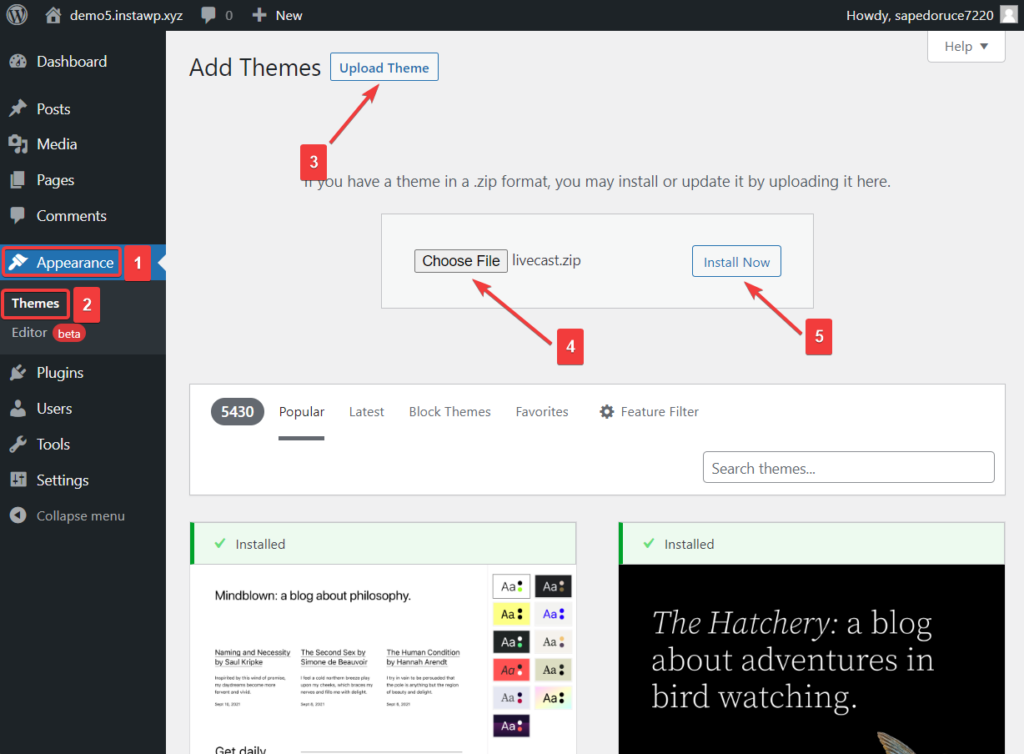
After logging in, you will be taken to your WordPress admin page. On this page, navigate to Appearance > Themes > Add Theme.
Open the folder downloaded from Themeforest and unzip the folder livecast.zip.
Upload the theme .zip file from your local computer using the Choose File option. Then hit the Install Now and Activate buttons to complete the installation.
If you have problems with the installation of the theme please check the Envato tutorial on how to install a theme.
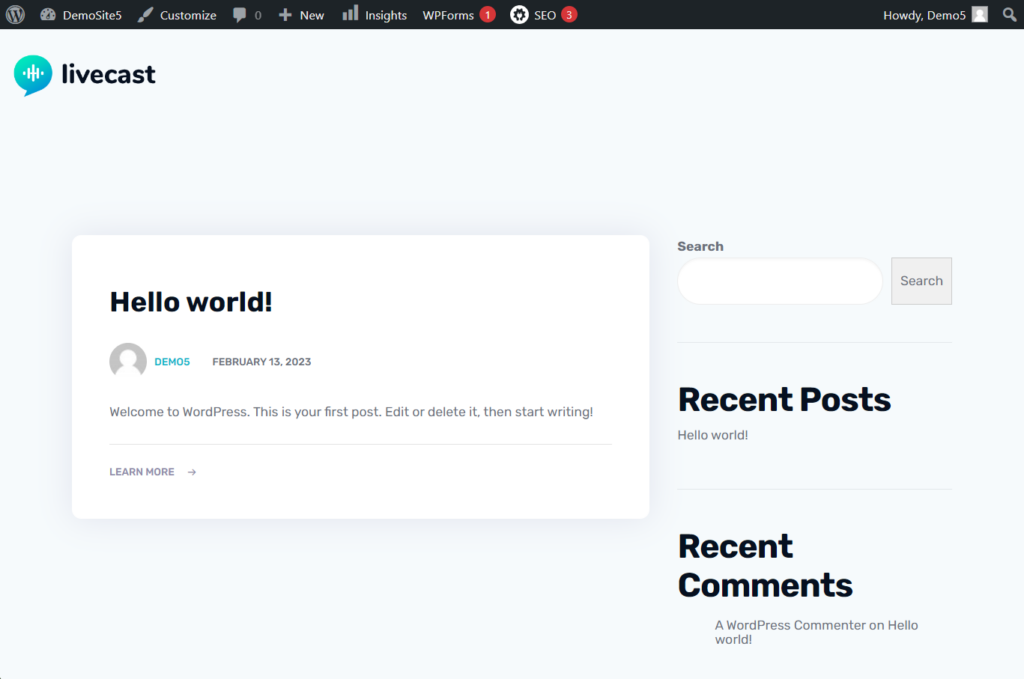
After the installation is over if you visit your homepage, you will notice how bland your site looks. Don’t worry! By the end of the next step, your site will look like it was designed by professionals.
Step 4: Import Livecast Pre-built Site
As we have mentioned several times in this article, Livecast offers prebuilt websites that can be imported into your website. Here are the steps you need to take:
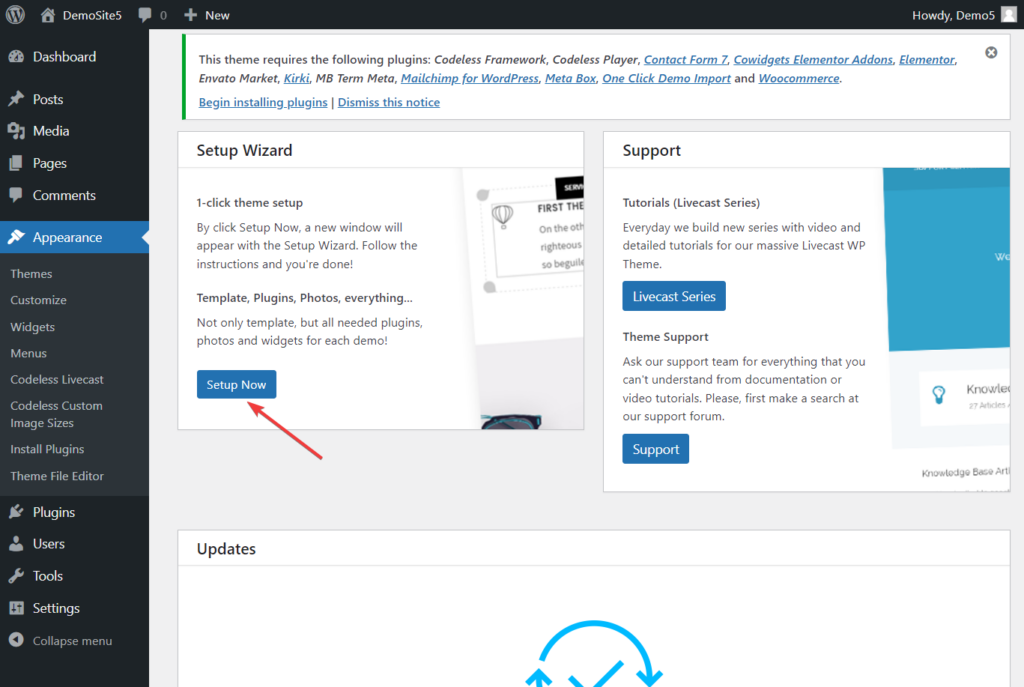
Go to Appearance and select Setup Now under Setup Wizard.
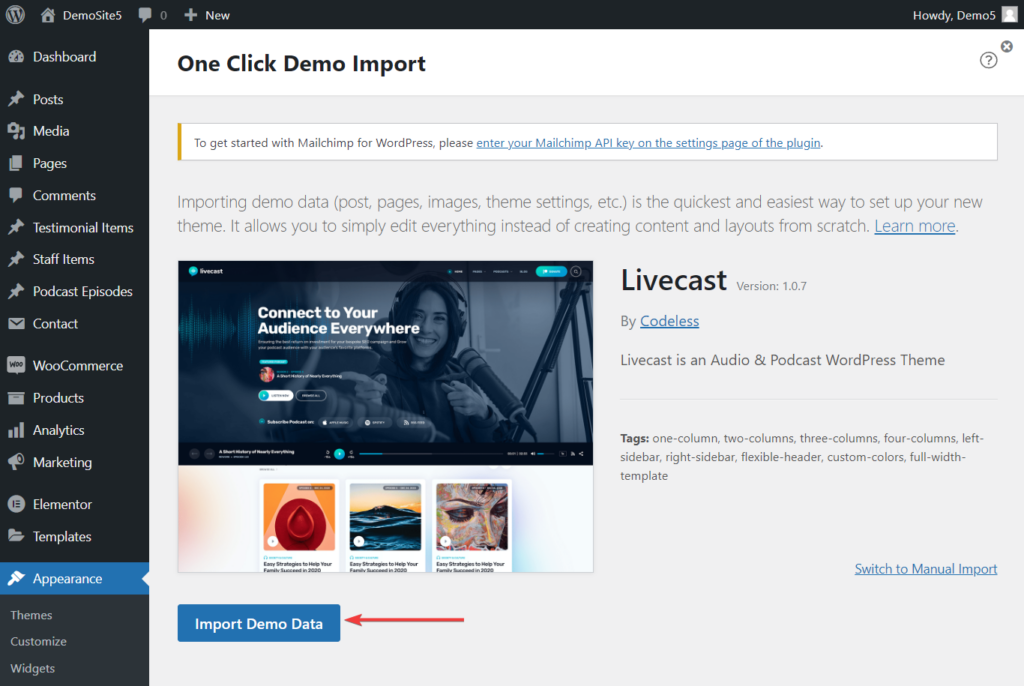
Then on the next page, select the Import Demo Data button.
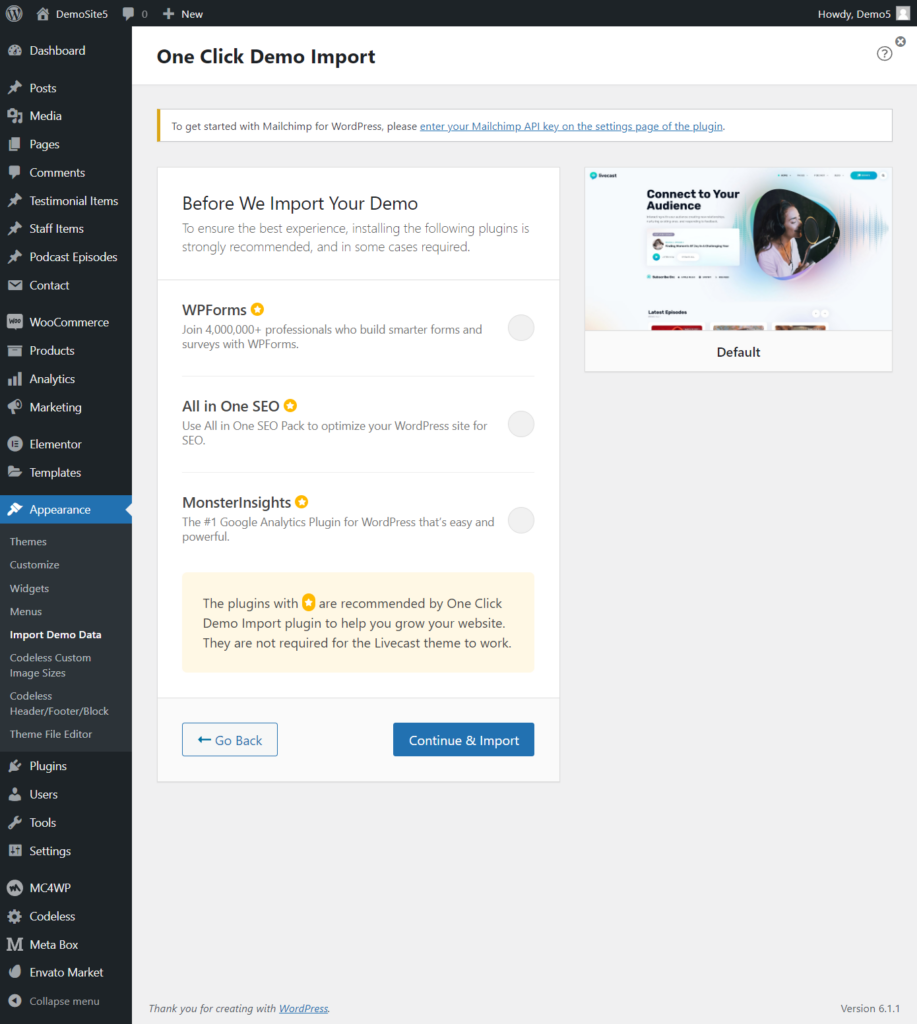
You will be taken to another page where you need to decide if you want to install the WPForms, All in One SEO, and MonsterInsights plugins.
WPForms helps create contact forms, All in One SEO enables optimization of posts and pages for the search engine and MonsterInsights shows data on your admin dashboard on how your site is performing.
We recommend selecting all the plugins and then hitting the Continue & Import button to start the import process.
It will take a couple of minutes for the import process to complete.
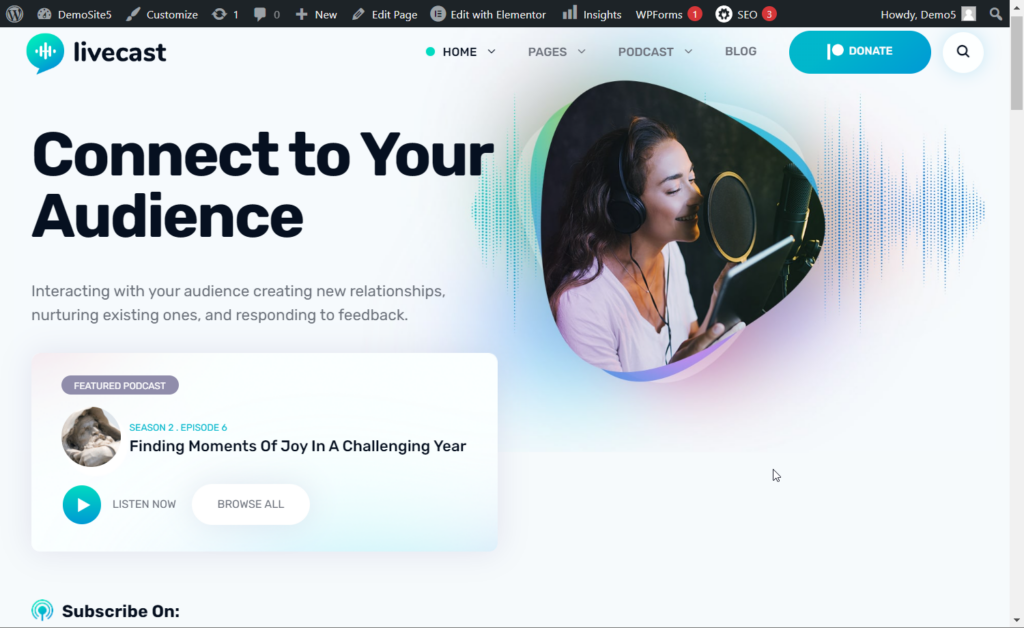
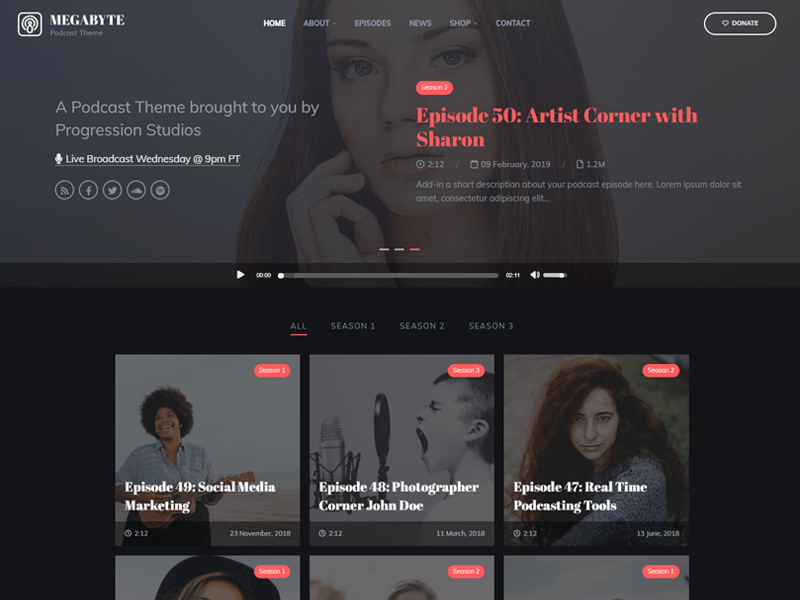
Once it’s over, visit your homepage. It should look something like this:
Step 5: Customizing Website
So far you have installed the Livecast WordPress podcast theme and imported a prebuilt site. Now it’s time to modify the website according to your needs.
You can start by doing the following:
- Change the content of all the pages
- Change the color scheme of the site
- Add logo
- Change content in header and footer
- Add podcasts episodes
- Add staff and testimonials
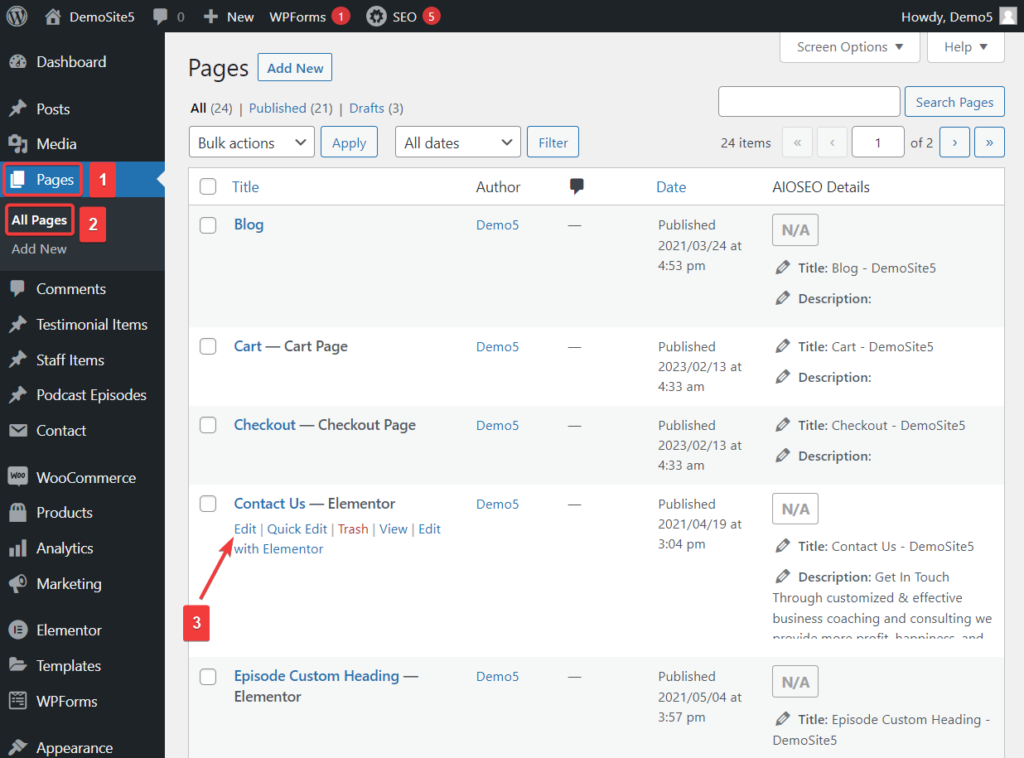
To modify your pages, go to Pages > All Pages and select the Edit button beneath the page you want to access.
Your site already has Elementor (one of the best page builders) already installed. You can use it to modify and add professional designs to your pages.
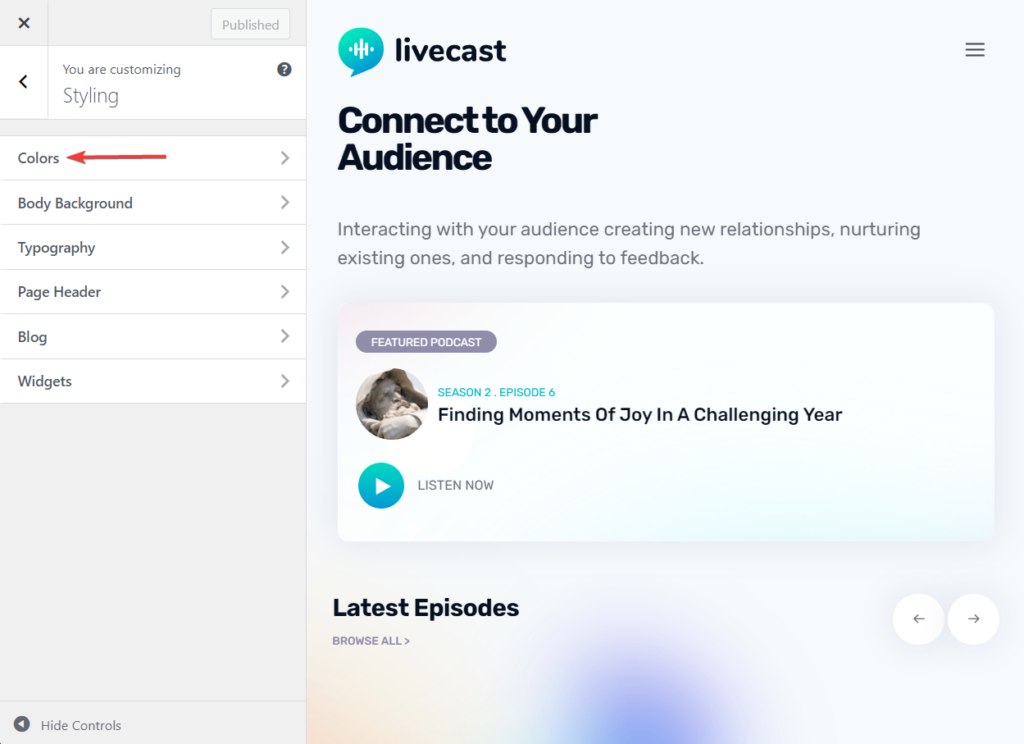
To change the site’s color scheme, go to Appearance > Customize > Styling > Colors.
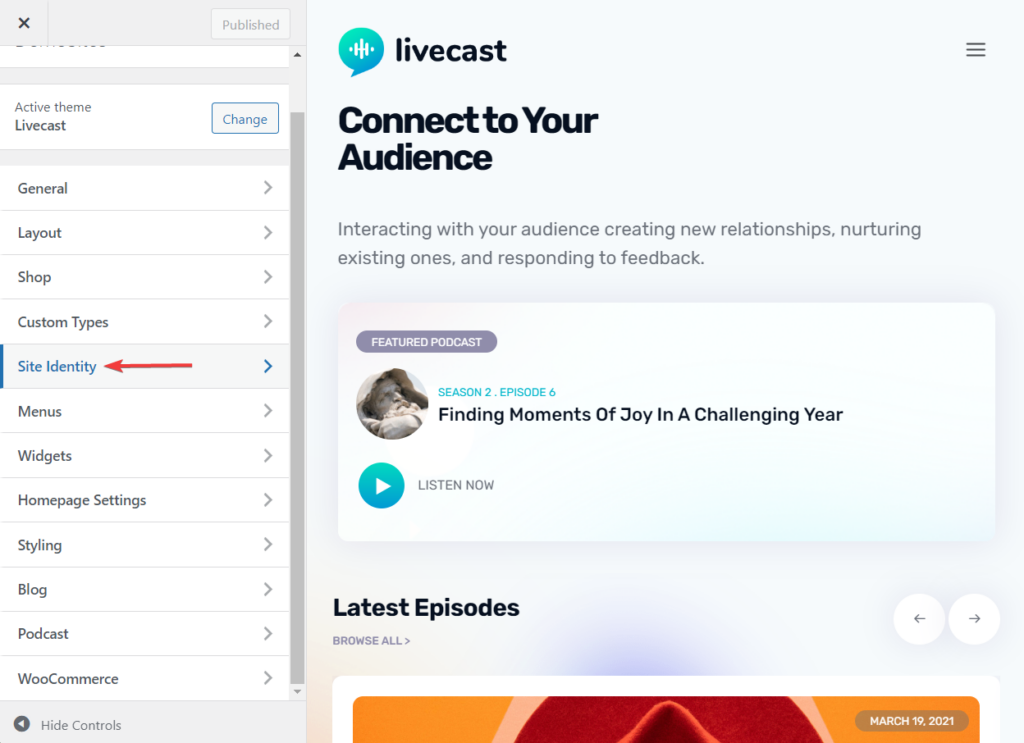
You can add the logo by going to Appearance > Customize > Site Identity.
The header and footer can also be modified using the customizer. We recommend that you spend some time going over each option in the customizer and changing them based on how you want your website to look and operate.
Podcast episodes have to be first uploaded to the media library and then added to the pages in the Podcast Episode section.
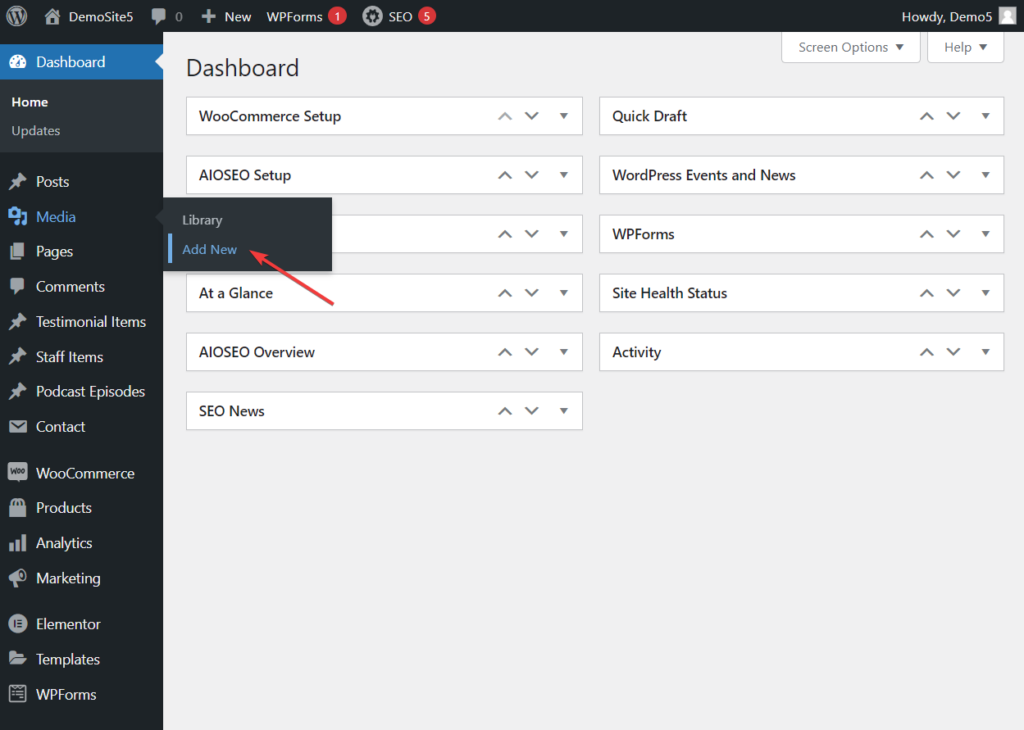
To upload episodes, go to your admin dashboard and navigate to Media > Add New. Then upload the episode files from your local computer to your website.
Next, go to the Podcast Episodes section and you will find several podcast posts that you can modify and add the podcast episodes to.
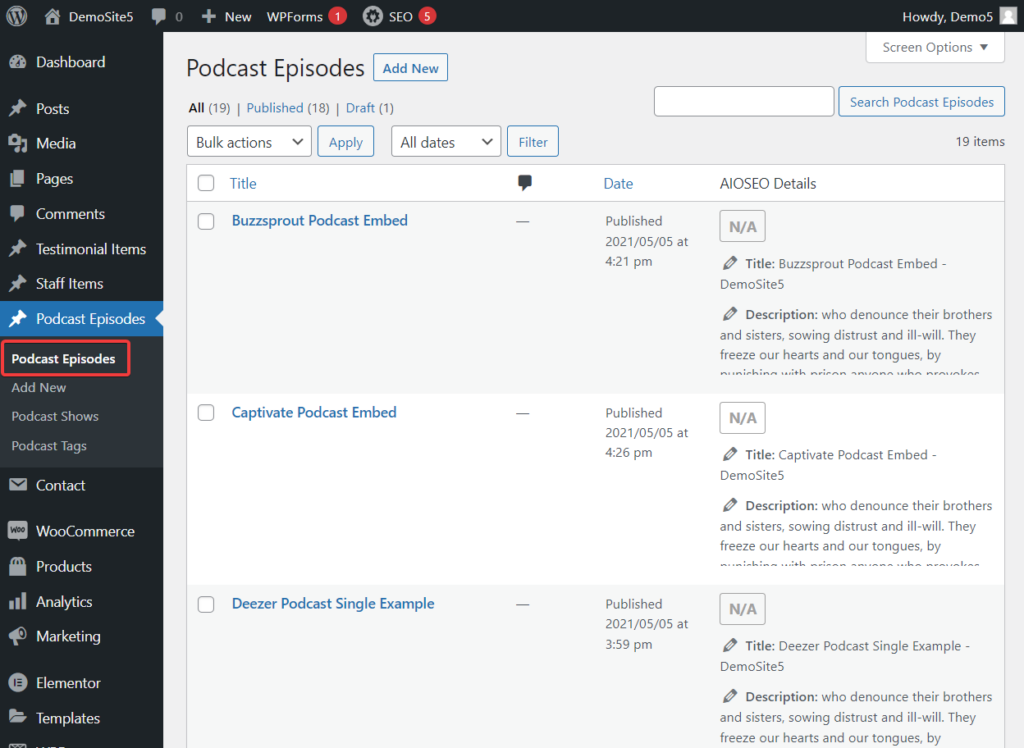
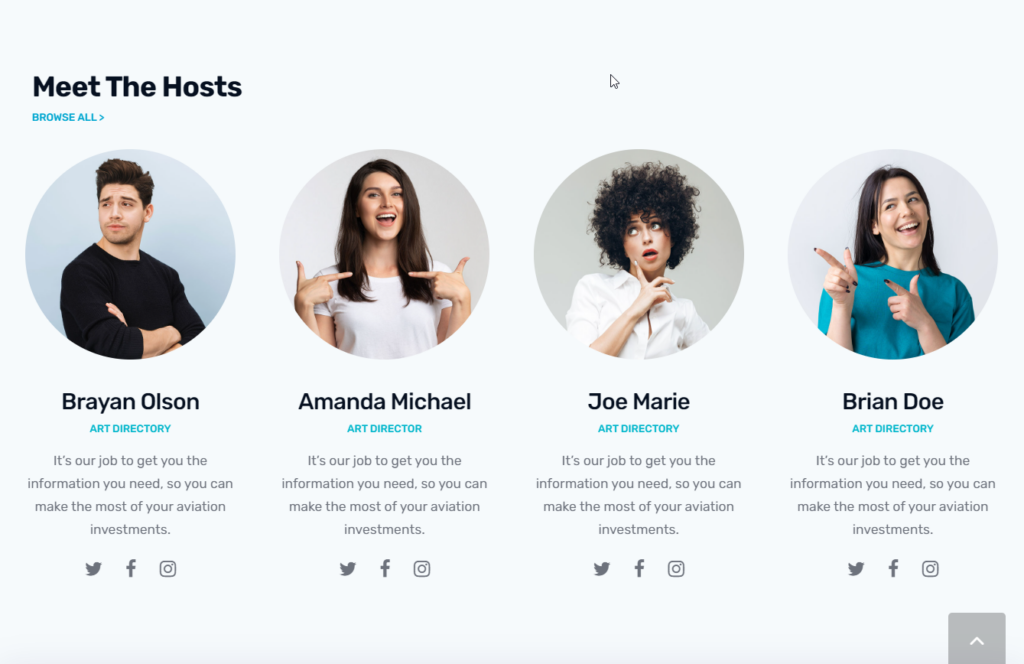
Right above the Podcast Episodes section, you will find the Staff Items and the Testimonial Items.
Staff Items allow you to show your podcast's cast and crew members to your site’s visitors.
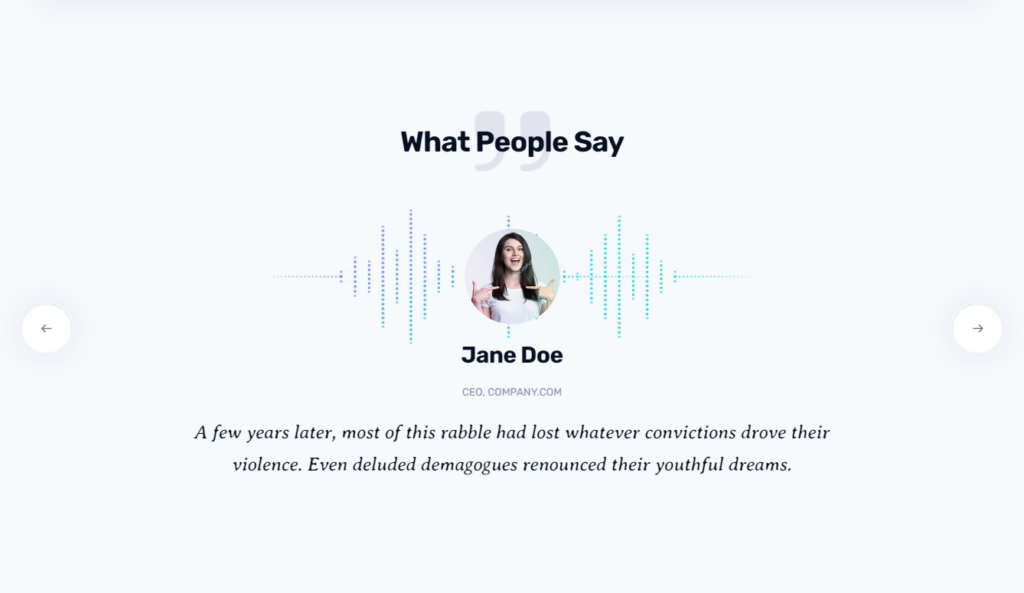
Testimonial Items allow you to add testimonials from your listeners and patrons to various pages on your website.
Needless to say, modifying the Livecast prebuilt website will require time and effort. You may have to take breaks and return to continue with the modification after some time.
Whenever you move away from your laptop, remember to hit the Save Draft or Update button, or else you might end up losing the work you have done.
Step 6: Configure Existing Plugins & Add More Plugins
When you were importing the Livecast prebuilt site back in step 4, you would have also imported several plugins.
You can check which plugins are installed on your site by going to Plugins > Installed Plugins.
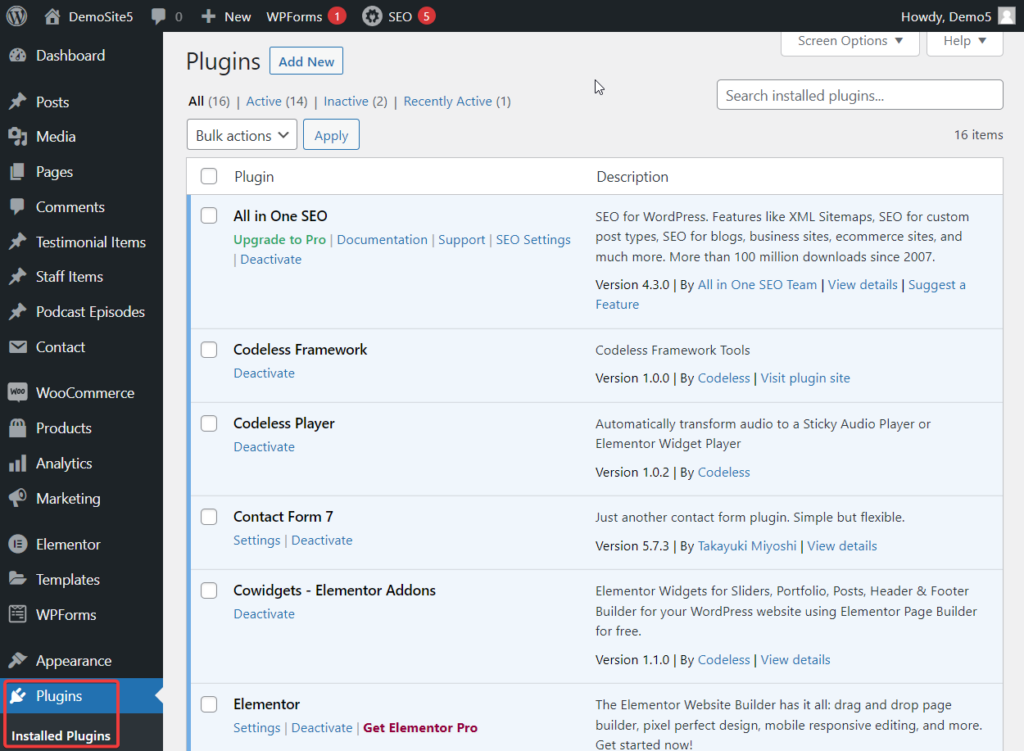
Some of these plugins (like the All in One SEO, MonsterInsights, Mailchimp for WordPress, WooCommerce, WPForms, etc) need to be configured so that they can work properly on your website.
Covering how to configure these plugins are beyond the scope of this tutorial. We recommend you do a quick Google search and set the plugins up properly.
As you start using your website daily, you may feel the need to install new plugins to add more functionalities to your site. Installing too many plugins can cause your site to become slow. So just remember that a good rule of thumb is to never exceed 20 plugins.
Step 7: Configure WordPress Setting Pages
WordPress settings dictate how your website functions and interacts with visitors. The default settings are not suitable for many websites so you need to review them and make modifications if required.
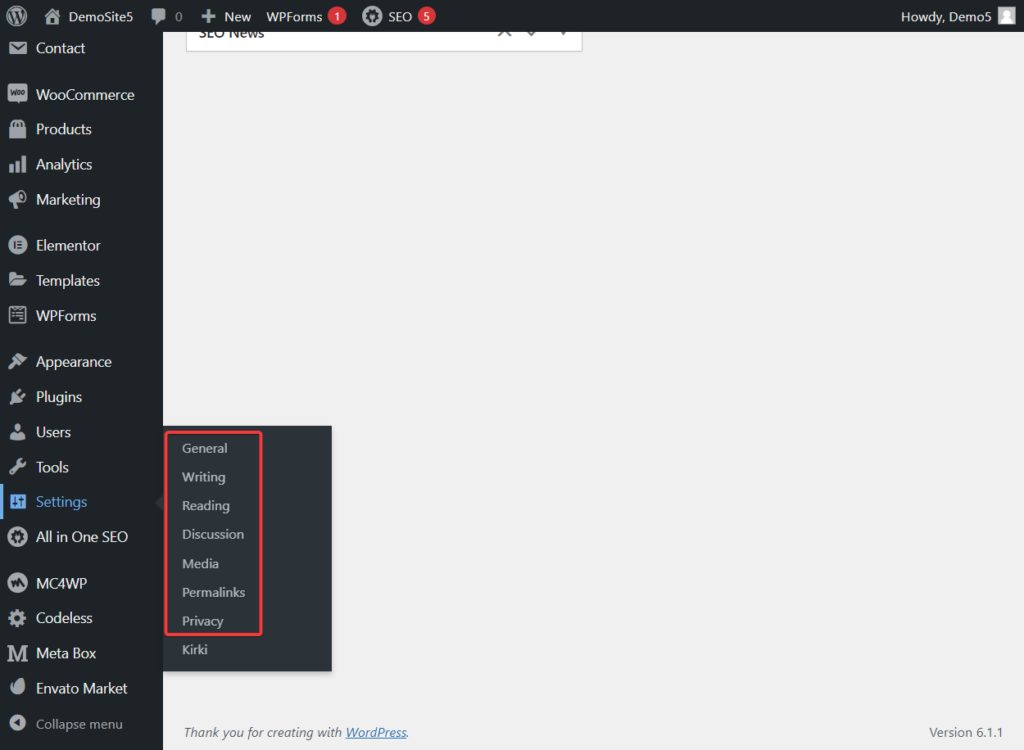
You can access the WordPress settings section from the left side of your admin dashboard. When you hover your cursor over the Settings section, it will reveal a couple of pages. The first 7 pages are default setting pages and you will need to configure them using these guides: General, Writing, Reading, Discussion, Media, Permalinks, and Privacy.
Step 8: Add Pages
There are some common pages that every website should have. Those are
- About us
- Contact
- Editorial process
- Ads and affiliate policies
- Privacy policy
- Terms and conditions
- Sitemap
The contact and privacy policy pages should already exist. They were imported from the Livecast prebuilt site. You will need to create the rest of the pages.
The sitemap can be created using the All in One SEO plugin. As for policies, there are plenty of ads, affiliates, terms, and condition generators on the internet. You can use them but we recommend getting the pages checked by a professional before making them live on the site.
Step 9: Create Social Media Profile
Having a social media account is recommended for podcast websites because it can be a great place to build a community and a loyal fanbase. You can get instant feedback from listeners which will help improve your show and you would have an audience ready to fund and listen to your new shows.
That said, building a social media following is hard but not impossible. There are many tried and tested strategies that you need to implement on your social media accounts and see what works for you.
Step 10: Add an Email Subscription Box
Like social media, email can build a fanbase and keep the community engaged in your business.
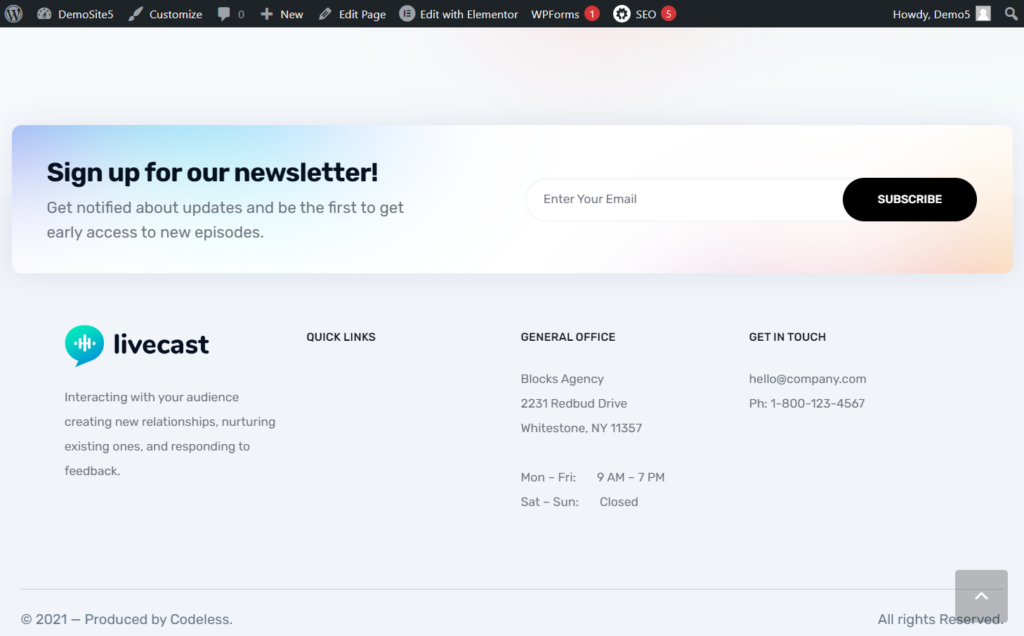
You should install email subscription boxes throughout your website to enable visitors to subscribe to your newsletters.
Luckily, the Livecast prebuilt site that you imported has already installed email subscription boxes on various pages of your website. All you need to do is configure the email plugin (i.e. Mailchimp for WordPress) and test the subscription boxes.
Step 11: Set Up Shop & Funding Accounts
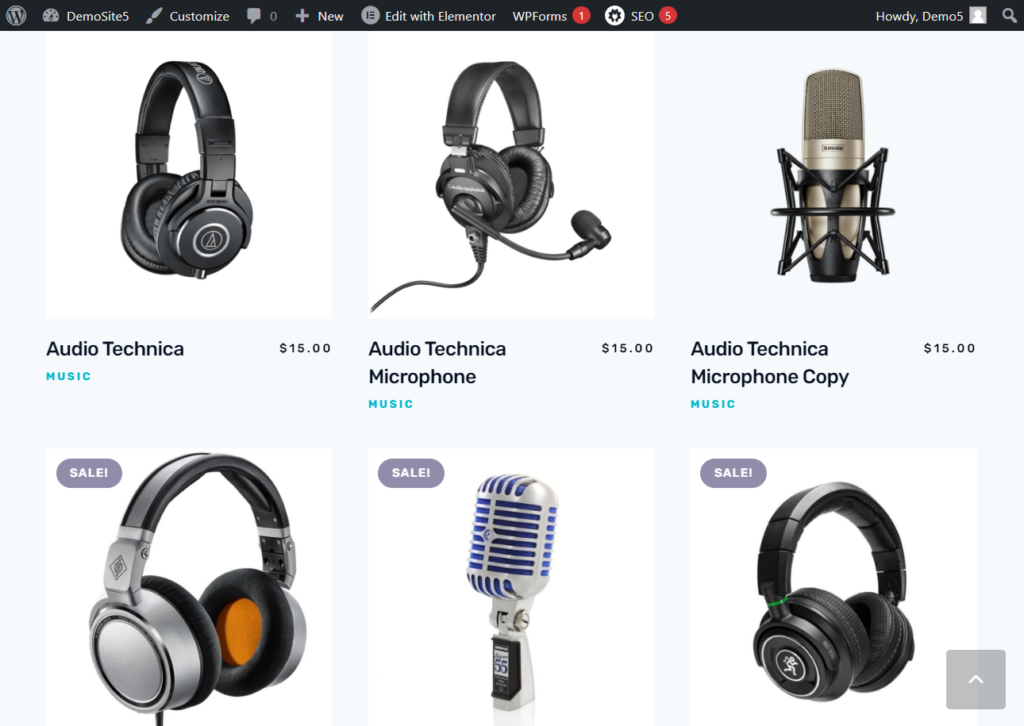
Running a podcast business is expensive. You can counter the cost by selling merchandise on your podcast website. Thanks to the Livecast theme import, you already have e-commerce software called WooCommerce installed on your site. You will need to configure the plugin and then add your merchandise as products.
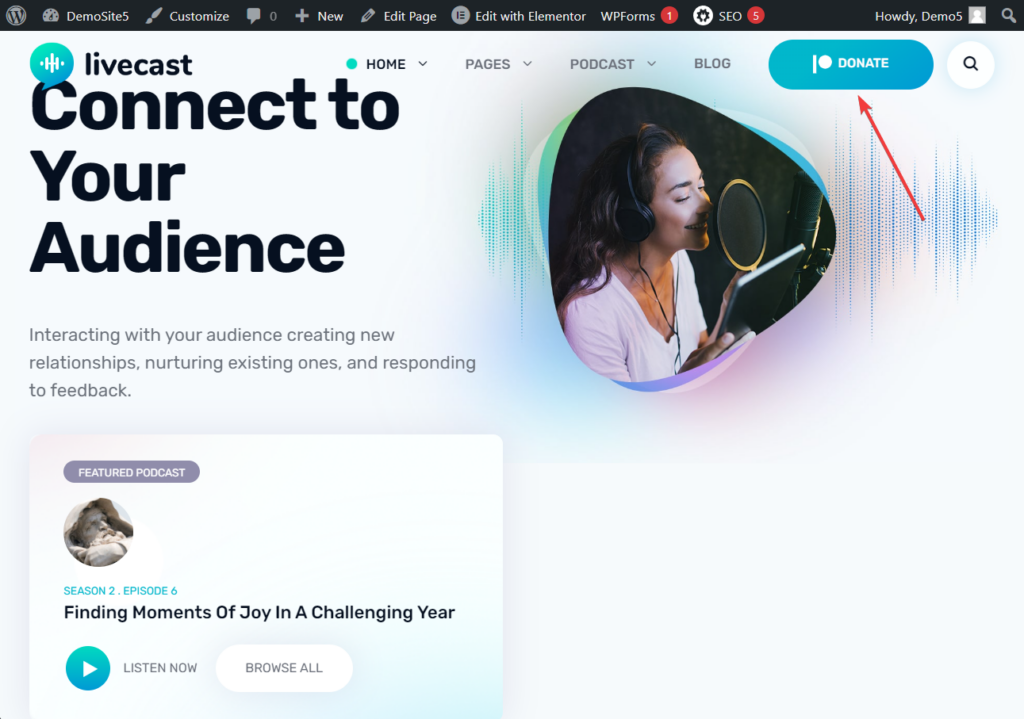
Apart from this, you can set up a Patreon account seeking help from the listeners. You will notice several donation buttons on the website. Add the link to your Patreon page to those buttons.
When you reach a point where hundreds of thousands of people listen to your podcast each month, you can seek advertisement opportunities.
You might be interested in reading more about the podcast hosting platforms: 9 Best Free Podcast Hosting Sites (+ their limitations)
Conclusion
Creating a podcast website is not difficult but since it involves several steps, the tutorial may seem overwhelming as you read it. Trust us, this is the easiest way to get a podcast website up and running.
Thanks to the Livecast WordPress theme you don’t have to build a website from scratch. All you need to do is modify existing pages and configure the default settings.
We strongly recommend that you spread the task across a couple of days.
With that, we have come to the end of this tutorial. Let us know if you have any questions in the comment section below.
As one of the co-founders of Codeless, I bring to the table expertise in developing WordPress and web applications, as well as a track record of effectively managing hosting and servers. My passion for acquiring knowledge and my enthusiasm for constructing and testing novel technologies drive me to constantly innovate and improve.
Expertise:
Web Development,
Web Design,
Linux System Administration,
SEO
Experience:
15 years of experience in Web Development by developing and designing some of the most popular WordPress Themes like Specular, Tower, and Folie.
Education:
I have a degree in Engineering Physics and MSC in Material Science and Opto Electronics.


Comments