
- Why build a website?
- Why create a website using WordPress?
- Step 1: Choose domain and hosting
- Step 2: Choose and Install a WordPress Theme
- Step 3: How to customize your website
- Step 4: Extend functionalities with plugins
- Step 5: Create pages and add content
- Step 6: Add site navigation and widgets
- Fine-tune and Launch your website
- Conclusion
Are you interested in learning how to create a website using WordPress as a beginner?
A website provides a professional look for whatever you intend to share with the world. Websites have grown to become an integral part of our day-to-day lives.
Just like learning how to drive or swim, being able to build your own website is fast becoming an important life skill. In 2023 are about 198,988,100 active websites all around the world
This article will teach you how to create a website using WordPress. You will learn how to set up a domain and hosting. In the end, you will also learn how to fully customize your site with a functional theme, plugins, and page navigation.
- Step 1: Choose domain and hosting
- Step 2: Choose and Install a WordPress Theme
- Step 3: How to customize your website
- Step 4: Extend functionalities with plugins
- Step 5: Create pages and add content
- Step 6: Add site navigation and widgets
You do not need prior experience in website development or software development to follow this article.
We have also created specific guides for different types of websites:
- How to Make a Small Business Website (WP)
- How to Create WordPress Portfolio Website
- Guide to Creating a WordPress Podcast Website
- How to Build a News Website With WordPress
- How to Create a WordPress Restaurant Website (with Food Ordering)
- How to Create WordPress Photography Website (Vibrance Theme)
- Start a WordPress Blog
Why build a website?
Whether you are in business, looking for a job, in school, or simply chasing after your hobbies, you can always benefit from having a website. There are a number of benefits to building your own website. These include:
- You will save money. Building your own website will save you from having to worry about paying developers to create it for you. This is an ideal option for someone who wants to start small.
- It is more efficient. Once you learn how to build your own website, you can always maintain and upgrade it when needed without having to wait for a web developer to do the work for you.
- It gives you more control of your site. You learn more about your site by building it which allows you to better control and respond to issues when they arise.
- It opens your world to more possibilities. You can connect with more like-minded people, set up a business online, create a passive income stream, get new clients, and much more by just having a website.
Why create a website using WordPress?

WordPress is a site builder that allows you to set up a website in a short time and without having to write a single line of code.
It is the best and biggest website builder on the internet powering more than 40% of the internet. This makes it an obvious option for many people looking to build their websites.
As a rule of thumb, your website builder should provide you with three things:
- Flexibility – it should be flexible enough to allow you to move your site to another platform without losing data or having to redo the whole website.
- Variety – It should have different features that enable you to build a fully functioning site. This includes fonts, themes, color options, and plugins.
- Ease of use – Your website builder should be easy to use. Always consider picking a builder that supports no code implementation features such as drag and drop. This way, you can set up a website without any web development skills.
WordPress provides all that plus other features such as:
- It is a free and open-source platform
- It is secure
- It offers great customization
- It has a great community behind it
Step 1: Choose domain and hosting
Once you have your preferred domain name(s) and a preferred domain registrar, it is time to set up your domain and hosting.
Simply put, a website is a collection of interconnected files on the internet. These files can collectively be accessed through a domain, for example, www.cnn.com. Think of a domain as the name of your website.
If you are confused about your domain registrar, consider reading this guide on the best cheap domain registrars to use.
How to plan for your domain name
Your domain name is also more commonly known as a web address. Having a domain name is the first step in building and owning a website.
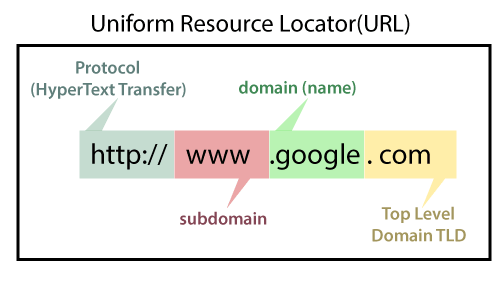
Domain names have two parts; the unique name of your website and the domain extension also known as a Top Level Domain(TLD). A domain extension is the combination of the last letters that come after the last period in a web address.
For example, in a domain like codeless.co, codeless is the name of the website and .co is the domain extension. The most common domain extension is .com.
Both play an important role in your website ownership journey. Combined, they can tell potential visitors more about you. For example, an address like audiobook.com tells potential visitors that they are going to expect audiobooks within the website. An address that ends with a .uk tells people that the institution that owns the website is located in the UK.
As such, it is always important to plan for a domain name and decide which domain extension works best for you.
1. Always get a .com extension
Whether you were planning on getting a .net, .org, or any other extension other than .com, it is always advisable to get a corresponding .com extension.
Remember, the .com domain extension is the most popular extension in the world. This means that most people will type .com at the end of a web address even when the address has a .org or .net extension.
Also, if you only get a .net domain, someone else could just get a .com domain that’s similar to yours and you’ll start competing for traffic.
Therefore, even when your plans revolve around having another extension, it helps to buy a .com extension and redirect traffic to your original site.
Here you can learn more about the differences between them.
2. Have a variety of domain options
Chances are, you will not find your domain name on the first try.
Sometimes, your preferred domain was bought a few years back and you can’t access it. Also, there are people and companies on the internet who buy off these domains in large numbers so they can sell them as third parties.
Usually, these prices are way above what’s considered normal. For example, you might find your preferred domain being sold by a third party at $5000.
In that case, having at least 3 domain name choices ready allows you to go to the next available domain without wasting time. If you can’t find the right domain name, pick one that matches your preferred name.
3. Pick the right domain name
It is important to pick a domain name that aligns with your intentions of owning a website.
For example, if you plan to open an eCommerce website, having the name of your store as the domain name is highly recommended. And if your plan is to open a personal brand website, your name should be on the domain name.
4. Pick an accessible domain
Your domain name should be accessible to your audience. This means that it should be easy to type and remember.
Avoid using a mix of characters and symbols within your domain name. A domain name like netflix.com is more easily recognized and remembered than [email protected].
5. Pick the right domain registrar
A domain registrar should offer more than just a domain name. Your website will need a lot of support to run effectively.
Here are a few things you can check from your domain registrar.
- SSL certificates – Your domain registrar should offer a digital certificate to help protect your site and its data at all times.
- Security – Check out what security features they are willing to offer you with your yearly plan. This ensures that your site and site visitors are safe from malicious attacks from the internet.
- Downtime – How much downtime are you going to suffer every year? A registrar that has too much downtime might end up costing you your money and business.
- Site migration – Does your domain registrar facilitate easy migration to and from their service?
- Good Customer care – this allows you to quickly resolve issues with your website when they appear.
You can verify some of these features from online forums and review websites. The bottom line is, only pick a domain registrar with a great review online.
How to set up a domain
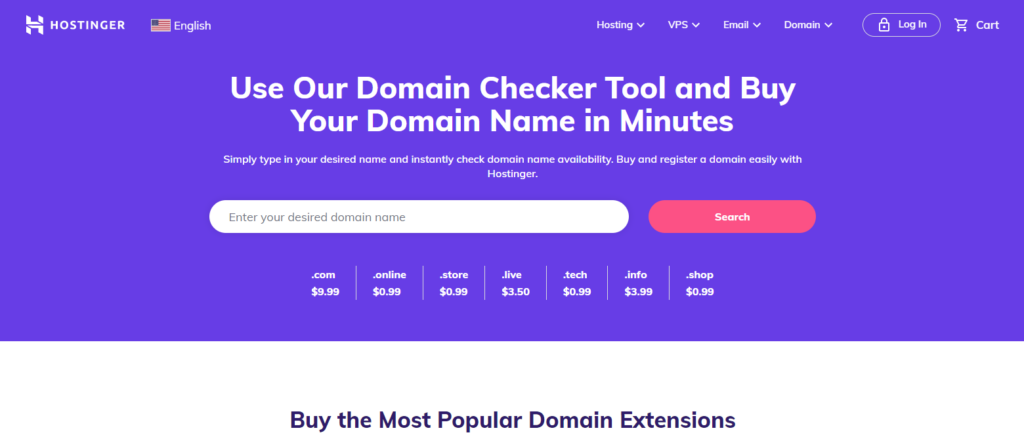
Domain registration is not hard. It is only a matter of setting up an account with your domain registrar and paying for a domain plan. We are going to use Hostinger, a great option for small business hosting.
To set up your domain:
1. Start by looking for a domain checker and searching for your preferred domain.
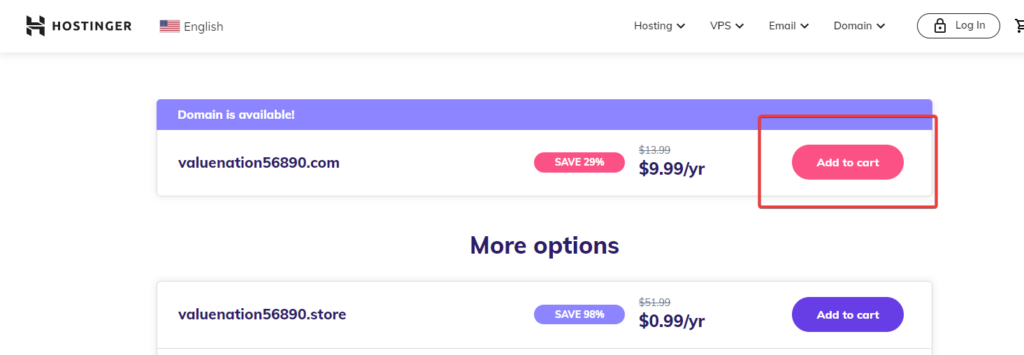
2. Check the pricing and confirm that it is within budget if your preferred domain name exists.

3. Click add to cart.
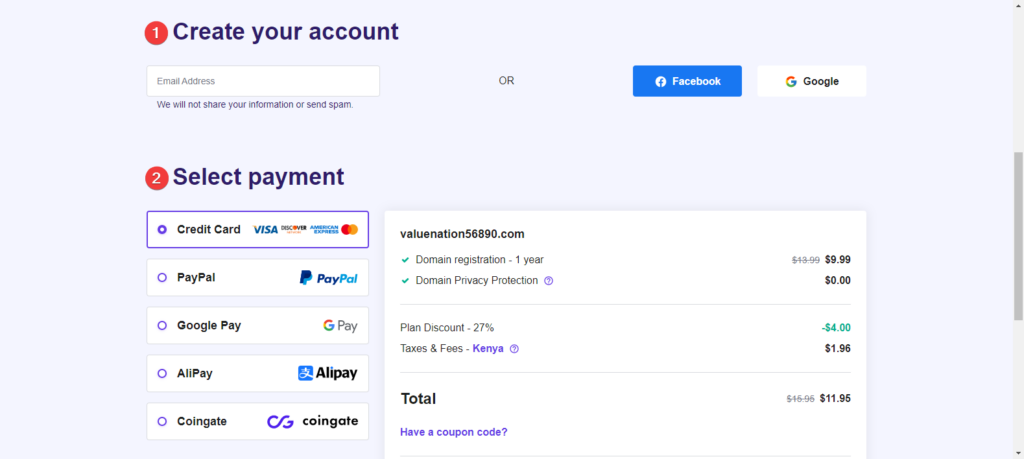
4. Create your account and provide your payment details
5. Fill out the details on the domain name registration page on your Hostinger control panel.
6. Wait for the domain registration to process to complete. This might take time depending on your registrar.
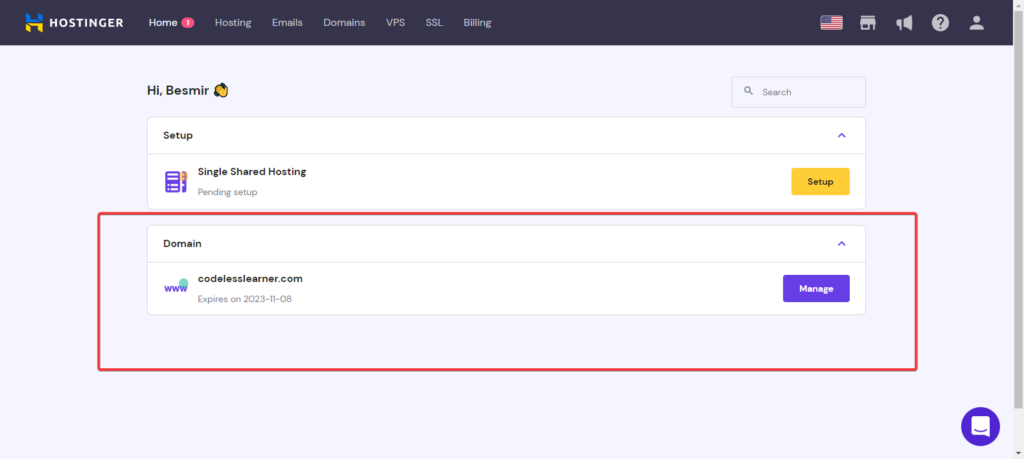
You should now see your domain details on your dashboard.
How to set up hosting
Once you are done with your domain, it is now time to set up hosting.
Hosting is usually provided by domain registrars. It allows you to store these files on the internet and allows people to access your website.
To set up hosting:
1. Click on the hosting tab right next to the Home link on your dashboard or on the prompt on your dashboard that requires you to set up your hosting.
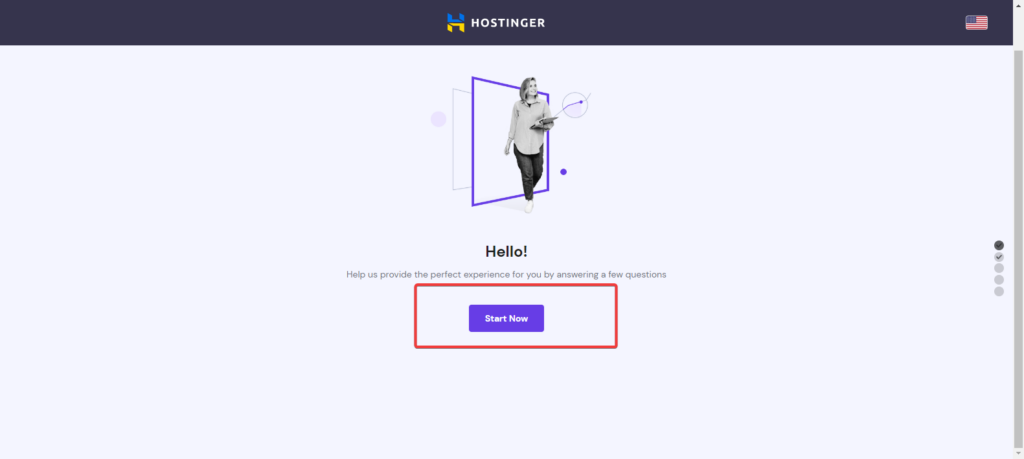
2. Click on the setup button on the Single Shared Hosting option on your screen. You will see a page with a welcome message.
3. Click on Start Now.
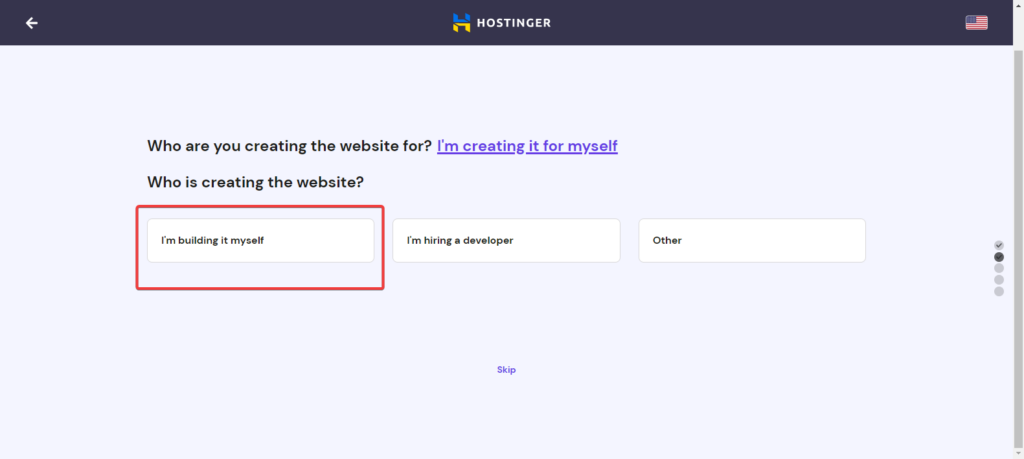
4. Pick an option when asked who you are creating the website for. You can skip if you are not sure what to pick.
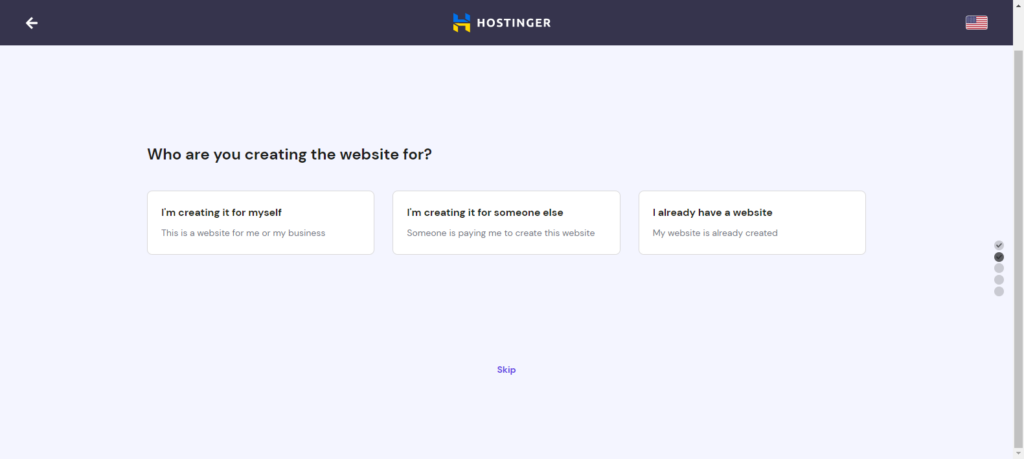
5. Select the “I am building it myself” option.
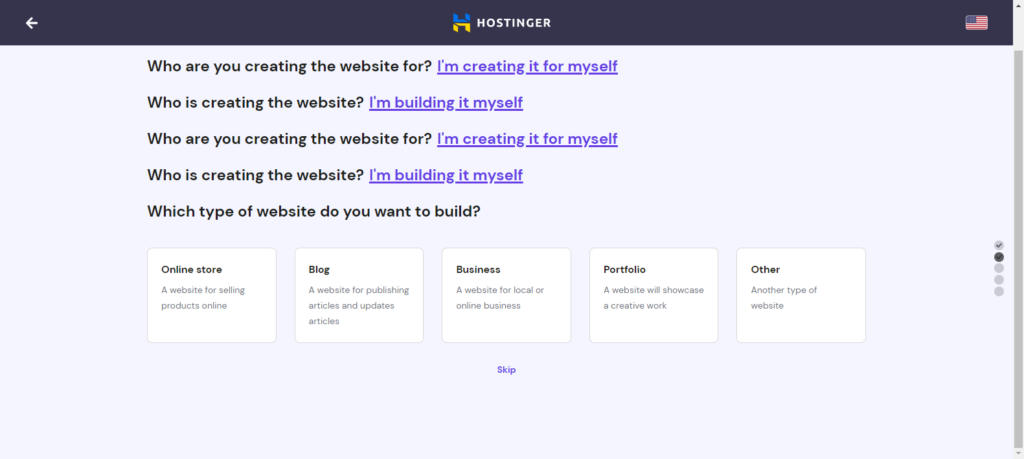
6. Decide what kind of website you want to create based on the options provided on the screen. If none of the options are aligned with your needs, pick Other or Skip.
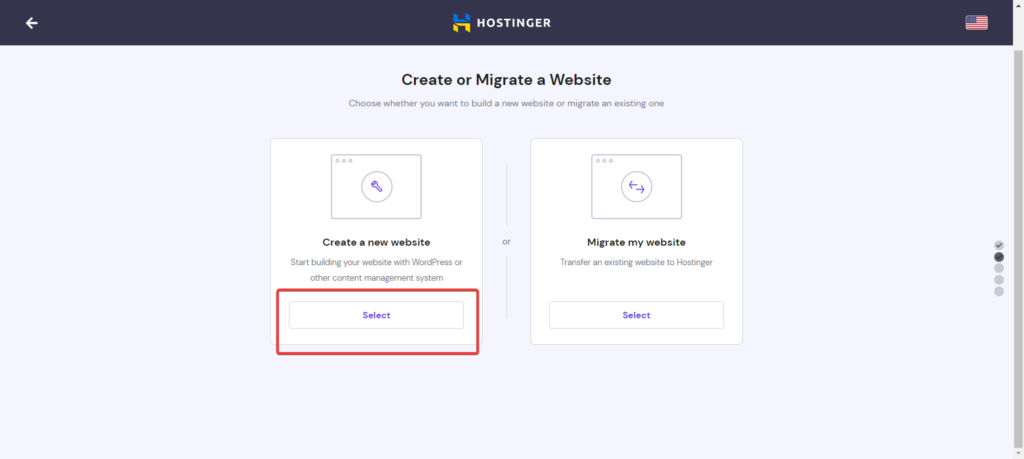
7. Click on the Create a new website tab.
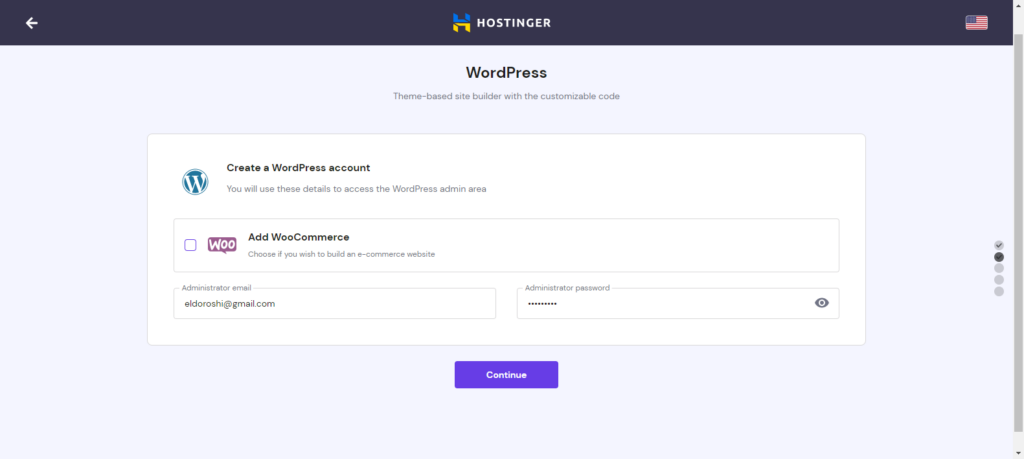
8. Pick WordPress as a building platform.
9. You can decide to add WooCommerce at his point if you are creating an eCommerce website. If not, click continue.
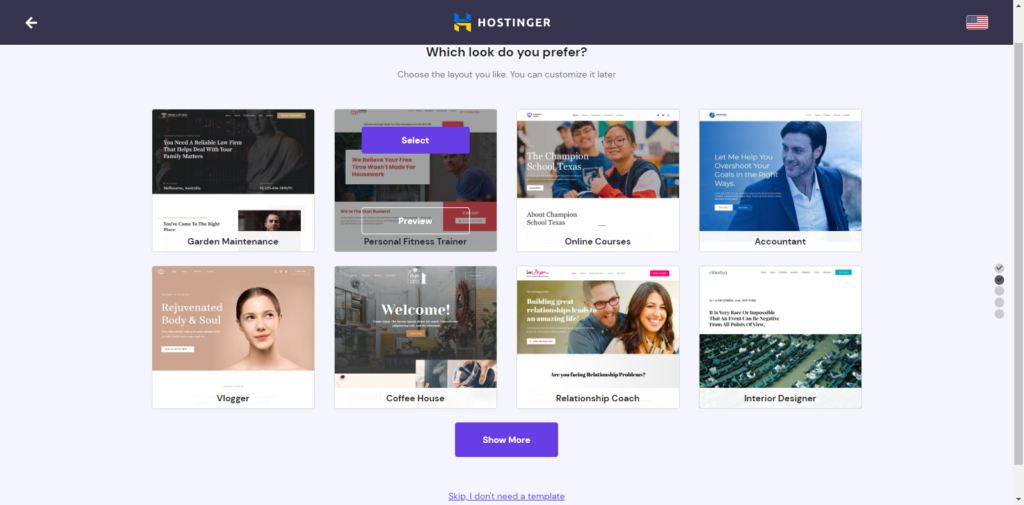
10. Choose a layout that best suits your preferred website. You can also decide to skip it for now.
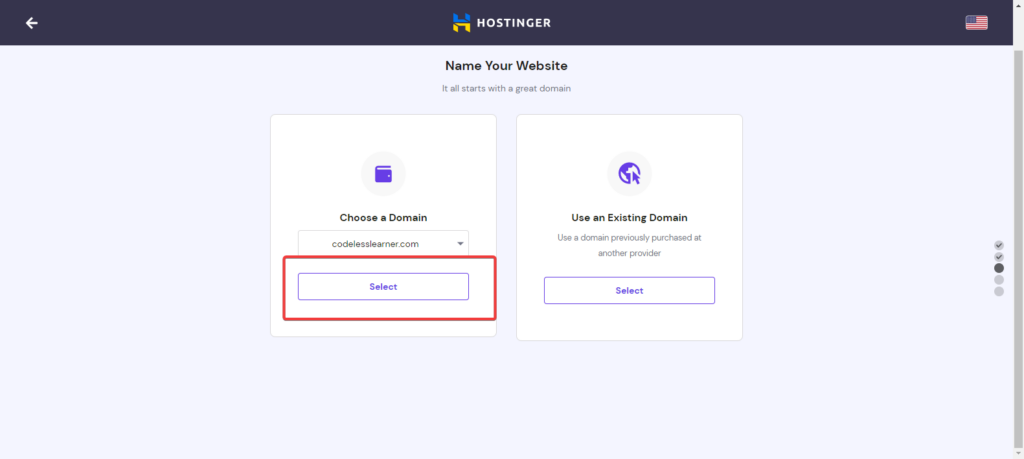
11. Click on your already registered domain once you see a tab labeled Choose a domain.
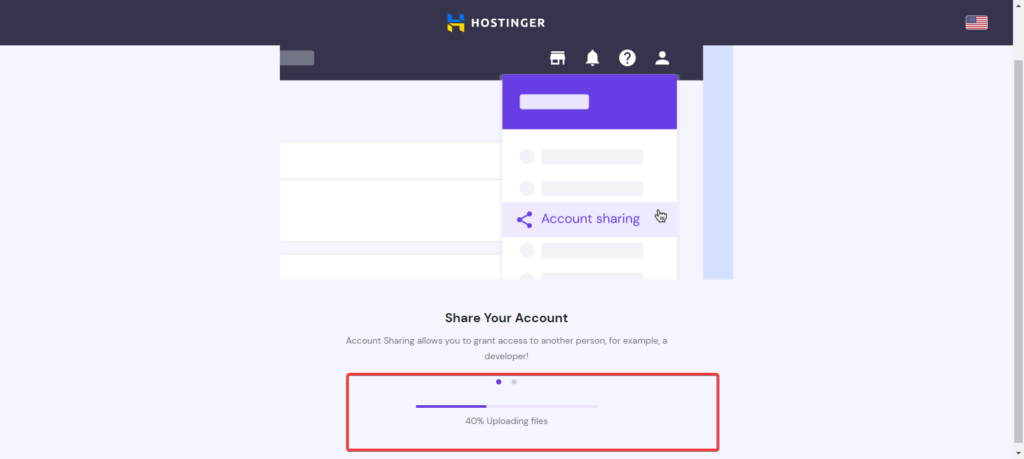
12. Wait for the setup to complete and click Finish Setup.
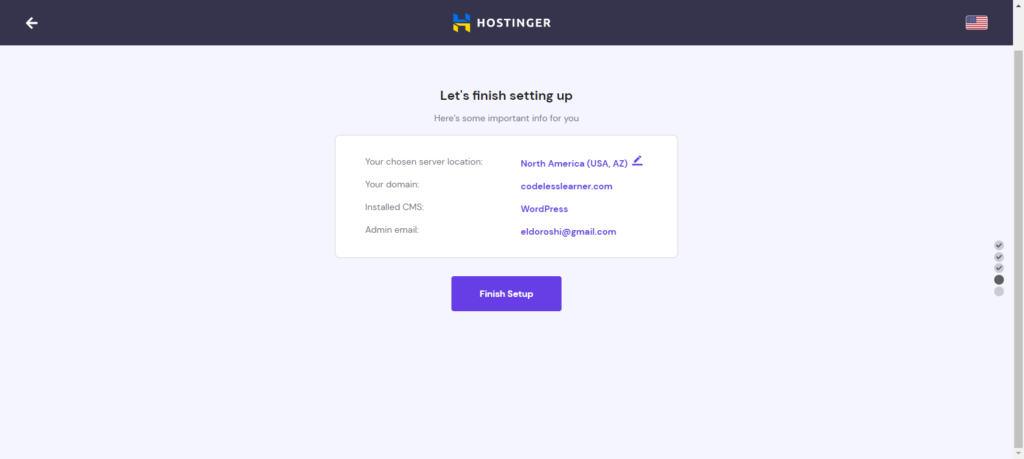
13. Wait for the setup to complete and for Hostinger to prepare your dashboard.
Once done, you are now ready to start editing your website in preparation for the launch. The page also provides you with access to your cPanel which works as the control panel for your site.
Step 2: Choose and Install a WordPress Theme
Once you have everything ready, your page should look like this.
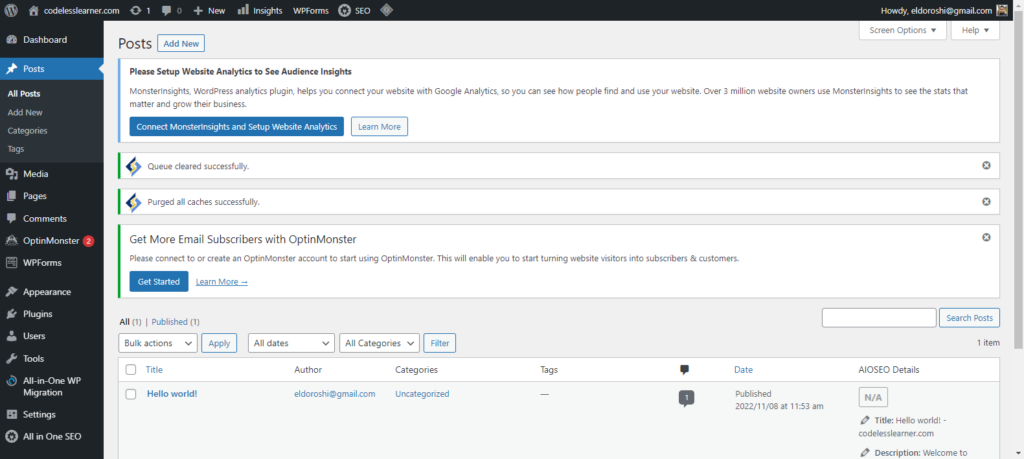
This is the dashboard section of a WordPress site. It allows you to fully customize your site by adding different components. You can always access different components of your website by clicking on the tabs on your left side.
How to pick and install a theme
Your first step in customizing your site will be to pick a theme and customize it to fit your website needs.
A theme is a combination of files that dictate how your website will look like. Themes usually provide graphics, style sheets, and code that control everything; from the site layout to the font’s text and size on different pages.
Different websites appear different because they have different themes. Currently, WordPress supports more than 30,000 themes.
There are two ways to install a theme on your website.
- You can pick a free themes from WordPress more than 5000 themes.
- You can upload a theme made by third-party providers.
How to pick a theme from WordPress.org
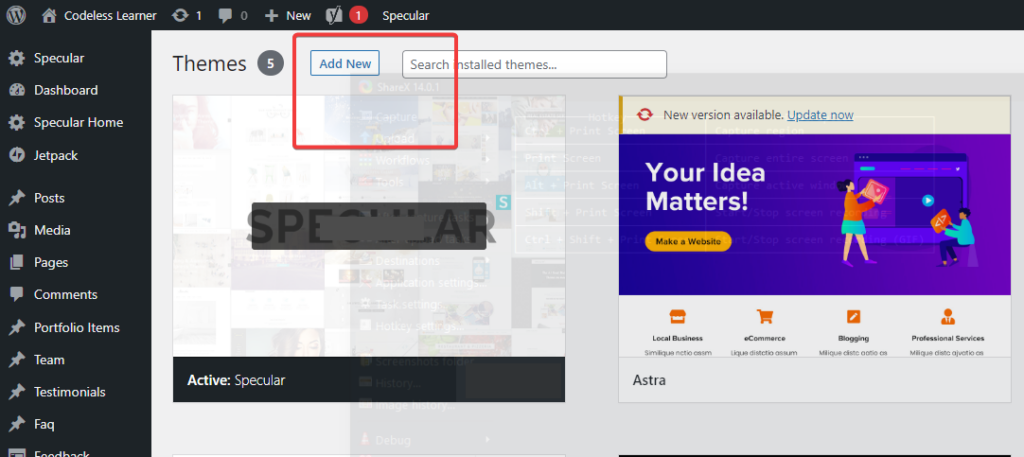
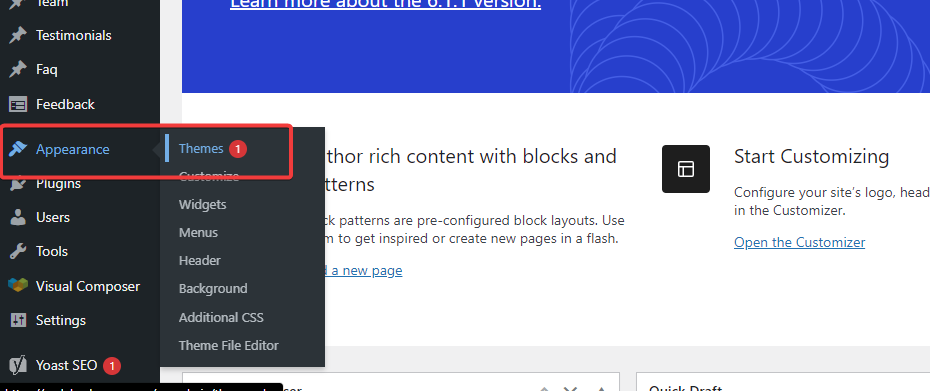
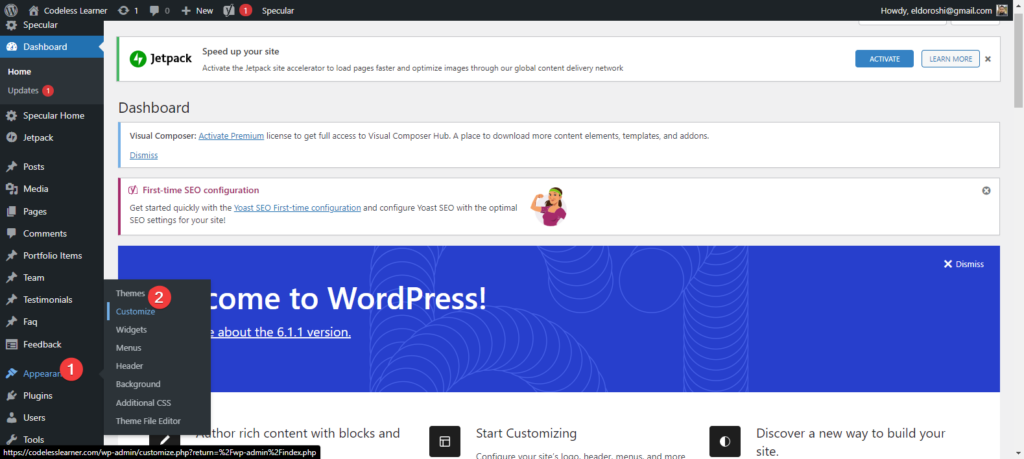
1. Click on the Appearance tab on the left side of your dashboard to reveal a menu.

2. Click on themes. You’ll see a page with the currently active theme that WordPress assigns to you when you start your website.
3. Click on Add New Theme to reveal a theme with more than 5,000 themes you can pick from.
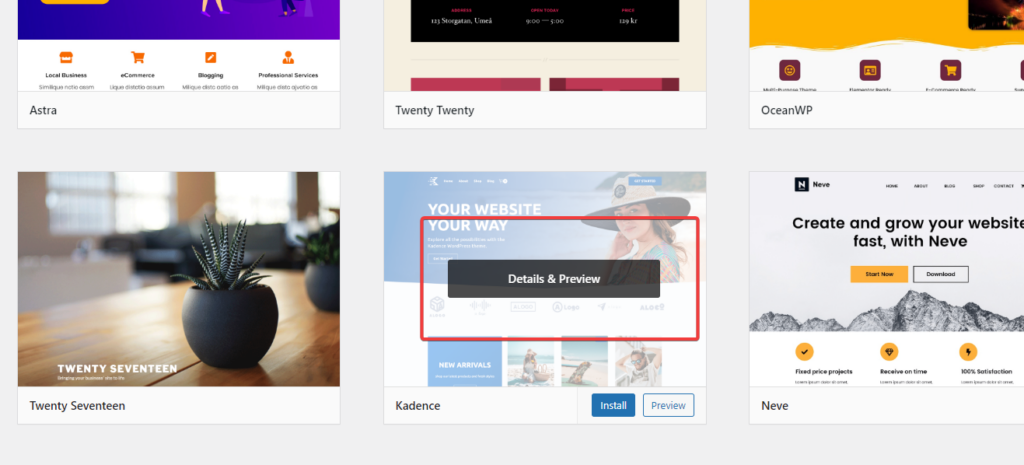
4. Hover your mouse on each theme to reveal the Details & Preview and Install and Preview buttons.
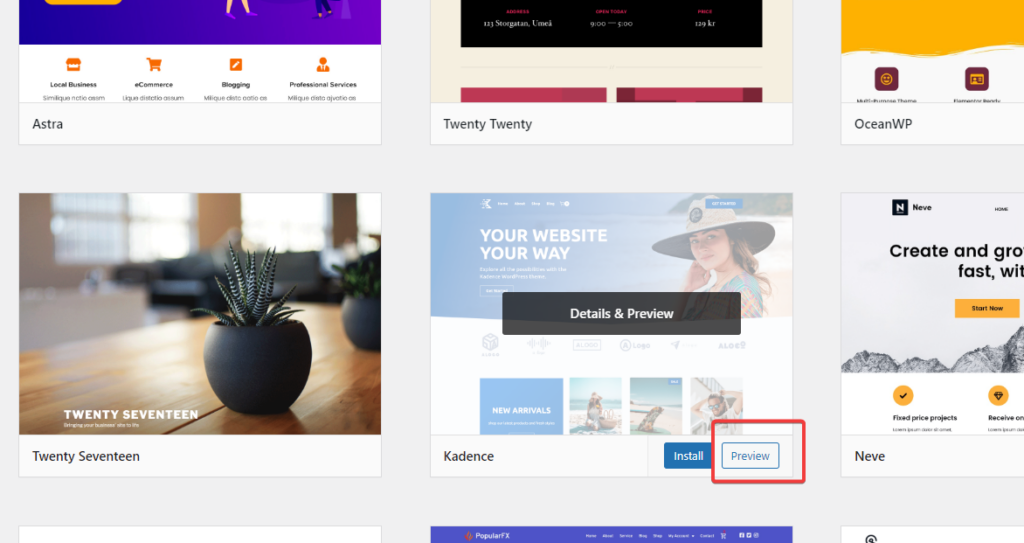
5. Click the preview button to see how your website will look with the theme.
6. Click on install and wait for the installation process to complete once you are satisfied with the theme.
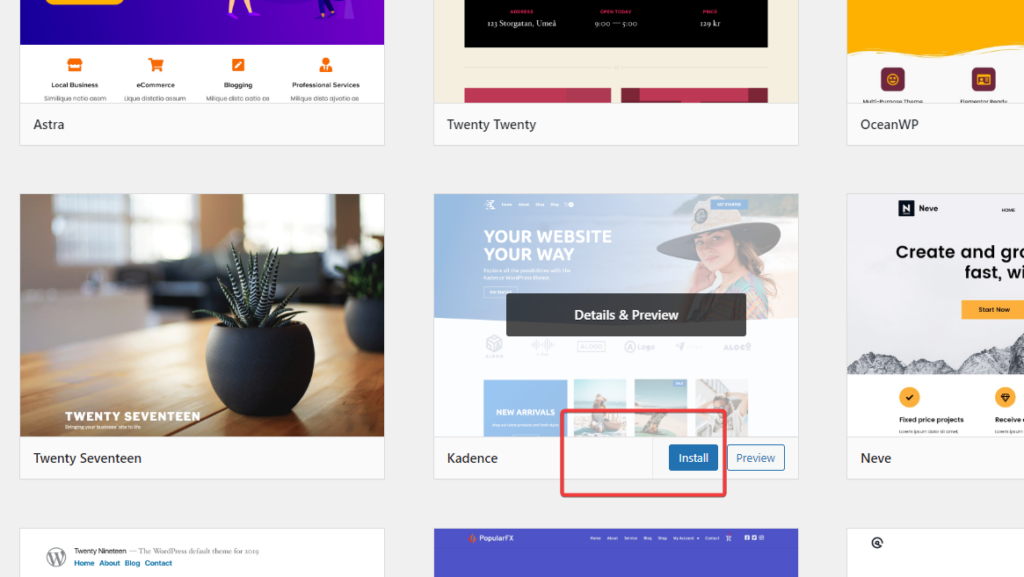
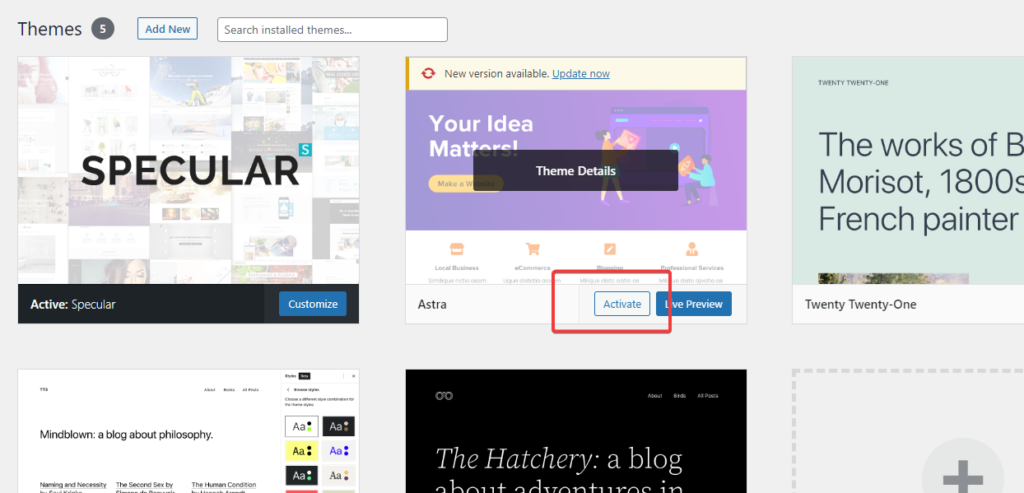
7. Click Activate once your theme has been installed to start customizing it.
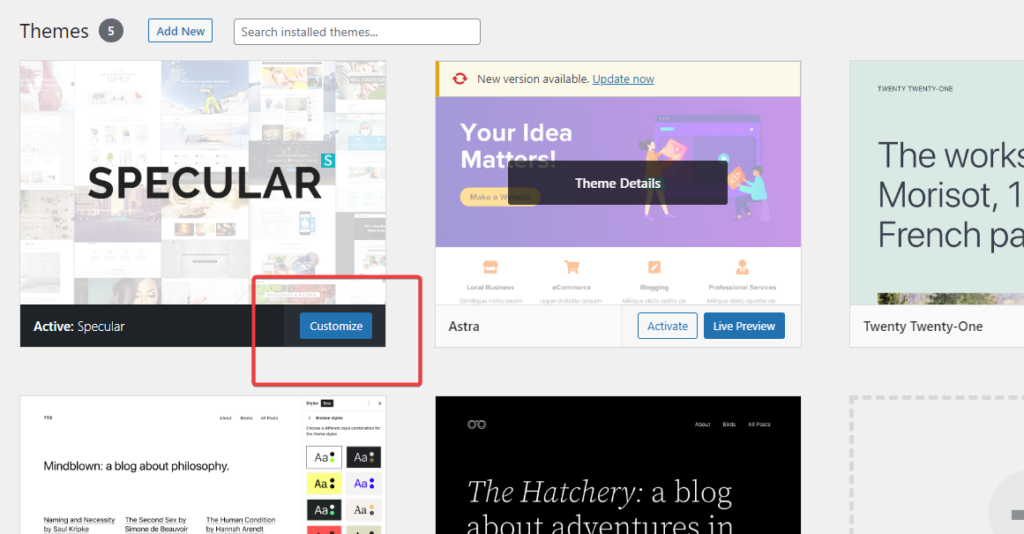
8. Click customize on your active theme and you’ll be ready to start changing the different aspects of your website to make it look more personal.
How to upload a theme
WordPress also allows you to upload themes that have been made by third-party developers like Codeless Themes. These are usually WordPress enthusiasts who meet the requirements needed to create fully functional WordPress themes.
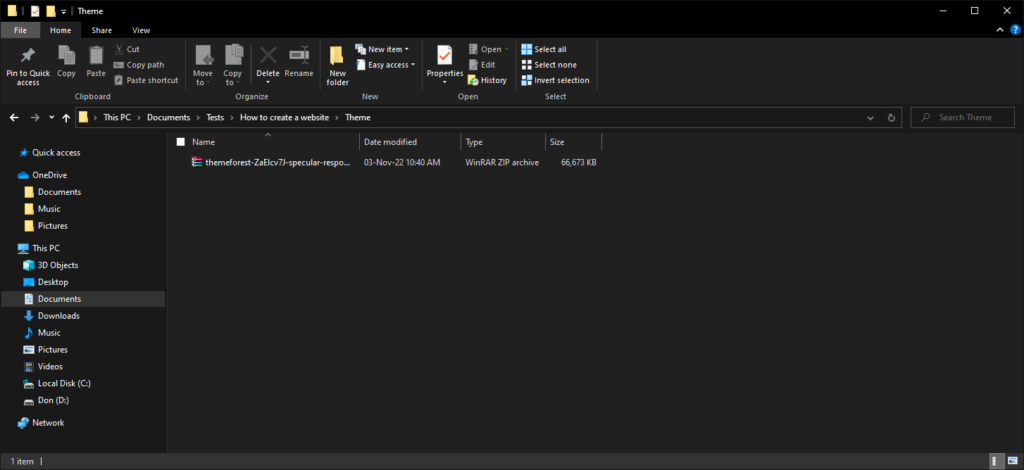
How to upload Specular WordPress Theme:
1. Start by making sure you have your desired theme on your computer and that it is in .zip format.
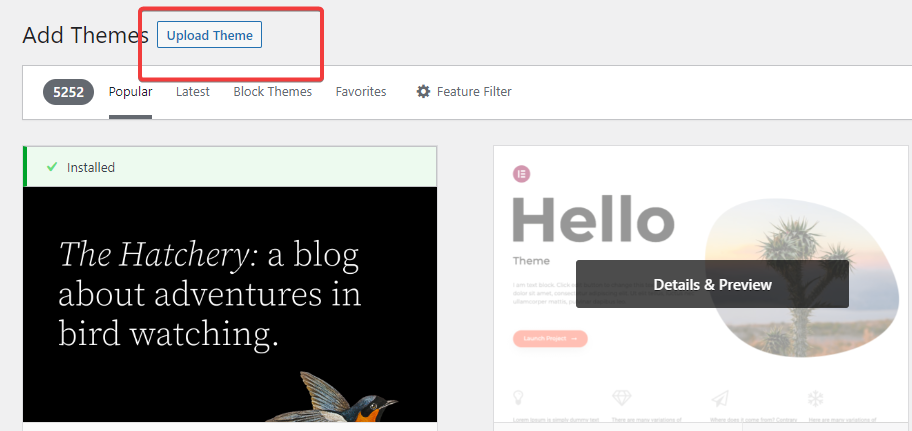
2. Click on the Themes button on your Appearance menu in your dashboard.
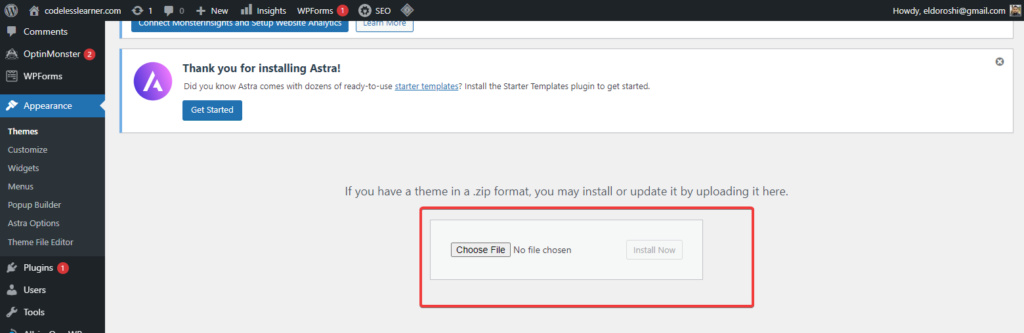
3. Click on Upload Theme. You will see a dialogue box prompting you to add a theme from your computer.
4. Click on the Choose file option to open a new window directing you to your computer folders.
5. Navigate to the location of your theme within your computer and click on the theme.
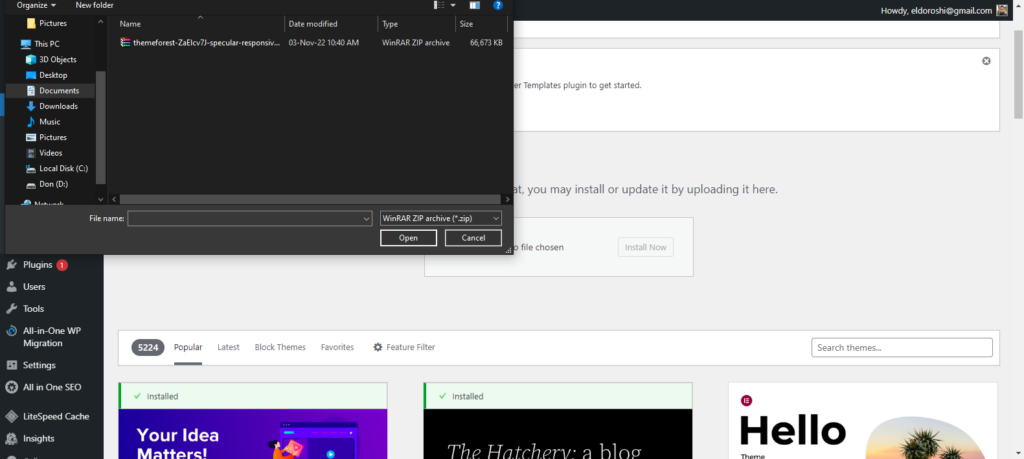
6. Click open.

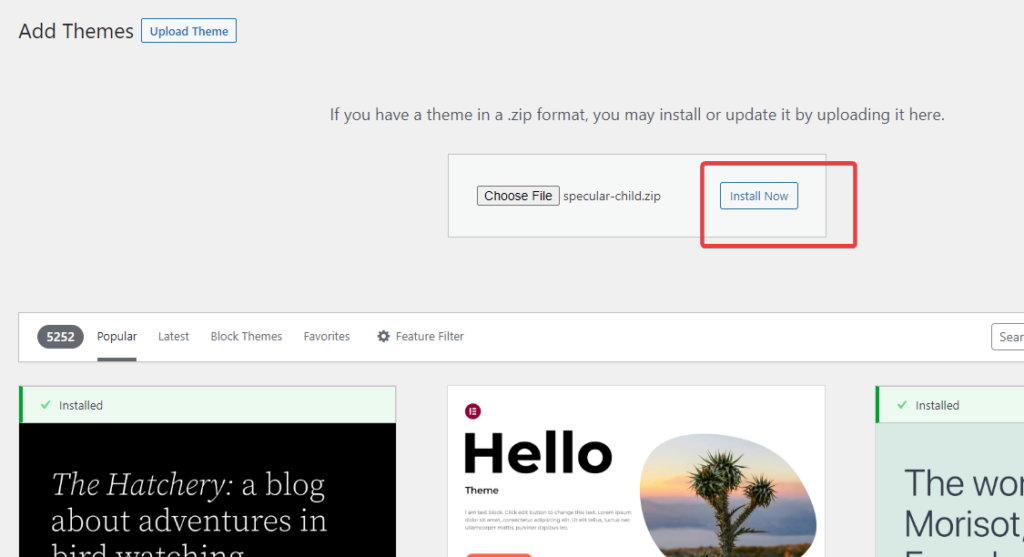
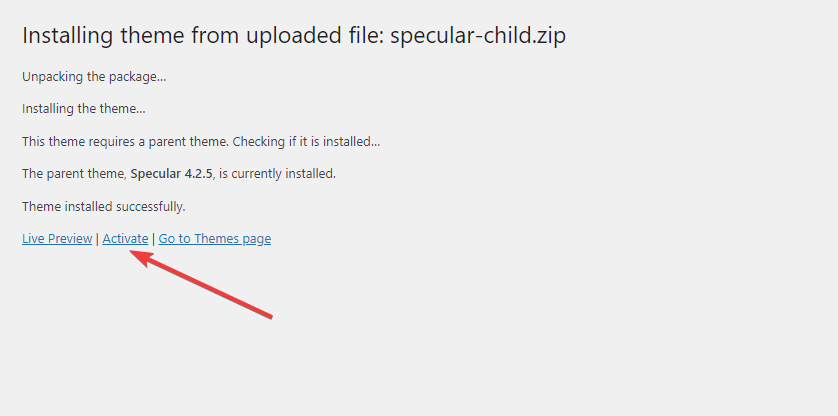
7. Click on Install Now on your dashboard and wait for the installation process to complete.
8. Once done, click on Live Preview to see what your website will look like.
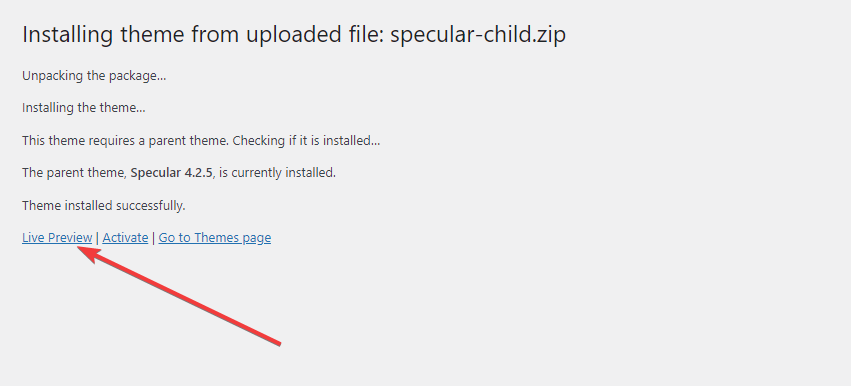
9. Activate your theme.
Below you can read the full documentation on how to Install Specular
Here you can check also our video tutorial:
Read More: How to Delete a WordPress Theme
Step 3: How to customize your website
Once your theme is installed, it is important to start customizing it. A properly customized theme should make it easy for your website visitors to navigate through the site. It should also make it easier for you to showcase important aspects of your website such as your logo, menus, fonts, and colors.
To customize your theme:
1. Hover your cursor on your Appearance tab to reveal a menu

2. Click o the Customize button. You should see a page with all the customizable features of your theme on your left side.

Add a logo
A logo is an important branding tool that creates a memorable impression for your visitors. You probably have products and brands that you recognize just from seeing the logo. Different companies and businesses use their logos as unique identifiers which at times grow to become status symbols.
The same should happen for your business. It is, therefore to make a logo that resonates well with your website and allows you to grow.
Here you can read the full tutorial on how to add a logo on Specular.
Where to get a professional logo
There are two great ways to get a professional logo as a beginner.
- You can hire a professional graphic designer to make a logo for you. This will cost you money but the job will be good.
- You can use tools such as Canva to create your logo. Canva is a great tool because it is free and has a wide variety of templates and options for your logo.
In any case, you should try to follow the following requirements when creating a logo for your website:
- The design should be simple and clean.
- Create harmony within your website by using the same colors on your website as those on your logo.
- Go for the best quality you can find to make it easier to share across different platforms such as your social media pages.
- Your logo’s background should be transparent to make it easier for it to fit anywhere on your website.
Add the right fonts
Fonts can also be set up on your theme through the customize function. Your fonts are important because they determine the user experience, convey your brand message, and complete the aesthetic of your website.
Users are less likely to stick around a website that has unreadable fonts. Usually, you will have lost a considerable number of visitors by the time you notice this and change your fonts.
Therefore, there are a few things you can do to make sure that your fonts are right for your website. These include:
- Make sure your fonts are readable. This boosts accessibility and allows everyone to get value from your website.
- Try to strike a balance between what is good for your site visitors and your personal taste. This makes it easier to have something that you are proud of and that your visitors can read.
- Check your fonts on different devices. Some fonts look distorted on large screens and good on small screens and vice versa. Testing different device screens allow you to pick a font that is good for everyone.
- Stick to only a few font designs. The fewer font designs you use, the less likely you are to confuse yourself and your site visitors as they move through pages.
Pick colors
Colors play an important role on your site. Other than adding some aesthetic element to your website, colors also play other important roles. For example, your colors could pass a message that represents your brand.
Colors can appear complicated, especially for someone who isn’t familiar with designing a website. However, there are a few tips and tricks that will help you pick the colors of your website without thinking too much about it.
These include:
- Start with a primary color – this will help set the mood for your entire site.
- Pick one or two additional colors to act as your secondary colors and help complement your primary color.
- Choose a less aggressive color than your primary color to act as your background color.
- Choose a typeface color for all the text on your website.
Here is a full video on how to play with colors on Specular WordPress Theme:
Set up your homepage
WordPress allows you to set up a home page or landing page depending on the kind of website you have.
For example, if you are planning on building a blog, your homepage will likely be your Blog Posts. If you have a website that requires a landing page, you can use a static page that welcomes people to the site.
This can be done through your theme customization.
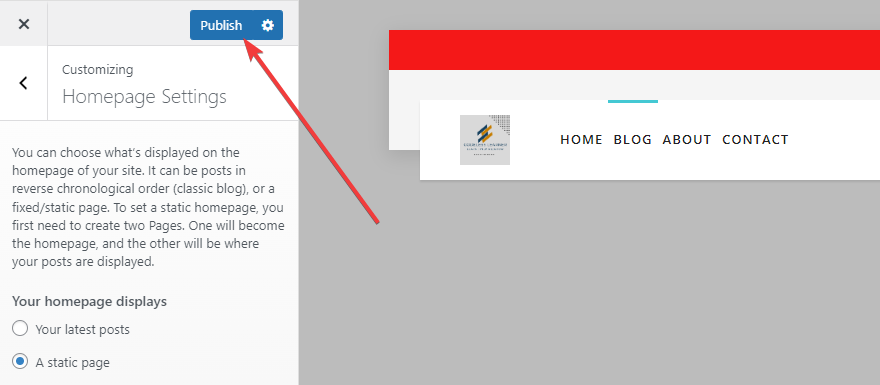
To set up your homepage:
1. Hover your cursor on your Appearance tab to reveal a menu

- Click o the customize button.

- Click on Homepage settings
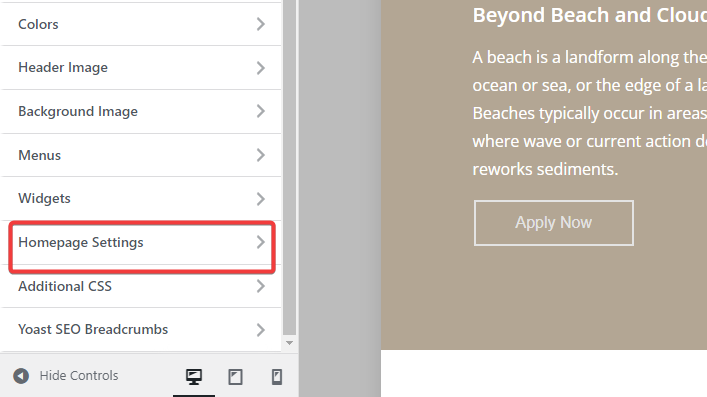
- Check the static page option under your Homepage displays
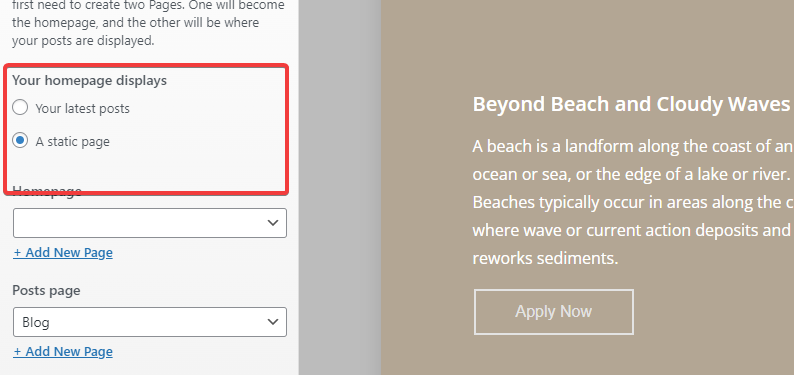
- Click on Add New Page to open a dialogue box
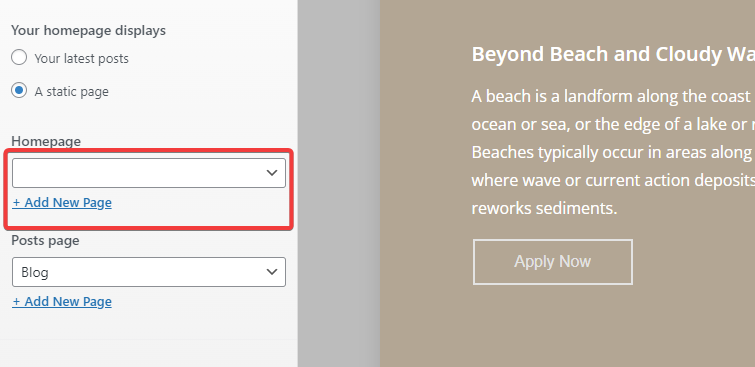
- Label your Home page and click Add

- Click Publish.

Now you have a Home page for your site that visitors will see first before they can move on to other sections of your website. we will customize it later to add content.
Step 4: Extend functionalities with plugins
A WordPress plugin is an independent piece of software that you add to your WordPress site to increase or extend functionality. Plugins play many important roles in the building of your website. They allow you to build any kind of website you want.
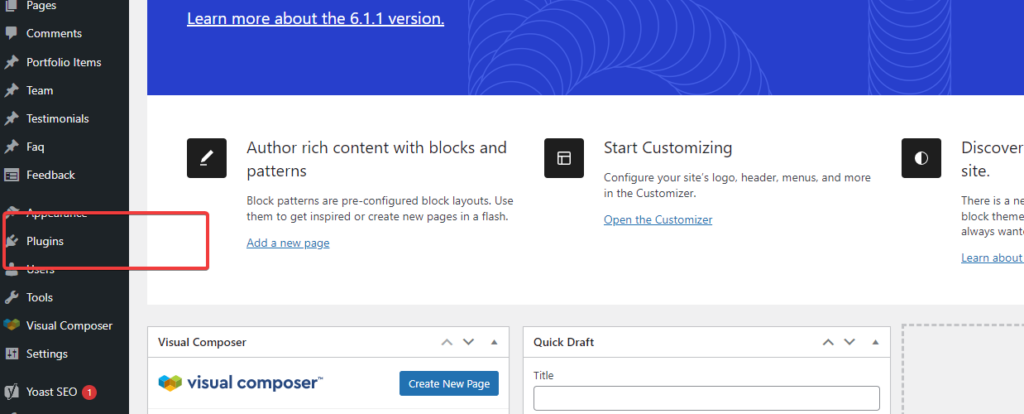
How to Install Plugins
There are 3 main ways to install a WordPress plugin. However, as someone who doesn’t have much experience with WordPress, we will cover the easiest and most straightforward method.
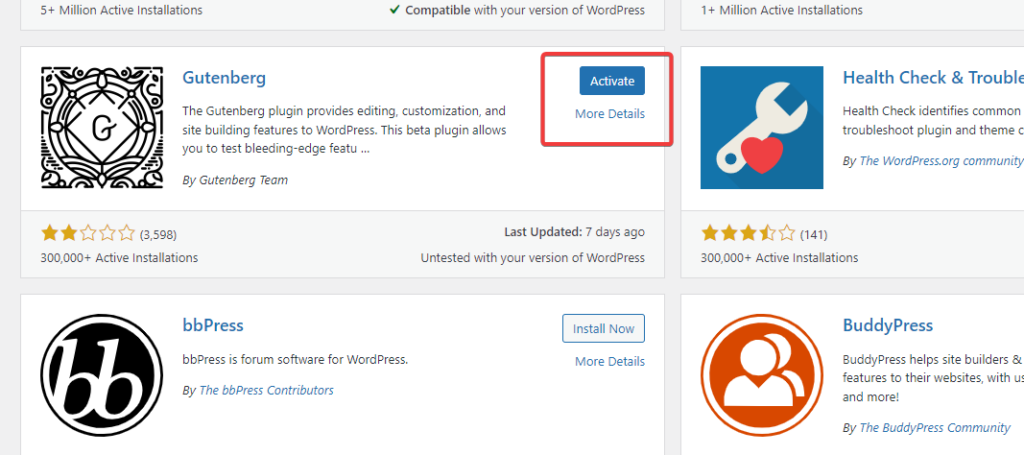
1. Click on the Plugins button in your Dashboard.
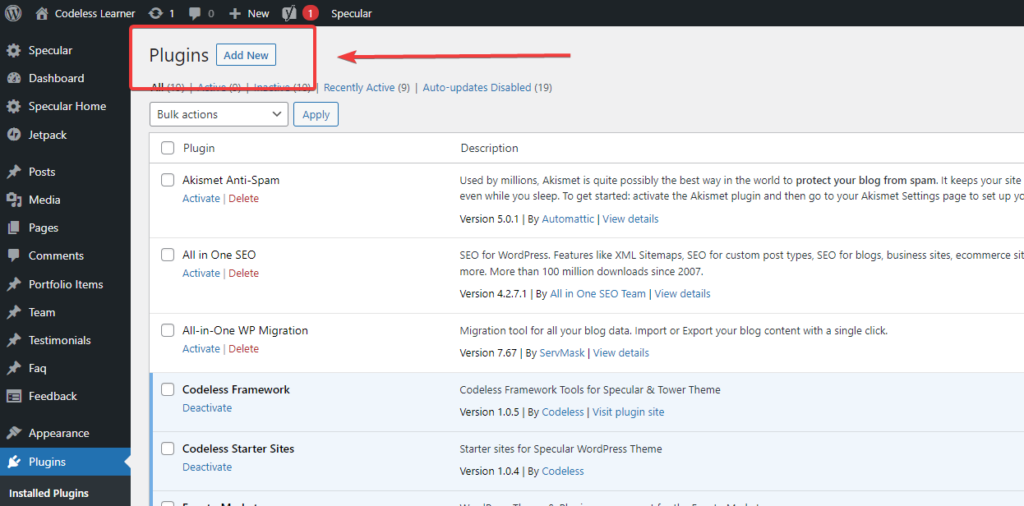
2. Click on the Add New button to open the Plugins page.
3. Click on the Install Now button to install a specific plugin and wait for the installation process to complete.
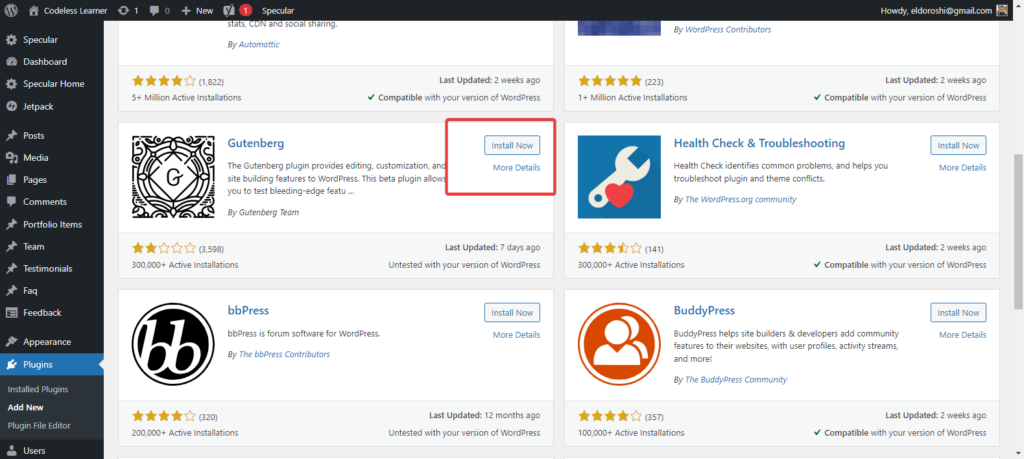
4. Click on Activate Plugin to activate your plugin.
Depending on the plugin, you might have to follow up with a few setup procedures. These usually follow prompts and are not hard to complete.
Useful plugins for your site
While there are more than 1000 plugins on WordPress, not all of them will be suitable for your site. You’re also not going to be using all of them.
Your site will require different plugins based on its purpose. For example, if you are building an eCommerce website, a plugin like WooCommerce will work well. Other plugins only work with specific types of websites.
However, there are plugins that work on all kinds of websites. These are the bare minimum plugins that will help your website run and they are free and easy to install. These plugins can be used to:
- Maintain the security of your site by protecting you against spam attacks and hacks as well as protecting your visitors from malicious attacks.
- Provide a way for your site visitors to contact you directly without you having to share your personal information.
- Provide metrics on how visitors are behaving on your site including what content they find most useful, how many people are visiting the site, and where they are from.
- Help you design your site without writing a single line of code. Remember, WordPress is famous because it allows anyone, including people who aren’t tech-savvy to create fully functional websites.
- Help you market your website to the world more easily.
We are going to go through 3 important plugins that will cover these needs before you can decide to add more plugins to your website. With time, you will learn what works best for your website and should be able to easily install additional plugins when needed.
Jetpack by WordPress

Jetpack is a multipurpose plugin designed to handle just about anything on your website. It is made by Automatic, the same company that built WordPress, and is designed to handle your security, performance, marketing, and design.
This free plugin comes with a variety of tools that help boost the functionality of your website. The tools provided include:
- A 24/7 auto security feature that allows you to back up your site automatically, block spam comments, monitor your site’s uptime and downtimes, as well as monitor any changes made on your site among others.
- A performance tool that is built to optimize your site on different devices such as mobile.
- Features such as Lazy load so your site can load faster.
- Unlimited high-speed, and ad-free video hosting for your video content and additional features such as custom site search.
- Growth tools such as advanced analytics tools, auto-publish features to your social media pages, SEO tools, and a mobile app.
- Design tools to enhance your subscriptions, a contact form, and an assortment of simple themes to customize your site.
Yoast SEO
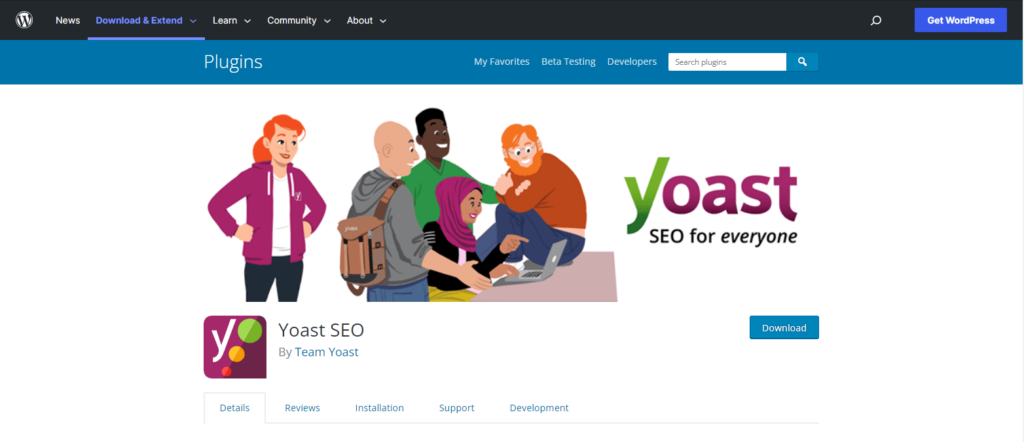
Yoast is is a search engine optimization tool designed to help better showcase your site and business to the world.
Search engine optimization is the process of structuring your content so that it appears on the first page of a search engine when people look for related content. If you ever visit a search engine like Google, there are websites that appear we you ask anything on the provided search feature.
These websites tend to get the most visitors and the owners get the chance to make money off their websites. To properly optimize your website for search engines and increase traffic to your site, consider using the Yoast SEO plugin. The plugin comes with benefits such as:
- Automated SEO improvements for your content.
- Faster loading times to reduce the bounce rate on your website.
- SEO and readability analysis for your content to make sure that it is good for both search engines and human beings.
Elementor
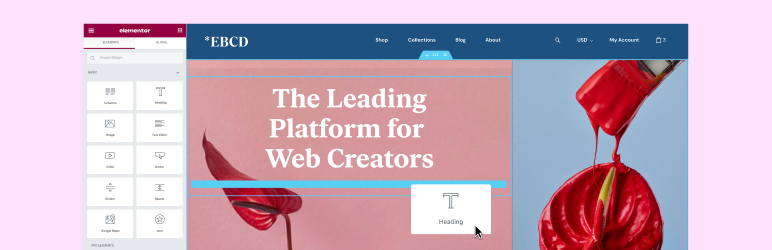
Elementor is one of the most popular plugins on WordPress and it let you create any website style without coding knowledge.
There to easy to use it only with drag and drop features where you can get elements and put them in the right place.
Also styling and font selection can be made in few clicks.
Visual Composer

Visual composer is one of the best WordPress page editing tools on the internet.
The plugin is designed to help you create professional-looking and aesthetic pages by incorporating different elements and design patterns.
There are many things to consider when creating your pages. For starters, Everything needs to look in place whether it is a landing page or an about us page.
As a beginner with no experience in WordPress, it helps to have a tool that helps you build your pages with zero hassle. Visual Composer does this by providing a variety of features that make it possible for you to build a website even without prior experience.
Some of the features you can expect when using Visual Composer include:
- Drag and drop functionality so that you won’t have to write a single line of code.
- Instant content updates to help you make decisions on the fly regarding your design journey.
- Mode then 500 templates, add-ons, blocks, and elements that give you full autonomy on the kind of site you want to build.
- A visual composer hub with various features and elements such as slideshows, templates, extensions, and different integrations.
For more info about the best plugins to use check our article: Best Free WordPress Plugins
Step 5: Create pages and add content
Now that your theme and plugins are all set, it is time to start adding pages to your site. Different pages hold different content. For example, your About page will hold content about your company, blog, or organization.
While different websites have different page structures, most websites have these three common pages.
- A homepage – also called a landing page where visitors first when visiting the site. Your homepage is going to be static.
- An About Us page – to let your visitors learn more about you.
- A Contact page – to give site visitors an easy way to reach you.
- A Blog page – This page holds all of your blog entries.
We started with plugins so that we could use some of them, such as Visual Composer, to customize our pages and make them look good.
Making a Home Page
Your home page is like your front lawn. It gives people an idea of what to expect throughout their stay on your site. Therefore, it should be the most appealing page on your website.
There are different ways to make your home page. You could use a template, build it using code or use a plugin like Visual composer or Elementor to flesh it out. You could also hire a WordPress designer to create an appealing front page and possibly the rest of the website.
Since you are doing it yourself, it’s best to use a plugin to make things easier.
To make your own home page using Visual composer:
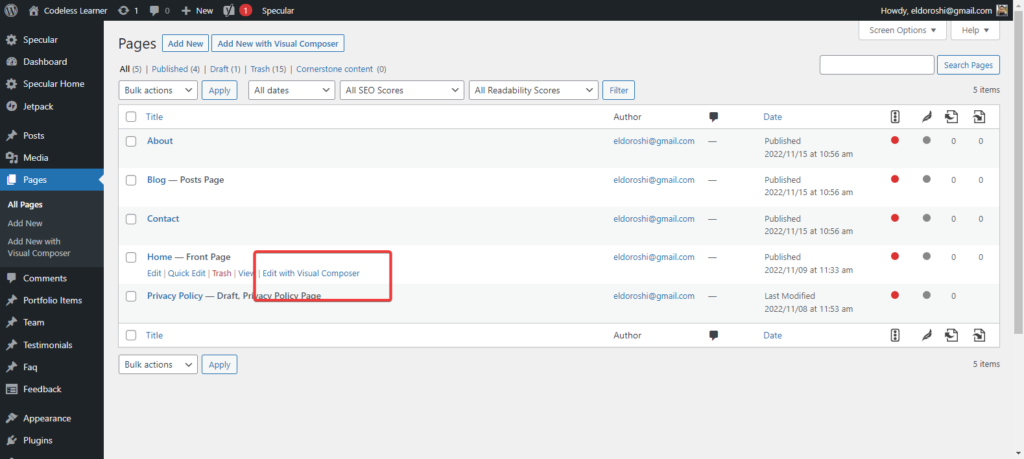
1. Go to your Dashboard and click on Pages. You will see a list of available pages including the one you created when customizing your theme.
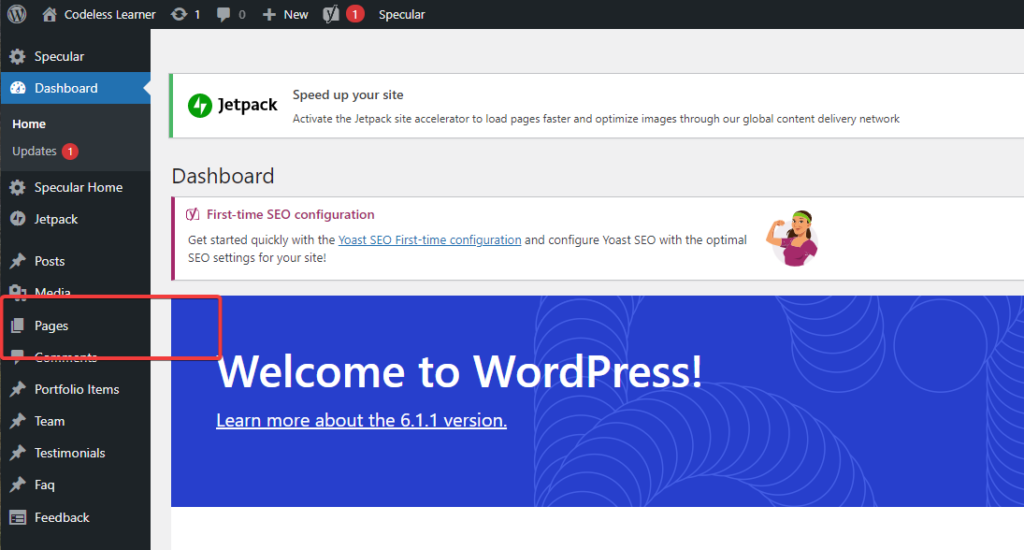
2. Hover your cursor on it to see available edit options.
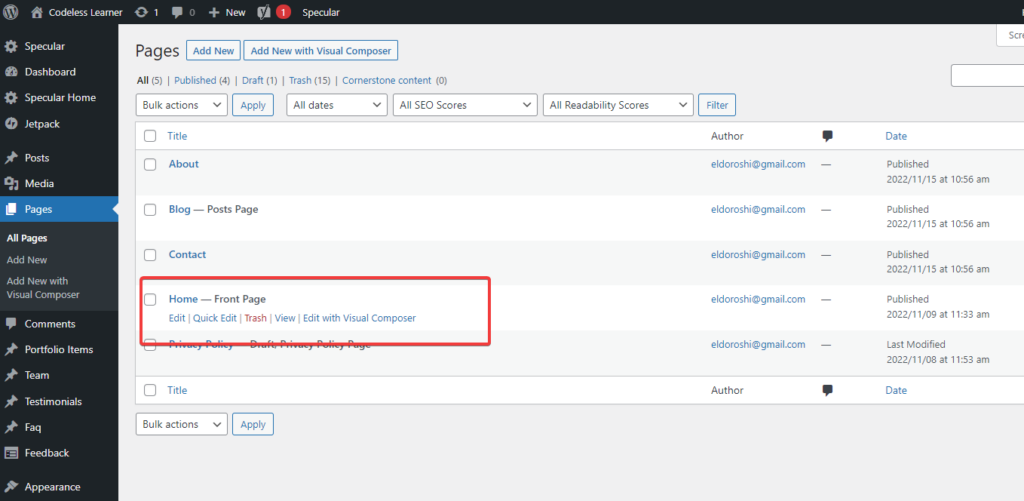
3. Pick Edit with Visual composer.
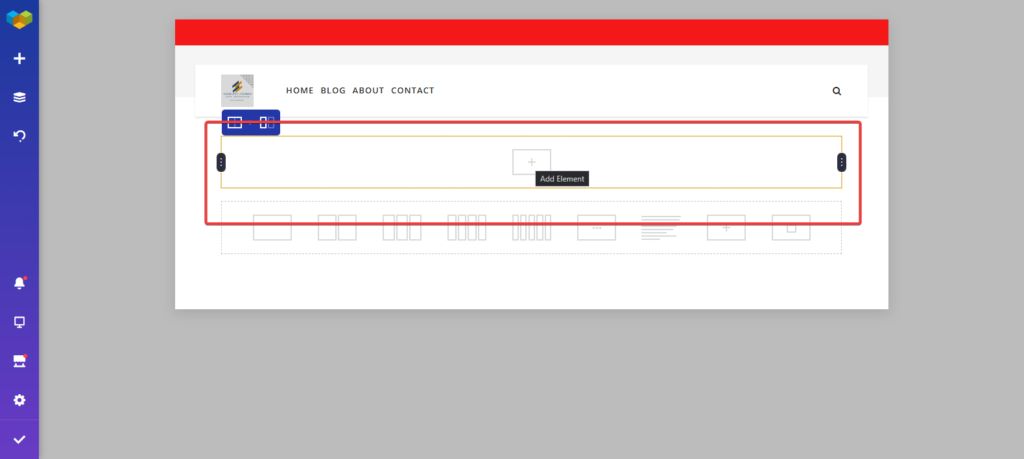
4. Pick a column for your site. This provides a structure of how your Home Page will look like.
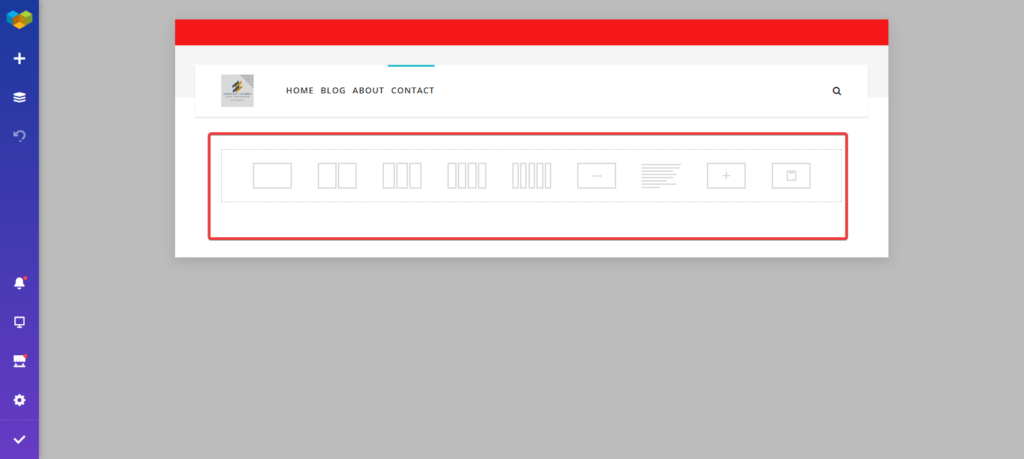
5. Click on the + sign on each column to add different elements.
6. Hover your cursor on the Tick sign to reveal the preview button, save draft, and publish options.
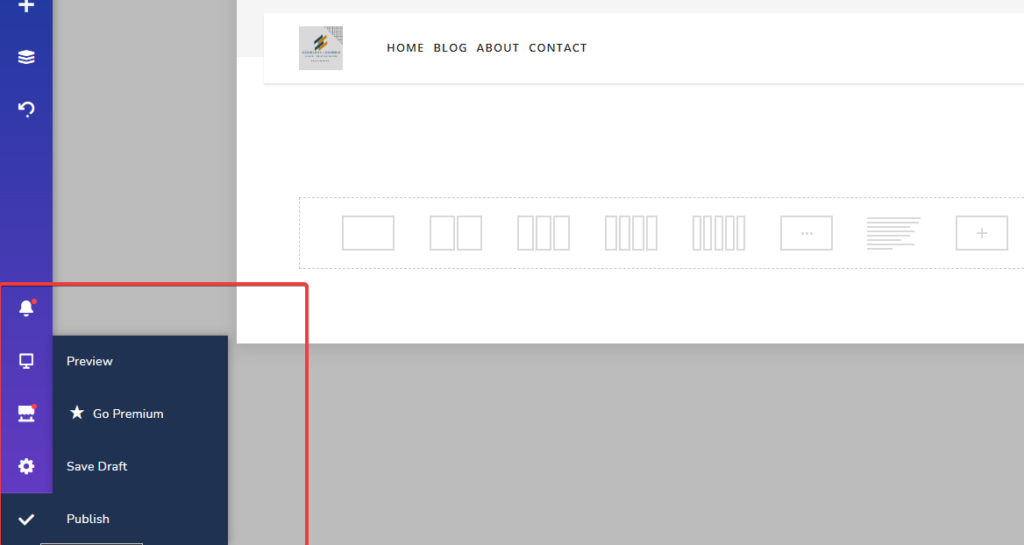
7. Click on the Tick sign every time you make changes to save your draft and publish
You can continue to learn more about how to use Specular and customize it by reading the documentation here:
Here you can check a full course on how to use Elementor as a page builder:
Add content
Once your pages are all set, it is time to start adding content to them.
There are three types of content you can add to your site:
- Web copy – This is content that is aimed at marketing your site or business. Some web copy will include a call to action on your landing page to push people to do something.
- Web content – This is the content that you find on the homepage, about us page, and other pages such as contact ages.
- Blog content – This is the content that’s available on your blog posts. Each blog post will ideally handle different topics that will either inform or entertain your visitors.
While there are different rules for writing effective content in these three categories, there are certain rules that apply to all your content on the website.
These include:
- Write clear and concise content – whether you are writing a blog post or landing page, there should be no room for confusion about your message. This makes it easier for your visitors to stick longer.
- Your content should be free of grammatical errors – Regardless of how interesting your content is, grammatical errors are going to distract your readers and increase their bounce rate.
- Your content should have the right font – This is an accessibility issue. The right font makes sure that your content is readable to your audience regardless of the choice of medium.
- Your content should be properly spaced – Proper spacing gives your readers a chance to breathe and ingest your content in a way that makes sense.
How easily visitors move from one page to the other determines how useful they find the content and how long they stay. Ideally, you want navigation throughout your site to be seamless.
This makes tasks such as finding more information about you or about the issue that brought them to your website easier. One of the best ways to improve site navigation is by providing different resources. These include:
A functional menu
This is usually found on the top part of your website. It contains links to other pages. A typical menu will include links to pages such as the Home Page, About section, Contact section, and Blog section.
You can create a functional menu through your theme’s customization feature.
You can create a functional menu through your theme’s customization feature.
1. Hover your cursor on your Appearance tab to reveal a menu

2. Click o the customize button.
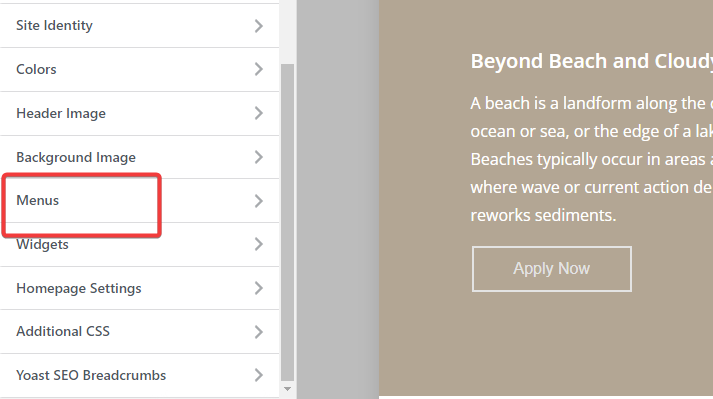
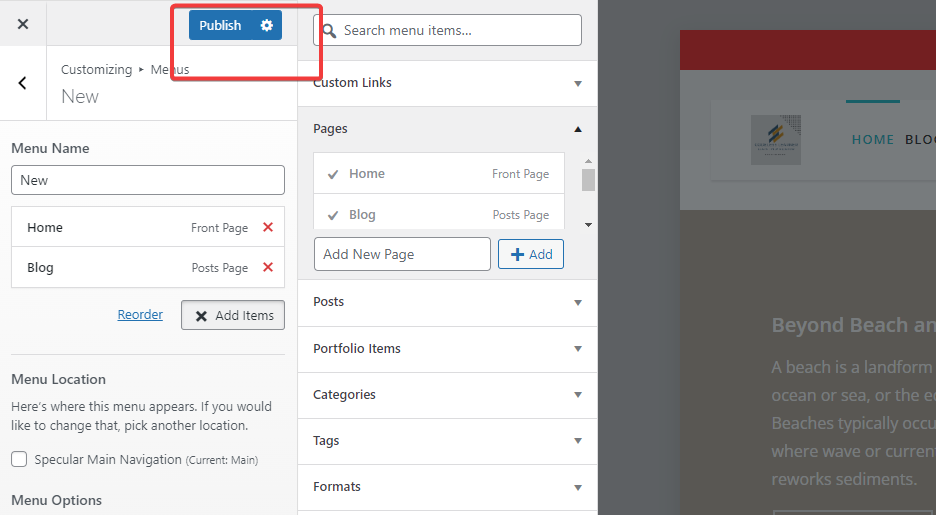
3. Click on Menus.
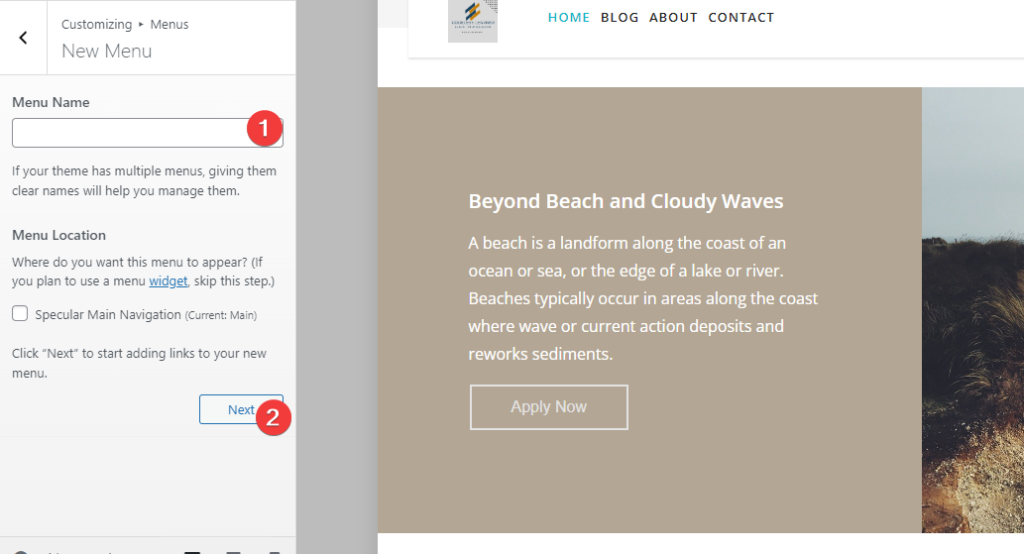
4. Click on Create New Menu and specify whether you want it to be the main menu.
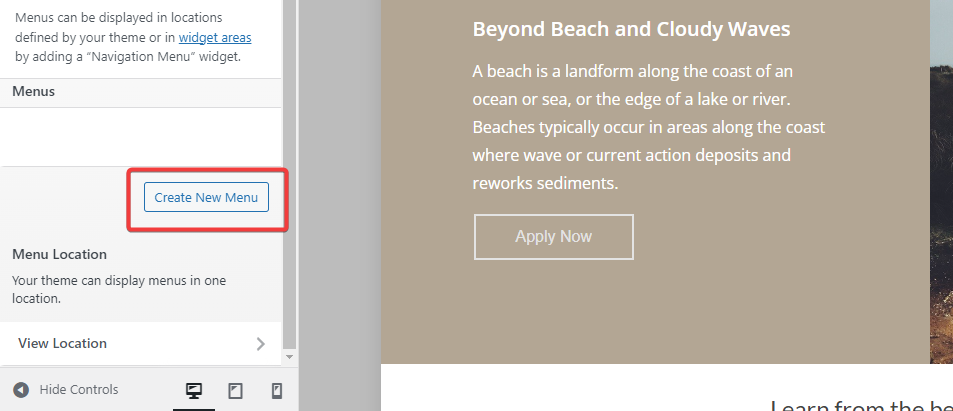
5. Provide a name for your menu and Click Next
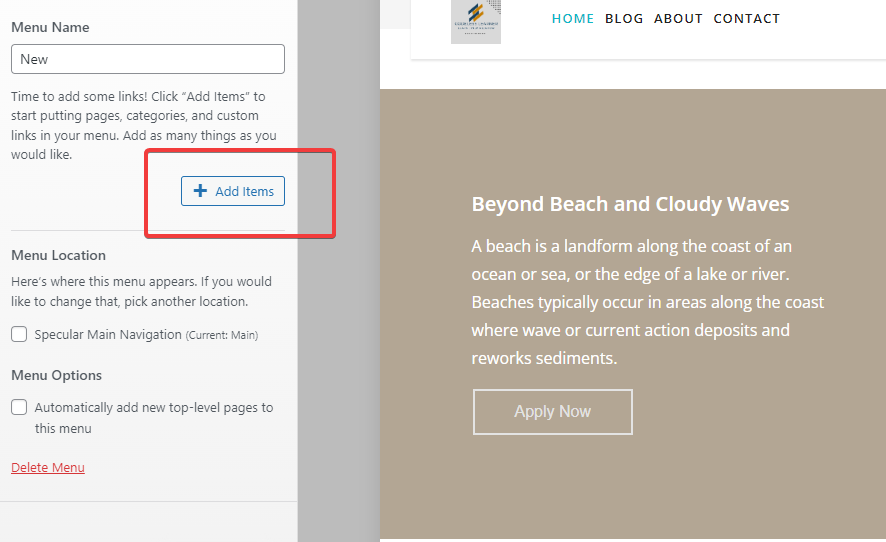
6. Click Add Items to reveal a menu on the left side.
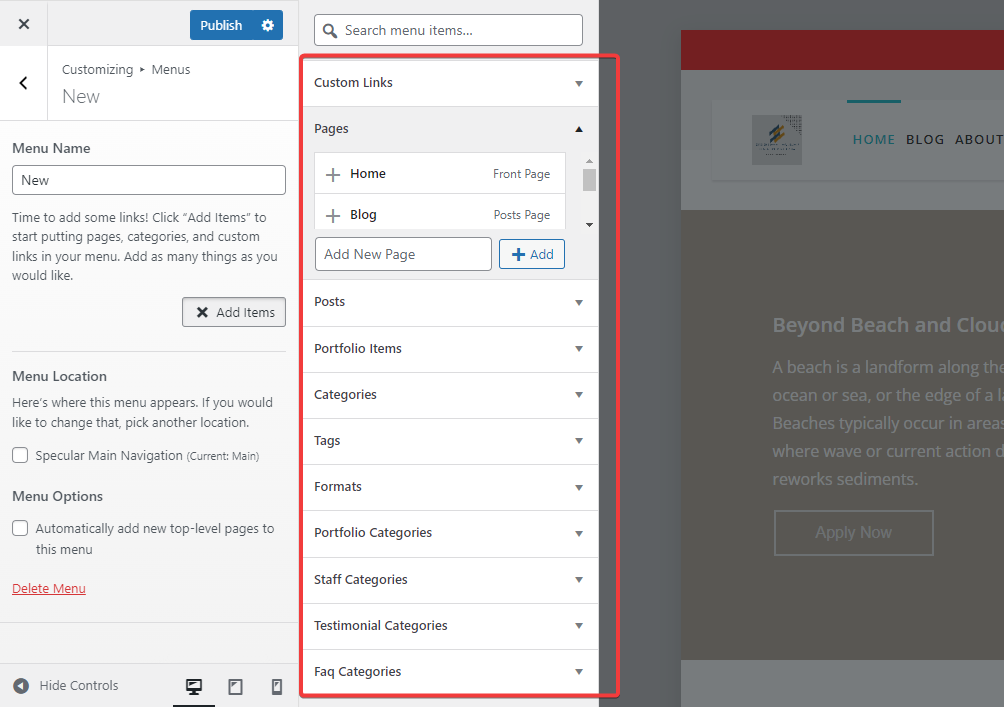
7. Click on all the items, including pages, tags, and categories that you wish to add to your menu.
8. Use Reorder to change the order in which they appear on your pages.
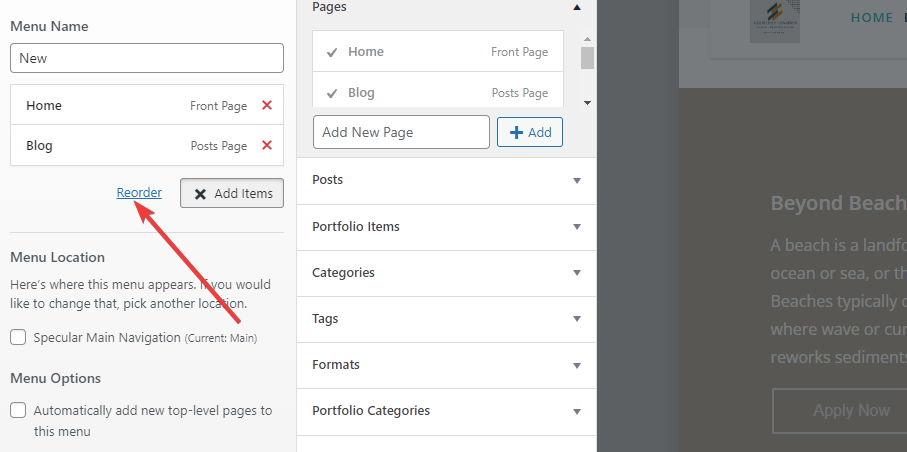
8. Click Publish to save your changes.
Add Widgets to your site
Widgets are blocks of content added to a page to offer added functionality and information to the reader. For example, a typical page will have widgets that contain social media links, related blog posts, and categories.
Widgets that offer additional information, say those that offer related content, make it easier for site visitors to gather more information on the topic. Those that contain social media links make it easier for users to reach the owner of the website or learn more about them.
Therefore, it is important to consider adding widgets on your site as a way to improve the user experience.
To add your widgets:
1. Hover your cursor on your Appearance tab to reveal a menu
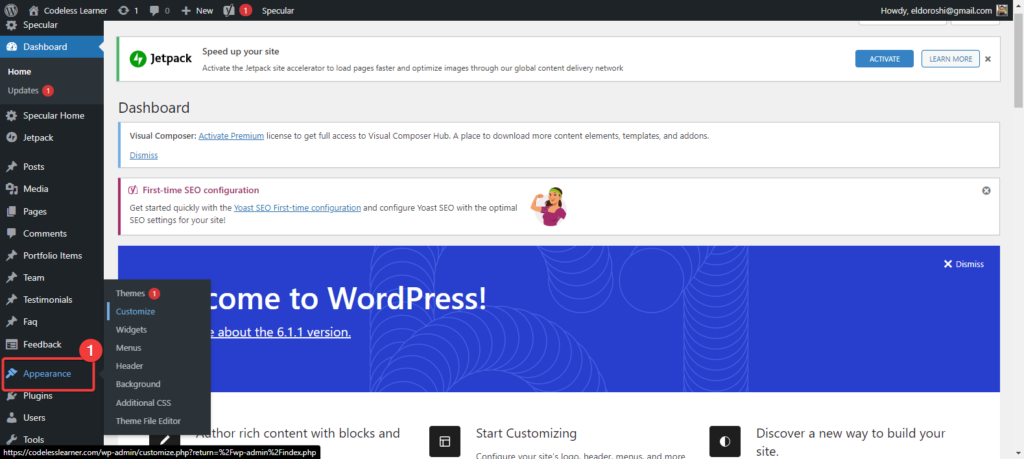
2. Click o the customize button.

3. Click on widgets
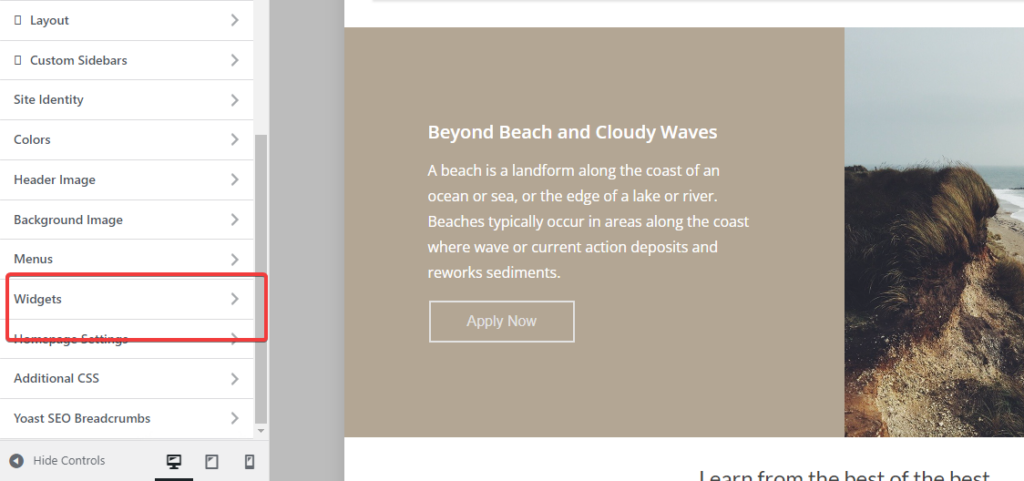
4. Pick where you want to place your widgets between the Sidebar, top header left, and top header right.
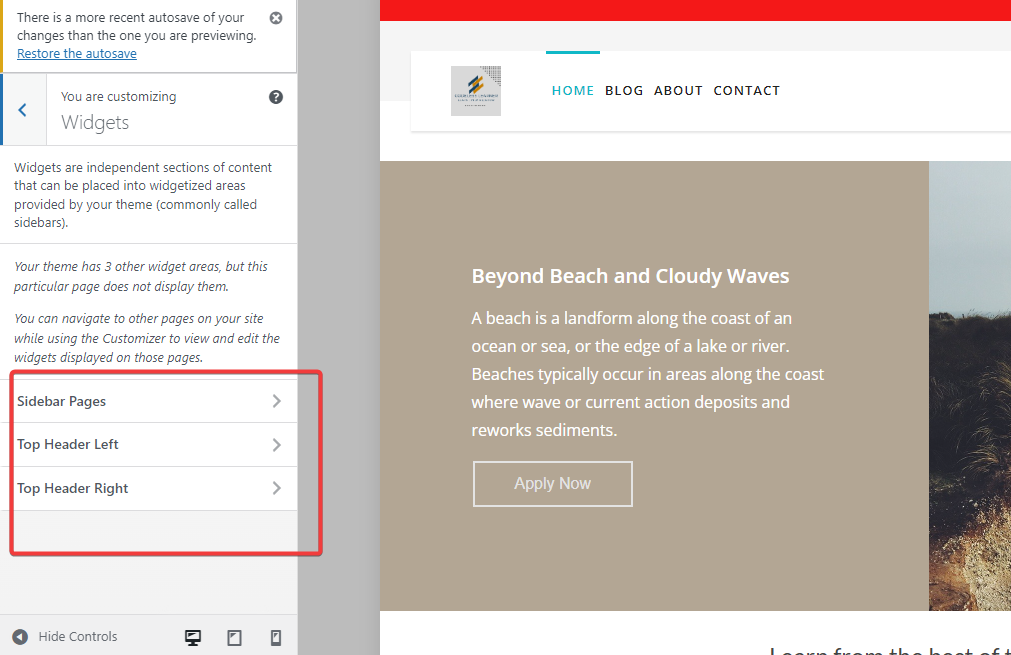
5. Click on the plus sign to reveal a list of elements you can add to your sidebar.
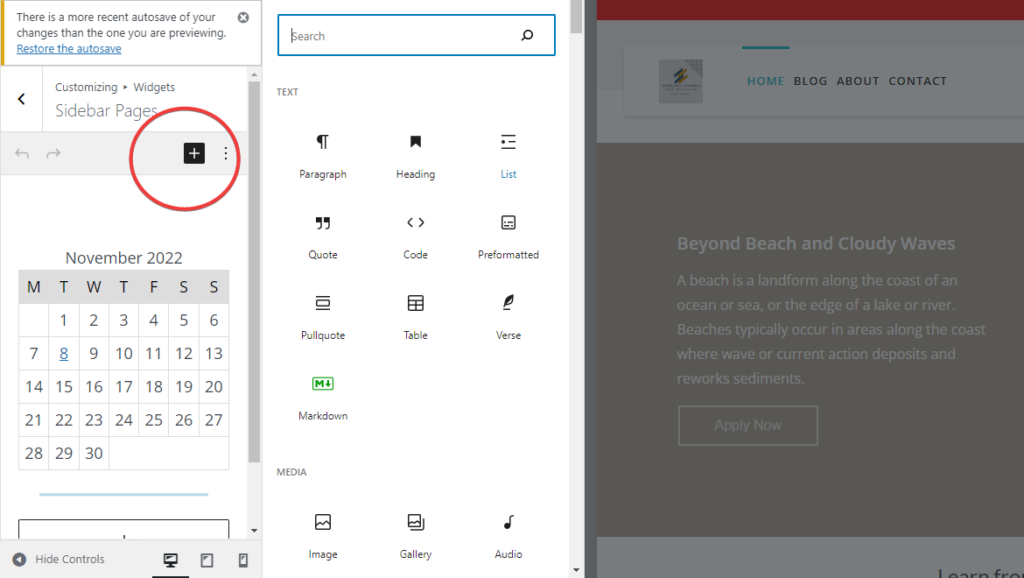
6. Scroll down to widgets and select one widget
7. Click publish when you are satisfied that your page looks nice.
Fine-tune and Launch your website
This is the last step in your web development journey using WordPress.
By the time you get to this point, your website has already taken shape and you can move through it easily. You should also be pretty satisfied with the content and images displayed on each page.
Your last step should, therefore, be to fine-tune it and make sure that there aren’t any tiny mistakes that could cost you your user experience.
There is a number of things you can do during this process to make sure that your website is okay.
- Proofread your content to make sure that there are no grammatical errors in the content. Use tools such as Grammarly to reduce grammatical errors.
- Add your social media accounts to help your site visitors reach you easily.
- Check whether all your links, both internal and external, work. This includes making sure that your social media links actually lead to your social media accounts.
- Check on your screen optimization to make sure that your content fits most screens.
Once you go through all these steps and are satisfied that your website is okay, it is now time to publish and share your website.
Conclusion
While building a website might seem daunting, it really is not hard. All you need are the right tools and some curiosity and you can have any website you wish. And by building your first website, you might have just opened yourself up to more possibilities.
Want to Learn More?
- How to Build a News Website With WordPress
- How to Start a WordPress Blog (Easy & Free)
- Best WordPress Hosting Sites (Detailed Comparison)
- The Best No-Code Website Builders
- How to Start a Student Website
Ludjon, who co-founded Codeless, possesses a deep passion for technology and the web. With over a decade of experience in constructing websites and developing widely-used WordPress themes, Ludjon has established himself as an accomplished expert in the field.


Comments